The Beginner's Guide to Motorcycle and ATV Clutch Actuation
If you are pulling the clutch lever on your Honda TRX400EX, Yamaha YZ450F, or Kawasaki KLR650 and the engagement feels mushy, inconsistent, or the bike creeps forward at a stoplight, you are likely dealing with actuation wear. Many beginners hit the forums searching for a worn clutch fork, but in the powersports world, we need to clarify some terminology before we grab our wrenches.
In automotive manual transmissions, a literal 'clutch fork' is the metal lever that pushes the throw-out bearing against the pressure plate. However, motorcycles and ATVs rarely use a traditional fork. Instead, they utilize a clutch release arm, lifter arm, or actuator cam. Despite the different name, the mechanical failure points, wear patterns, and symptoms are virtually identical to a car's clutch fork. For the sake of this guide, we will use 'worn clutch fork' interchangeably with 'worn release arm' to match your search intent while teaching you the correct mechanic terminology used in OEM service manuals.
As we move through the 2026 riding season, understanding how your clutch pack interfaces with the release mechanism is critical. A failing actuation arm won't just ruin your ride; it will prematurely destroy a $200 clutch kit if left unchecked.
Top 5 Symptoms of a Worn Clutch Release Arm (The 'Fork')
Because the release arm is bathed in engine oil (on most wet-clutch motorcycles and ATVs), it doesn't suffer from the same dust and heat contamination as a car's dry clutch fork. Instead, it suffers from friction wear, galling, and improper adjustment. Here is what to look for:
1. The 'Dead Zone' and Inconsistent Free Play
A healthy clutch lever should have roughly 10mm to 15mm of free play before you feel resistance. If your release arm's contact surface is worn or grooved, the pushrod will travel further before actually engaging the pressure plate springs. You will find yourself constantly chasing the free-play adjustment on your perch or crankcase cover, only for the lever to feel 'dead' again a week later.
2. False Neutrals and Clunking into Gear
When the release arm wears, it fails to pull the pressure plate back evenly or far enough. This means the clutch friction plates don't fully separate. When you come to a stop and try to find neutral, the transmission remains under partial load, resulting in the dreaded 'false neutral' or a violent clunk when shifting into first gear.
3. Clutch Slipping Under Heavy Throttle
Ironically, a worn release arm can cause slipping. If the arm wears unevenly, it may apply a constant, microscopic amount of pressure against the pushrod even when the lever is fully released. This prevents the pressure plate from clamping down with 100% of its spring force, causing the friction plates to slip under heavy load or while climbing hills on your ATV.
4. Grooved or 'Cupped' Contact Surfaces
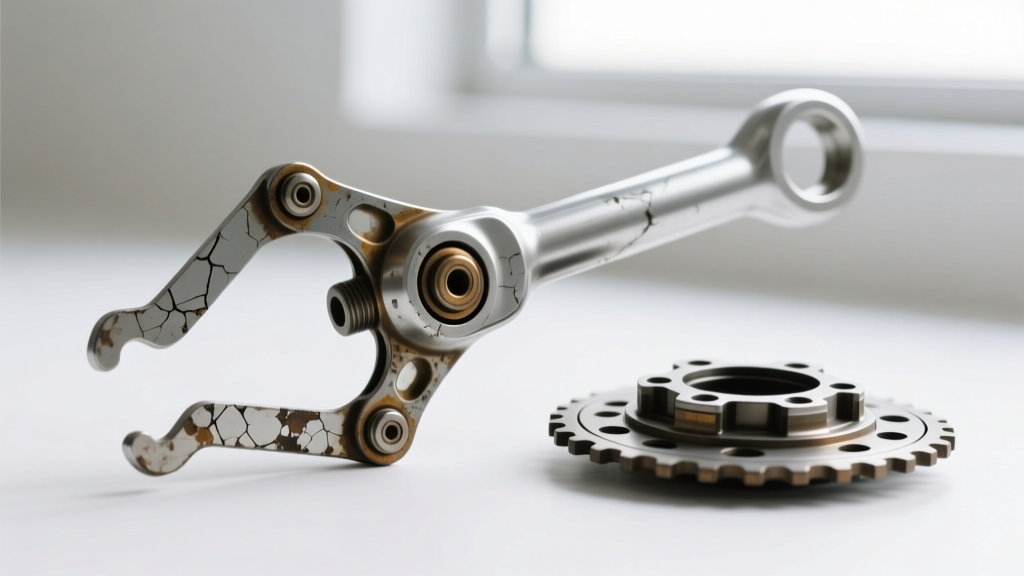
If you remove the right-side crankcase cover, you can visually inspect the release arm. The point where the arm contacts the clutch pushrod (or the pressure plate hat on older models) should be smooth. If you see a deep, shiny groove or a 'cupped' indentation, the arm has exceeded its service limit.
5. Squealing or Grinding Noises at Idle
While rare on wet clutches, if the wear is severe enough that the release arm is rubbing against the pushrod or the pressure plate hat while the clutch is engaged (lever out), you may hear a rhythmic ticking or squealing noise that matches engine RPM.
Diagnostic Matrix: Is it the Fork, the Cable, or the Plates?
Beginners often misdiagnose a worn clutch fork when the real culprit is a stretched cable or glazed friction plates. Use this diagnostic table to narrow down your issue before ordering parts from suppliers like Partzilla or your local dealer.
| Symptom | Most Likely Cause | How to Verify |
|---|---|---|
| Lever feels spongy, but engagement point is consistent. | Air in hydraulic line (if hydraulic) or stretched cable. | Bleed the system or check cable housing for fraying and stretch. |
| Lever feels normal, but bike slips under heavy acceleration. | Worn friction plates or weak clutch springs. | Measure friction plate thickness with calipers against OEM spec. |
| Constant need to adjust free play; lever feels 'gritty'. | Worn clutch fork / release arm or mushroomed pushrod. | Remove clutch cover and inspect arm contact point and pushrod tip. |
| Cannot find neutral at a stop; bike creeps forward. | Warped steel plates or worn release arm not lifting evenly. | Check steel plates for bluing/warping on a glass surface. |
Step-by-Step Inspection for Beginners
Inspecting the clutch release arm on a motorcycle or ATV is a straightforward job that requires basic hand tools and a clean workspace. Here is your beginner-friendly workflow:
- Drain the Engine Oil: Most ATV and motorcycle clutches are housed in the engine crankcase. Drain the oil into a pan. (Note: For 2026, ensure you refill with a JASO MA3 certified oil, the newest standard designed for modern wet clutches and high-friction coatings).
- Remove the Right-Side Clutch Cover: Using an 8mm or 10mm socket, remove the perimeter bolts. Keep them organized in a cardboard template, as they are often different lengths.
- Locate the Release Arm: Follow the clutch cable (or hydraulic slave cylinder pushrod) to where it enters the crankcase. You will see a cast or stamped metal arm pivoting on a shaft.
- Inspect the Contact Point: Look at where the arm touches the clutch pushrod. Run your fingernail across it. If your nail catches in a deep groove (typically anything over 0.5mm of depth), the arm is worn out.
- Check the Pushrod: Pull the long metal or ceramic pushrod out of the transmission main shaft. Inspect the ends. A common failure is the pushrod 'mushrooming' out, which accelerates wear on the release arm.
Real-World Specs, Torque, and Replacement Costs
To give you an idea of what to expect when repairing a worn clutch fork/release arm, here are real-world specifications and pricing for some of the most popular platforms on the trail and track today.
Honda TRX400EX / TRX400X (ATV)
- OEM Release Arm Part Cost: ~$35 - $45
- Clutch Center Nut Torque: 64 lb-ft (87 Nm). Always use a proper clutch holding tool; do not rely on the rear brake alone.
- Common Failure: The lifter arm shaft bore wears out, causing the arm to wobble and push the rod at an angle, leading to uneven pressure plate lift.
Yamaha YZ450F (Dirt Bike)
- OEM Release Arm Part Cost: ~$25 - $30
- Clutch Boss Nut Torque: 58 lb-ft (78 Nm).
- Common Failure: High-RPM dirt bike riding causes the actuator cam to gall against the pushrod. Upgrading to an aftermarket hardened steel cam (available via Rocky Mountain ATV/MC) is a popular $20 fix that prevents future wear.
Harley-Davidson Sportster (Belt Drive Primary)
- OEM Clutch Release Arm (Ramp) Cost: ~$60 - $90
- Primary Chaincase Bolt Torque: 84 - 108 in-lbs (Do not overtighten, or you will crack the aluminum derby cover).
- Common Failure: Sportsters use a ball-and-ramp mechanism. The 'ramp' acts as the fork. Over time, the ball bearings pit the metal ramps, causing a gritty lever feel. Rebuilding the ramp kit is a mandatory fix.
When to Upgrade vs. Replace with OEM
If you are riding a stock Kawasaki KLR650 or doing light trail riding on a Honda Foreman, sticking to the OEM cast-aluminum or stamped-steel release arm is perfectly fine. They are engineered to last tens of thousands of miles under normal use.
However, if you are building a high-horsepower turbo ATV, racing motocross, or running heavy-duty clutch springs (like Hinson or ProX racing springs), the increased spring pressure will accelerate wear on a stock release arm. In these scenarios, invest in a billet aluminum or hardened-steel aftermarket release arm. The extra $30 upfront will save you from a DNF (Did Not Finish) on race day.
Final Thoughts for the Home Mechanic
Don't let the terminology intimidate you. Whether your service manual calls it a clutch fork, a release arm, or a lifter cam, the diagnostic logic remains the same. If your lever feel is degrading and your cable adjustments aren't fixing it, it is time to drain the oil, pull the cover, and inspect the metal. Catching a worn clutch fork early will save your pushrod, your pressure plate, and your wallet. Grab your torque wrench, order your gasket, and get your machine back on the trail.