Understanding the Tractor PTO Slip Clutch
When you connect a rotary mower, baler, or post-hole digger to your tractor, the Power Take-Off (PTO) shaft transfers massive rotational energy from the tractor's transmission to the implement. But what happens when that implement suddenly strikes a hidden rock or a dense root ball? Without a mechanical buffer, that sudden stop would send a violent shock load directly up the driveline, potentially shattering gears or destroying your tractor's internal transmission. This is where the tractor PTO slip clutch saves the day.
Acting as a mechanical torque limiter, a slip clutch is designed to disengage (slip) when resistance exceeds a specific threshold, and re-engage seamlessly once the obstruction is cleared. However, clutch engagement and disengagement issues are among the most common—and most destructive—failures in agricultural drivelines. In this beginner-friendly explainer, we will break down exactly why your PTO slip clutch fails to engage or disengage, the hidden costs of ignoring these symptoms, and how to properly calibrate your system using real-world torque specifications.
The Anatomy of a PTO Slip Clutch
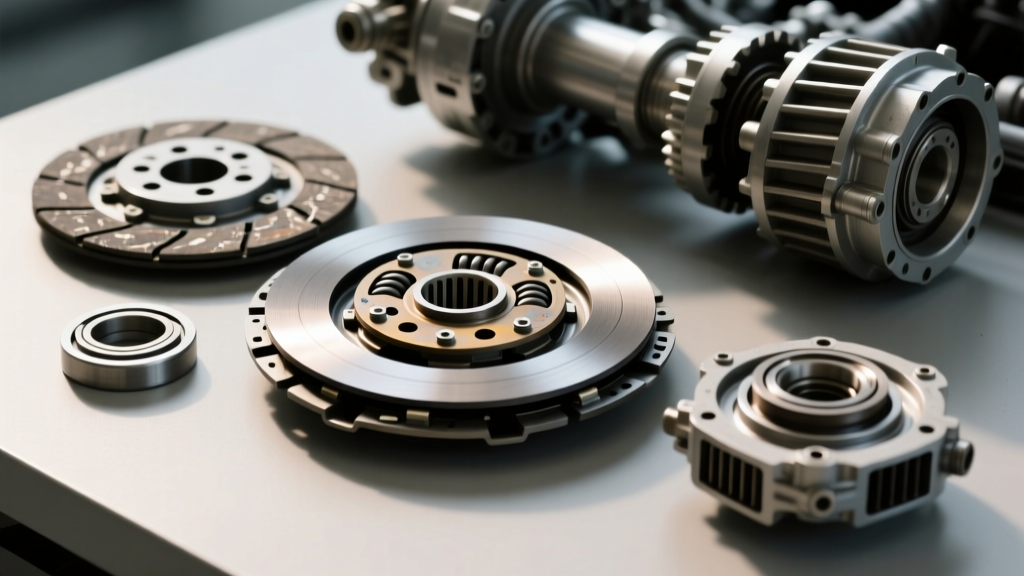
Before diagnosing engagement issues, you need to understand the components inside the slip clutch housing (commonly manufactured by brands like Walterscheid, Comer, or Bondioli). A standard slip clutch consists of:
- The Inner and Outer Hubs: Splined to the PTO shaft and the implement gearbox, respectively.
- Friction Discs: Usually made of sintered bronze or heavy-duty organic composite material, splined to one hub.
- Steel Intermediate Plates: Splined to the opposing hub, sandwiching the friction discs.
- Belleville Washers or Coil Springs: Provide the clamping force.
- Adjusting Nuts: Threaded onto the housing bolts to compress the springs and set the slip torque.
When the implement's resistance overcomes the friction holding the discs and plates together, the clutch slips. When the load normalizes, the spring tension forces the plates back together, re-engaging the drive.
Symptom 1: The 'Rust-Weld' (Failure to Disengage)
The most dangerous failure mode is when the slip clutch refuses to slip. From a diagnostic perspective, this is a failure to disengage under peak load. Why does this happen?
The Moisture and Storage Factor
Most PTO slip clutches are exposed to the elements. Over the winter or during long periods of wet storage, moisture penetrates the housing. The steel intermediate plates oxidize and literally rust-weld themselves to the friction discs. When you engage the PTO in the spring, the clutch acts as a solid, locked shaft. If the mower hits a rock, the shock load bypasses the slip clutch entirely.
The Over-Tightening Mistake
Many beginners notice their implement slipping during heavy grass cutting and mistakenly assume the clutch is "broken." They grab a wrench and tighten the adjusting nuts all the way down to stop the slipping. By fully compressing the springs, they exceed the design limits of the friction material, effectively locking the clutch and eliminating its protective disengagement capability.
Symptom 2: The 'Free-Spin' (Failure to Engage)
Conversely, a clutch that fails to engage will slip continuously, even under normal operating loads. You will smell burning friction material, see smoke, and notice the implement losing RPMs while the tractor PTO shaft spins freely. This engagement failure is typically caused by:
- Oil Contamination: A leaking input seal on the implement's gearbox (e.g., a worn Comer gearbox seal) allows 80W-90 gear oil to migrate up the shaft and saturate the friction discs. Once oil-logged, organic and sintered discs lose their coefficient of friction and cannot engage.
- Worn Friction Discs: Friction discs have a minimum thickness specification. A new sintered bronze disc might be 4.0mm thick. Once it wears down below 2.5mm, the coil springs can no longer provide adequate clamping force, resulting in perpetual slipping.
- Spring Fatigue: Leaving the adjusting nuts fully tightened during storage permanently deforms the coil springs or flattens the Belleville washers, destroying their tension memory.
The Hidden Cost: Destroying Your Tractor's Internal PTO
Why is a slip clutch disengagement failure so catastrophic for modern tractors? As of 2026, the majority of mid-range and high-horsepower tractors (such as the John Deere 6R series or Kubota M7 lineup) utilize internal electro-hydraulic wet clutch packs to engage the PTO smoothly. These internal clutches are designed for modulation and gradual engagement, not violent mechanical impacts.
If your external PTO slip clutch is seized (rust-welded) and your rotary cutter hits an immovable object, the kinetic energy has nowhere to go. It will instantly strip the external PTO shaft splines, shear the internal PTO shear pin, or worse, shatter the internal wet clutch hub. Replacing an external slip clutch friction disc kit costs between $45 and $120. Replacing an internal tractor PTO clutch pack requires splitting the tractor or dropping the rear axle housing, resulting in repair bills ranging from $2,500 to $4,500+.
Implement Breakaway Torque & Spring Compression Chart
Proper engagement relies on setting the correct breakaway torque. Below is a reference table for common agricultural implements. Note: Always consult your specific implement manual, as gearbox ratios affect final output torque.
| Implement Type | PTO Speed | Target Slip Torque (Nm) | Spring Compression Length (mm) | Friction Disc Material |
|---|---|---|---|---|
| Light Duty Rotary Mower | 540 RPM | 350 - 450 Nm | 38 - 42 mm | Sintered Bronze |
| Heavy Duty Flail Mower | 540 / 1000 RPM | 600 - 800 Nm | 40 - 45 mm | Heavy-Duty Organic |
| Round Baler | 540 / 1000 RPM | 900 - 1200 Nm | 45 - 52 mm | Sintered Bronze / Ceramic |
| Post Hole Digger | 540 RPM | 200 - 300 Nm | 30 - 35 mm | Sintered Bronze |
Step-by-Step: The 'Breakaway' Calibration Method
To ensure your tractor PTO slip clutch engages under normal loads but disengages during a jam, you must perform an annual calibration. According to agricultural safety guidelines outlined by the Penn State Extension, testing the slip clutch should be a mandatory pre-season maintenance task.
Step 1: Break the Rust-Weld
Before the season starts, loosen all the adjusting nuts on the slip clutch until the springs are completely relaxed (zero tension). Start the tractor, engage the PTO at a low idle for exactly 2 to 3 seconds, and disengage. This allows the friction discs to spin independently of the steel plates, scraping off any surface rust or oxidation. Never skip this step.
Step 2: Reset to Factory Compression
Tighten the adjusting nuts evenly until the springs reach the manufacturer's specified compressed length (e.g., 42mm). Use a digital caliper to measure the distance between the spring retainer and the pressure plate. Uneven tightening will cause the clutch to engage at an angle, leading to rapid, uneven wear and severe driveline vibration.
Step 3: The Lever-Arm Torque Test
If you want to verify the exact breakaway torque without a specialized PTO torque adapter, use the lever-arm method:
- Clamp a 1-meter (100 cm) length of steel pipe securely to the implement's input shaft (behind the slip clutch).
- Attach a digital hanging scale to the end of the pipe.
- Pull the scale steadily. The clutch should begin to slip when the scale reads the target force. (Remember: Torque in Nm = Force in Newtons x Distance in Meters. Pulling 45 kg of force at 1 meter equals roughly 441 Nm).
When to Replace: Friction Disc Wear Limits
Slip clutches are wear items. If you have adjusted the springs to the minimum allowable compression length and the clutch still fails to engage (slips continuously), the friction discs are worn out or contaminated. Disassemble the housing and inspect the discs. If the sintered bronze material is grooved, glazed, or measures less than 2.5mm with a micrometer, replacement is mandatory. OEM replacement kits from manufacturers like Walterscheid or aftermarket equivalents are widely available and should be kept as spare parts in your tractor's toolbox.
Expert Tip: Always store your implements with the slip clutch adjusting nuts backed off to relieve spring tension. This simple 5-minute winterization step prevents spring fatigue and reduces the severity of the 'rust-weld' effect, ensuring your clutch engages and disengages flawlessly when spring arrives.