Understanding the Anatomy: A Single Plate Clutch Easy Diagram Breakdown
When troubleshooting manual transmission drivetrains, consulting a single plate clutch easy diagram is the fastest way to visualize the mechanical relationship between the flywheel, friction disc, and pressure plate assembly. Unlike complex automatic transmissions (such as the ZF 8HP or 6L80), a manual clutch system relies on raw mechanical friction and hydraulic leverage. However, simplicity does not equate to invulnerability. In 2026, with torque outputs from factory-tuned 4-cylinder engines frequently exceeding 350 lb-ft, the thermal and mechanical stresses on single-plate setups are higher than ever.
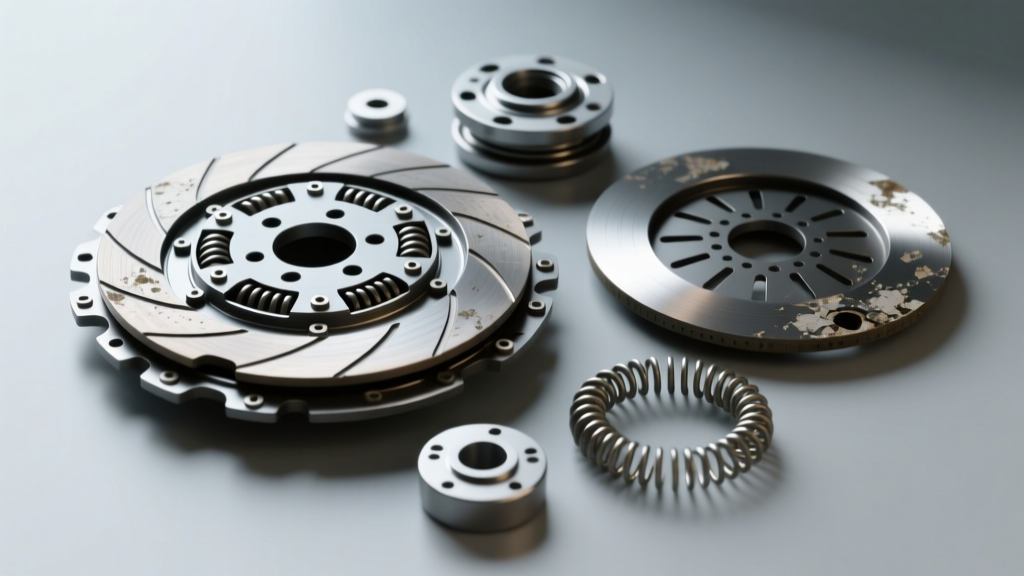
Before diagnosing a failure, it is critical to understand the load path. The engine crankshaft bolts directly to the flywheel. The clutch disc—featuring friction material, marcel (wave) springs, and torsion dampers—is sandwiched between the flywheel and the pressure plate. The diaphragm spring within the pressure plate applies clamping force, while the release (throwout) bearing disengages the system when the pedal is depressed. When any single node in this diagram fails, the entire drivetrain suffers.
Top 4 Clutch Failure Modes and Root Cause Analysis
Proper diagnosis requires moving beyond the symptom (e.g., 'the clutch is slipping') to identify the root mechanical failure. Here are the most common failure modes we see in the shop.
1. Friction Material Glazing and Thermal Overload
Symptoms: RPM flaring under heavy load, delayed engagement, burning odor.
Root Cause: Glazing occurs when the clutch friction material is subjected to excessive slip, generating surface temperatures exceeding 800°F (426°C). This bakes the organic resins, creating a hardened, glass-like surface. Common culprits include 'riding' the clutch pedal, improper hydraulic system bleeding (causing drag), or towing loads beyond the vehicle's Gross Combined Weight Rating (GCWR).
Diagnostic Check: Inspect the friction surface. If it appears shiny and lacks porosity, the disc is glazed. The flywheel and pressure plate surfaces will likely exhibit blue heat spots and must be resurfaced or replaced.
2. Hub Spline Wear and Engagement Chatter
Symptoms: Violent shuddering or 'chatter' upon initial takeoff, metallic rattling at idle.
Root Cause: The inner hub of the clutch disc mates with the transmission input shaft splines. If these splines lack proper lubrication, or if the transmission was misaligned during installation, the hub will wear unevenly. This creates excessive backlash, causing the disc to bind and release erratically as the marcel springs compress. Another root cause is the failure of the internal torsion dampers (coil springs within the disc), which are designed to absorb engine torsional vibrations.
Diagnostic Check: Slide the old clutch disc onto the input shaft. It should move smoothly with zero radial play. If it rocks or binds, the splines are compromised.
3. Diaphragm Spring Fatigue and Clamping Loss
Symptoms: Slipping in higher gears (4th, 5th, 6th) despite a firm pedal feel, or a pedal that feels unusually light.
Root Cause: Over tens of thousands of engagement cycles, the high-carbon steel diaphragm spring loses its temper and tensile strength. Heat cycling from normal friction accelerates this fatigue. Furthermore, if the throwout bearing has been constantly resting against the diaphragm fingers (due to a lack of pedal freeplay), the fingers will wear grooves, altering the geometry and reducing the clamping force applied to the friction disc.
4. Flywheel Runout and Hotspotting
Symptoms: Pulsation in the clutch pedal during engagement, vibration at cruising speeds.
Root Cause: Flywheel runout (wobble) exceeding manufacturer tolerances causes uneven clamping pressure. This is often caused by improper torque sequencing during installation, warped bellhousings, or severe thermal shock. According to REPXPERT by LuK, maximum allowable flywheel runout is typically 0.003 to 0.005 inches (0.07 - 0.12 mm). Exceeding this guarantees premature release bearing failure and chatter.
Buyer’s Guide: Matching Replacement Kits to Failure Modes
Once you have isolated the root cause, selecting the correct replacement kit is paramount. Upgrading to a heavy-duty clutch on a stock daily driver will result in a harsh, unforgiving pedal and accelerated transmission synchro wear. Conversely, installing an OEM organic disc on a tuned vehicle guarantees immediate glazing. Below is our 2026 comparison chart for top-tier single plate clutch kits.
| Brand / Kit Line | Friction Material | Torque Capacity | Est. Price (2026) | Best Application |
|---|---|---|---|---|
| LuK RepSet (OEM) | Organic / Marcel Sprung | ~300 lb-ft | $250 - $350 | Daily commuters, factory replacement, smooth engagement. |
| Exedy OEM Replacement | High-Grade Organic | ~350 lb-ft | $300 - $450 | Sport daily drivers, autocross, slight power bumps. |
| ACT Heavy Duty Sprung | Ceramic / Heavy Sprung Hub | ~520 lb-ft | $550 - $680 | Tuned/Boosted engines, track use. Stiffer pedal feel. |
| South Bend Stage 3 Daily | Kevlar / Organic Blend | ~600 lb-ft | $700 - $850 | Heavy towing, diesel applications, high-torque street use. |
Buyer's Tip: The Dual Mass Flywheel (DMF) Dilemma
Many modern manual vehicles (e.g., Porsche G50, late-model VW/Audi TDI) utilize a Dual Mass Flywheel to dampen diesel or low-RPM torsional vibrations. When replacing the clutch, you must decide whether to replace the DMF (costing an additional $400-$800) or convert to a Single Mass Flywheel (SMF) using a solid hub conversion kit from brands like Sachs or South Bend. While SMF conversions save money upfront and improve throttle response, they transfer more gear rattle and vibration into the cabin at idle.
Critical Installation Specs: Torque and Alignment
Even the most expensive clutch kit will fail prematurely if installation protocols are ignored. Root cause analysis frequently reveals that 'defective' clutches were actually victims of improper installation. Adhere strictly to these specifications:
- Flywheel Resurfacing: Never install a new clutch on a used, un-machined flywheel. The removal of material changes the distance between the flywheel friction surface and the pressure plate mounting surface, altering the diaphragm spring geometry and reducing clamping force.
- Flywheel Bolt Torque: When using aftermarket fasteners like ARP (Part #104-2802 for many GM LS/Tremec applications), torque to 75-85 ft-lbs using ARP Ultra-Torque lube. Always follow the ARP Fasteners Torque Guide for specific metallurgy requirements.
- Pressure Plate Torque: M8x1.25 pressure plate bolts should be torqued to 22-25 ft-lbs, while M10 bolts require 35-40 ft-lbs. Crucial: Tighten in a star pattern, one turn at a time, to prevent warping the pressure plate cover.
- Spline Lubrication: This is where most DIYers fail. Apply a micro-thin layer of high-temperature molybdenum disulfide grease (e.g., Honda Moly Paste #08798-9010) to the input shaft splines. Over-lubrication will cause grease to sling onto the friction material during high-RPM operation, resulting in catastrophic slipping.
- Bellhousing Alignment: Use a dial indicator to check bellhousing runout. If runout exceeds 0.005 inches, the input shaft will bind, causing premature throwout bearing failure and clutch chatter. Use offset dowel pins to correct misalignment.
Diagnostic Decision Framework: Repair vs. Upgrade
When a customer presents with clutch failure, use this framework to guide your purchase and repair strategy:
- Was the failure hydraulic? If the master or slave cylinder bypassed internally, it may have caused clutch drag and subsequent glazing. Replace the hydraulic components and bleed the system before condemning the friction disc.
- Is the vehicle modified? If an ECU tune has increased torque output by more than 20% over stock, an OEM organic clutch (like a standard LuK RepSet) will not survive. Step up to an Exedy Stage 1 or ACT HD Sprung hub.
- Check the release system: Always replace the throwout bearing and pilot bearing (or bushing) during a clutch job. A $25 pilot bearing failure will destroy a $600 input shaft. For hydraulic concentric slave cylinders (CSC), replacement is mandatory, as they cannot be reliably tested outside the bellhousing.
By understanding the mechanical realities illustrated in a single plate clutch easy diagram and respecting the precise torque and material requirements of modern drivetrains, you can accurately diagnose failures and select the exact replacement kit required for reliable, long-term performance.