Understanding Mechanical Clutch Linkages in a Modern Era
While the automotive landscape of 2026 is heavily dominated by hydraulic actuation and drive-by-wire systems in modern manuals and EVs, millions of vehicles on the road still rely on the humble mechanical clutch cable. Whether you are daily-driving an older light-duty truck like a Chevy S10, maintaining a global-market compact car, or wrenching on a classic Ford Mustang, the cable remains the critical physical link between your left foot and the transmission.
When you experience clutch engagement and disengagement issues—such as grinding when shifting into reverse, a pedal that feels unusually loose, or a clutch that refuses to fully disengage—the cable is often the primary culprit. This beginner-friendly explainer will demystify how clutch cables work, how to diagnose engagement faults, and the exact specifications you need for replacing clutch cable assemblies safely and correctly.
How a Bowden Clutch Cable Actually Works
To troubleshoot effectively, you must understand the physics of the component. A mechanical clutch system utilizes a Bowden cable. This consists of two main parts:
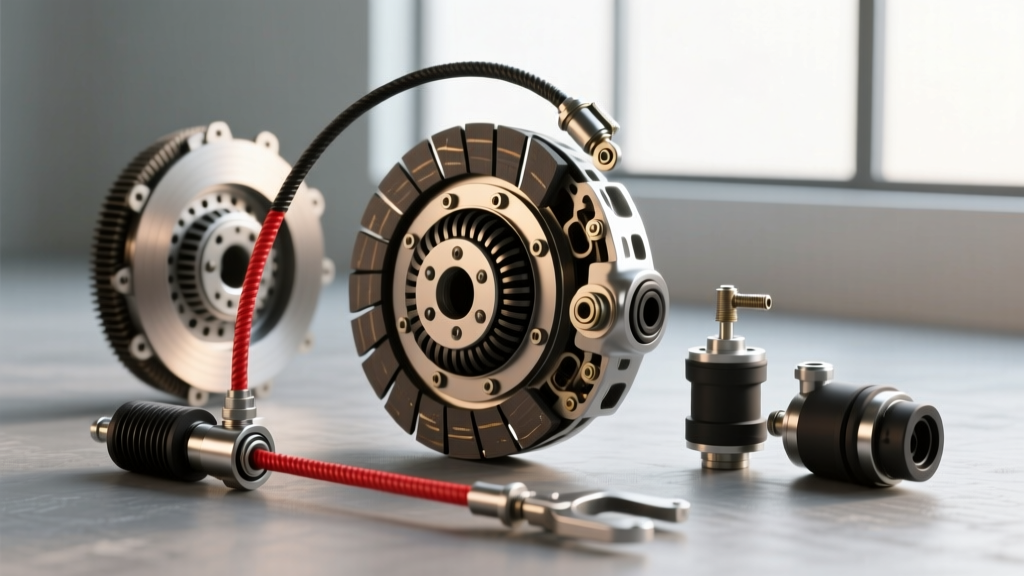
- The Inner Wire: A braided or solid steel cable that pulls the clutch release fork, which in turn pushes the throwout bearing against the pressure plate fingers.
- The Outer Housing: A tightly wound steel coil lined with a low-friction PTFE (Teflon) sleeve that provides a rigid track for the inner wire to slide through.
When you press the pedal, the outer housing is anchored at the firewall and the bellhousing. The inner wire is pulled taut, actuating the clutch. If the outer housing compresses, cracks, or if the inner wire stretches and frays, the mechanical advantage is lost, leading directly to severe clutch engagement and disengagement issues.
Top Symptoms of a Failing Clutch Cable
Before you order parts, confirm that your symptoms align with mechanical cable failure rather than internal transmission damage or a worn pressure plate.
- High Pedal Engagement Point: The clutch only disengages when the pedal is pushed all the way to the floor mat. This indicates the inner wire has stretched or the adjustment mechanism has maxed out.
- Grinding Gears (Disengagement Failure):strong> If you cannot smoothly slide into first gear or reverse while stopped, the cable is not pulling the release fork far enough to separate the friction disc from the flywheel.
- Pedal Binding or Notching: A gritty, rough feeling through the pedal pad means the inner steel wire is fraying inside the housing, catching on the PTFE liner.
- Slipping Under Load (Engagement Failure):strong> Paradoxically, a cable that is adjusted too tightly (zero free-play) will keep constant pressure on the throwout bearing. This prevents the pressure plate from fully clamping the disc, causing slip and rapid wear.
Diagnosing the Issue: The Free-Play Measurement Test
The most critical concept in clutch cable diagnostics is pedal free-play. Free-play is the distance the pedal moves before you feel the resistance of the clutch fork spring. According to the AA1Car Clutch Diagnosis Guide, lacking proper free-play is the number one cause of premature throwout bearing failure and clutch slip.
How to Measure Free-Play Like a Pro
- Sit in the driver's seat and press the clutch pedal down with your fingers until you feel the mechanical resistance of the clutch spring engage.
- Use a ruler or a digital caliper to measure the distance the pedal pad traveled from its resting top position to the point of resistance.
- Compare your measurement to the manufacturer's specification (typically between 1/2 inch and 1.25 inches, or 12mm to 32mm).
Diagnostic Rule of Thumb: If your free-play is zero, your clutch will slip. If your free-play is over 1.5 inches, your clutch will not fully disengage, causing gear grind.
Vehicle-Specific Clutch Cable Specs & Part Numbers
When replacing clutch cable components, using high-quality aftermarket or OEM equivalents is vital. Cheap cables often feature inferior outer housings that compress under heavy pedal pressure, mimicking a stretched cable. Below is a reference table for popular cable-driven platforms:
| Vehicle Application | OEM Part Number | Premium Aftermarket | Pedal Free-Play Spec | Est. Part Cost |
|---|---|---|---|---|
| 1994-2004 Ford Mustang V8 | F4ZZ-7A554-A | Dorman 924-135 (w/ Quadrant) | 3/4' - 1.0' | $45 - $85 |
| 1998-2002 Chevy S10 2.2L | 15996218 | ACDelco 15996218 | 1/2' - 3/4' | $35 - $60 |
| 1996-2000 Honda Civic (Manual) | 46540-S01-A01 | Dorman 924-090 | 1.0' - 1.25' | $25 - $50 |
Note: For Foxbody and SN95 Mustang owners, the plastic clutch quadrant (the gear mechanism behind the pedal) frequently breaks, masquerading as a stretched cable. Always replace the quadrant and consider a billet aluminum firewall adjuster when replacing the cable on these platforms.
Step-by-Step Guide to Replacing Clutch Cable
Replacing a clutch cable is a straightforward mechanical job that usually requires basic hand tools, a pair of wire cutters (for the old cable), and a 10mm to 15mm socket set. Expect to spend 1 to 2 hours on the job.
Step 1: Cabin-Side Removal
Disconnect the negative battery terminal. Under the dash, locate the top of the clutch pedal arm. Unhook the cable end from the pedal quadrant or pivot pin. Remove the rubber grommet or unbolt the cable housing retainer bracket from the firewall. Carefully feed the cable end through the firewall into the engine bay.
Step 2: Engine Bay Extraction
Trace the cable routing. Note how the cable loops around the exhaust headers and through the steering shaft—taking a photo with your phone is highly recommended for reassembly. Unbolt the cable bracket from the transmission bellhousing. Unhook the inner wire from the clutch release fork. Pull the old cable out of the vehicle.
Step 3: Routing and Installation
Feed the new cable through the firewall. Critical E-E-A-T Tip: Ensure the outer housing sits perfectly flush in the firewall grommet. If the housing is not fully seated, firewall flex will absorb your pedal travel, causing massive disengagement issues. Route the cable away from hot exhaust components; if it must cross near a header, ensure a heat-sleeve is installed over the housing.
Step 4: Bellhousing Connection
Attach the inner wire to the release fork. Bolt the cable housing bracket to the bellhousing. This is where precision matters.
Pro-Tip on Lubrication: Modern premium cables come pre-lubricated with a dry PTFE powder. Do not spray liquid WD-40 or heavy grease into the housing, as it will attract dirt, turn into a grinding paste, and cause the pedal to bind within a few thousand miles.
Adjustment and Final Torque Specifications
Once installed, the cable must be adjusted to achieve the correct free-play. If your vehicle features a threaded firewall adjuster (common on performance applications and motorcycles), turn the adjuster nut to lengthen or shorten the outer housing until the pedal free-play matches the specifications in the table above.
Crucial Torque Specs
While many beginners simply 'tighten until snug,' using a torque wrench ensures you do not crack the cast-aluminum bellhousing or strip the firewall studs.
- Bellhousing Cable Bracket Bolts (M8x1.25): 15 to 18 lb-ft. Over-torquing can crack the aluminum transmission housing.
- Pedal Assembly / Quadrant Nuts (M10): 22 to 25 lb-ft.
- Firewall Adjuster Locknut: Hand-tight against the firewall, plus a 1/4 turn with a 10mm wrench to secure it without bending the firewall sheet metal.
Final Verification and Road Test
After adjusting the free-play, start the engine and press the clutch to the floor. Wait two seconds, then attempt to shift into reverse. If the transmission grinds, you need slightly more cable tension (less free-play). Take the car for a test drive. Shift through all gears under light acceleration, then under heavy load. The pedal should return smoothly and instantly to the top of its travel. If it hangs up or returns slowly, re-check your routing for sharp bends or interference with the steering column.
By understanding the mechanics of the Bowden cable and adhering to strict free-play measurements, you can completely resolve engagement and disengagement issues. For high-quality replacement components and fitment guides, the Dorman Products Catalog remains an industry-standard resource for mechanics and DIYers alike. Mastering this fundamental mechanical linkage will save you hundreds of dollars in misdiagnosed transmission repairs and keep your classic or light-duty truck shifting smoothly for years to come.