Diagnosing and Resolving Eaton Auto Shift Clutch Drag
Heavy-duty Class 8 trucks equipped with Eaton Fuller AutoShift and UltraShift automated manual transmissions (AMTs) rely on incredibly precise clutch release mechanisms to execute seamless gear changes. When clutch drag occurs in an Eaton Auto Shift system, the clutch fails to fully disengage the engine from the transmission input shaft. This results in grinding during stationary shifts, premature synchronizer wear, creeping at stoplights, and eventually, catastrophic transmission failure.
Unlike traditional manual setups where a driver's left leg provides the feedback, an Eaton AMT utilizes a Pneumatic Clutch Actuator (PCA) or Electronic Clutch Actuator (ECA) paired with a heavy-duty Solo or Easy-Pedal twin-plate clutch. Diagnosing clutch drag in these systems requires a methodical approach, blending mechanical inspection with electronic calibration. This step-by-step guide will walk you through identifying, measuring, and fixing clutch drag and release problems in Eaton automated transmissions.
Understanding the Eaton AMT Clutch Release Anatomy
Before turning a wrench, it is critical to understand the components involved in the Eaton Auto Shift clutch release circuit. According to the Eaton Roadranger Clutch Service Manual (TRTS0910), the system relies on three primary mechanical touchpoints:
- The Clutch Actuator: A pneumatic or electronic cylinder mounted to the bellhousing that pushes the clutch release fork.
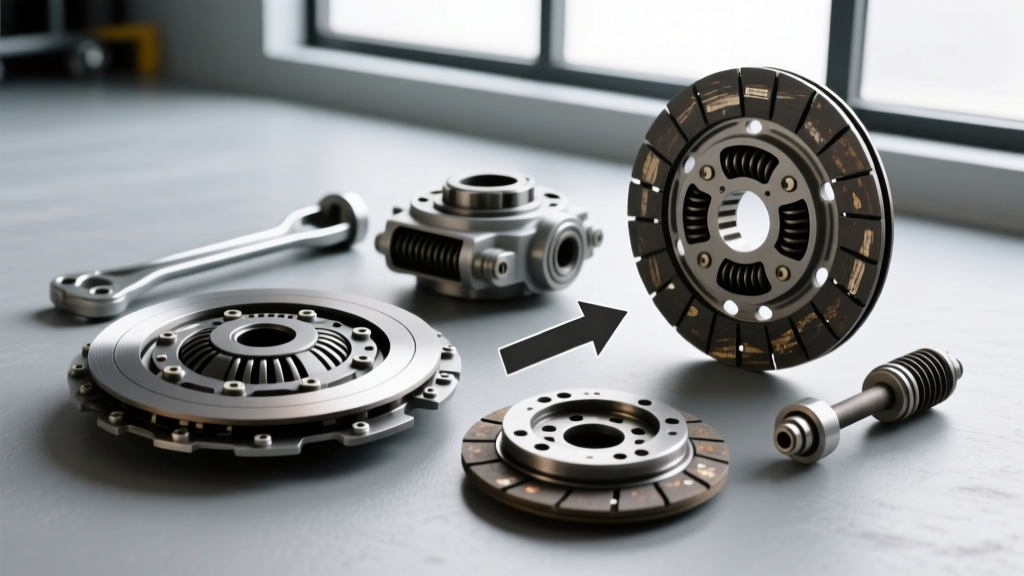
- The Release Bearing (e.g., K-3401-1): Translates the actuator's linear force against the clutch brake and the diaphragm spring fingers of the pressure plate.
- The Clutch Brake (e.g., K-3451-1): A friction disc designed to squeeze against the input shaft to halt rotation, allowing the transmission to engage first gear or reverse from a dead stop.
When clutch drag occurs, the release bearing is not traveling far enough to fully retract the pressure plate fingers, or the clutch brake is failing to arrest input shaft momentum.
Required Tools and Safety Preparation
Working on Class 8 AMT systems involves high-pressure air and heavy moving components. Ensure the truck is on level ground, wheels are chocked, and the parking brakes are fully engaged.
Essential Diagnostic Toolkit
- Eaton ServiceRanger 4 (or newer) diagnostic software with a compatible NexIQ or Noregon JPRO adapter.
- Dial indicator with a magnetic base.
- Feeler gauge set and precision machinist ruler.
- Calibrated 120 PSI air pressure gauge with quick-connect fittings.
- Standard SAE and Metric socket sets, including torque wrenches rated up to 250 lb-ft.
Safety Warning: Never crawl under a truck or place your hands near the clutch actuator pushrod without first bleeding the secondary air tanks and applying Lockout/Tagout (LOTO) procedures. The pneumatic actuator can deploy with over 2,000 lbs of force without warning if residual air is present.
Step 1: Verify Air System Supply and Actuator Health
The most common cause of sluggish clutch release and subsequent drag in pneumatic Auto Shift models is inadequate air volume or a leaking actuator O-ring. The PCA requires a minimum of 90 PSI to achieve full stroke against a heavy-duty 15.5-inch twin-plate clutch.
- Build System Pressure: Start the engine and allow the air governor to cut out at 120-125 PSI.
- Check for Leaks: With the engine off, apply soapy water to the PCA air fittings, the quick-release valve, and the actuator cylinder weep hole. Bubbles at the weep hole indicate internal O-ring failure, requiring an actuator rebuild or replacement (Part # K-3304-101 or equivalent).
- Measure Supply Pressure: Tap your calibrated gauge into the actuator supply line. Have an assistant cycle the ignition (without starting) to command a clutch engagement. Pressure at the actuator must not drop below 95 PSI during the stroke.
Step 2: Measure Actuator Pushrod Stroke and Free Play
If air pressure is nominal, the next culprit is mechanical misadjustment. The actuator pushrod must have a specific amount of free play to ensure the release bearing is not constantly riding on the clutch fingers, which causes drag, heat, and premature bearing failure.
Checking Free Play
Using a pry bar, gently pull the release fork back toward the actuator until all slack is taken up. Measure the gap between the actuator pushrod and the fork pad. For most Eaton Solo and Easy-Pedal clutches, the specified free play is 0.125 to 0.250 inches (3.17mm to 6.35mm). If there is zero free play, the clutch is being partially depressed at all times, leading to massive slip and drag.
Verifying Full Stroke
Mount a dial indicator to the bellhousing inspection cover, resting the plunger on the release bearing carrier. Command a full clutch disengagement via the ServiceRanger software or by fully depressing the clutch pedal (if equipped with a manual override). The release bearing must travel a minimum of 1.50 inches to 1.75 inches. If travel is short, the internal clutch linkage or cross-shaft is worn, or the actuator pushrod is out of adjustment.
Step 3: Inspect the Clutch Brake and Squeeze
When an Eaton Auto Shift truck is stopped, the transmission control module (TCM) commands the actuator to push past the standard disengagement point, squeezing the clutch brake against the input shaft to stop it from spinning. If the clutch brake is glazed, warped, or worn past its limit, the input shaft continues to spin, causing severe gear grinding that mimics clutch drag.
The Squeeze Test: Measure the distance the release bearing travels after it makes initial contact with the clutch brake. The proper clutch brake squeeze specification is 0.50 to 0.75 inches (12.7mm to 19.0mm). If the squeeze is less than 0.50 inches, the clutch brake (Part # K-3451-1) is worn out and must be replaced. Attempting to compensate for a worn clutch brake by over-stroking the actuator will result in bending the clutch fingers and destroying the pressure plate.
Step 4: Electronic TCM Calibration
Whenever mechanical adjustments are made, or if components like the clutch actuator or transmission range selector are replaced, the TCM must be recalibrated. The Eaton Auto Shift system uses positional sensors to learn where the clutch fully engages and disengages.
- Connect your laptop running Eaton ServiceRanger to the vehicle's 9-pin diagnostic connector.
- Navigate to the Transmission ECU and select Clutch Actuator Calibration.
- Follow the on-screen prompts. The system will automatically stroke the actuator to find the physical hard-stops and the clutch brake engagement point.
- Clear any historical fault codes (such as Code 17 - Clutch Actuator Fault or Code 44 - Clutch Slip) and perform a stationary shift test.
Eaton AMT Clutch Drag Diagnostic Matrix
Use the following table to cross-reference your symptoms with the most likely root causes in Eaton AutoShift and UltraShift systems.
| Symptom | Probable Root Cause | Corrective Action |
|---|---|---|
| Grinding only when shifting into 1st or Reverse from a stop. | Worn Clutch Brake (K-3451-1) or insufficient brake squeeze. | Measure squeeze (target 0.50'-0.75'). Replace clutch brake if worn or adjust pedal/actuator limit. |
| Truck creeps forward with brake applied and gear engaged. | Clutch actuator pushrod out of adjustment (zero free play) or warped friction discs. | Reset pushrod free play to 0.125'-0.250'. If issue persists, drop transmission to inspect clutch pack. |
| TCM throws Fault Code 44 (Clutch Slip/Drag) during upshifts. | Oil contamination on friction discs or weak pressure plate diaphragm springs. | Inspect rear main seal and transmission input shaft seal. Replace clutch assembly if contaminated. |
| Sluggish release, actuator sounds like it is struggling. | Internal PCA O-ring leak, restricted air filter, or frozen moisture in air lines. | Rebuild or replace Pneumatic Clutch Actuator. Drain secondary air tanks and check air dryer. |
| Shifts are harsh, accompanied by a metallic 'clunk'. | Release bearing binding on the transmission input shaft sleeve. | Remove inspection cover. Check for lack of lubrication or scoring on the bearing sleeve. |
The Cost of Ignoring Clutch Drag
Fleet managers and owner-operators often attempt to 'live with' minor clutch drag by relying on the transmission's automated rev-matching to force gears into place. This is a costly mistake. Forcing an Eaton UltraShift or AutoShift to engage while the input shaft is still rotating transfers immense kinetic energy directly into the transmission's main box synchronizers and the auxiliary range selector.
Replacing a heavy-duty twin-plate clutch kit (such as the Eaton Solo 15.5-inch) typically costs between $1,800 and $2,500 in parts alone, with labor requiring a 6-to-8 hour transmission drop. However, if clutch drag destroys the input shaft splines or the main box synchronizers, you are looking at a complete transmission overhaul or replacement, which can easily exceed $12,000 to $18,000 in parts and downtime.
Final Torque Specifications and Reassembly
If your diagnosis requires dropping the transmission to replace the clutch brake, release bearing, or the entire clutch assembly, strict adherence to torque specifications is mandatory to prevent bellhousing distortion, which causes its own release geometry issues.
- SAE #1 Bellhousing to Engine Block Bolts: 120 - 150 lb-ft (lubricated threads).
- Clutch Actuator Mounting Bolts: 35 - 45 lb-ft.
- Clutch Cover to Flywheel Bolts: Tighten in a star pattern to 100 lb-ft (verify specific Eaton manual for your exact pressure plate model, as some Easy-Pedal models require 125 lb-ft).
- Driveshaft U-Bolts: 135 - 155 lb-ft.
By systematically verifying air pressure, measuring mechanical stroke, inspecting the clutch brake, and performing a TCM calibration, you can eliminate Eaton Auto Shift clutch drag and restore the smooth, automated performance your fleet relies on. For further technical bulletins and updated calibration files, always consult the official Eaton Truck and Bus Resource Center.