The Brutal Reality of Drag Racing Drivetrains
When enthusiasts browse forums debating a stage 1 vs stage 2 clutch setup for their daily drivers or weekend autocross builds, they are generally focused on street manners, pedal effort, and organic versus ceramic friction materials. However, when you transition to dedicated drag racing, those street-oriented paradigms completely collapse. Drag racing is an environment defined by extreme transbrake shock, violent RPM drops, and instantaneous torque transfer that would instantly shatter the marcel springs and fracture the friction pucks of a standard street performance clutch.
As we navigate the 2026 racing season, the proliferation of small-turbo and big-turbo combinations pushing 1,500+ horsepower through manual shifters in classes like Super Street and Limited Drag Radial demands a meticulous, data-driven approach to preventive maintenance. A catastrophic clutch failure on the starting line doesn't just cost you a round; it can destroy a $15,000 bellhousing, scatter shrapnel through the firewall, and end your season. This guide outlines the definitive preventive maintenance protocol for dedicated drag racing clutches, moving far beyond street-stage limitations into the realm of sintered iron and multi-disc drag configurations.
Why Street Stages Fail Under Transbrake Shock
To understand drag clutch maintenance, you must first understand the physics of the launch. When a driver releases a transbrake button at 5,500 RPM, the engine's rotational mass and the sudden grip of the slick or radial tire create a massive torsional shockwave.
- Stage 1 (Heavy Duty Organic/Kevlar): Designed for grip and daily drivability. Under transbrake shock, the organic material will instantly glaze, and the Kevlar will delaminate from the puck backing plate.
- Stage 2 (Ceramic Puck/Sprung Hub): Offers higher torque capacity (up to 800 lb-ft) but relies on a sprung hub to dampen engagement. The violent shock of a drag launch will bottom out and shatter the marcel springs and dampening springs within the first three passes.
- Dedicated Drag Clutches (Sintered Iron / Solid Hub): Utilize unsprung, solid-hub discs with sintered iron or specialized ceramic materials that thrive on high slip and extreme heat, requiring aggressive maintenance intervals.
Material Science: Friction Surfaces and Wear Rates
Choosing the right friction material dictates your maintenance schedule. According to engineering data from RAM Clutches and Tilton Engineering, sintered iron remains the gold standard for high-horsepower manual drag cars due to its ability to absorb immense thermal energy without fading.
| Friction Material | Max Torque Capacity | Heat Threshold | Drag Strip Viability | Maintenance Interval |
|---|---|---|---|---|
| Organic / Kevlar | 450 - 600 lb-ft | 400°F - 500°F | Poor (Fails on transbrake) | 15,000 Street Miles |
| Ceramic Puck (Sprung) | 700 - 900 lb-ft | 800°F | Fair (Bracket racing, foot-brake) | 50 - 100 Passes |
| Sintered Iron (Solid) | 1,200 - 1,800+ lb-ft | 1,200°F+ | Excellent (Pro Mod, Radial, Transbrake) | 10 - 20 Passes / Teardown |
| Carbon/Carbon Multi | 2,000+ lb-ft | 2,500°F+ | Elite (Top Sportsman, Mountain Motor) | 5 - 8 Passes / Rebuild |
The Preventive Maintenance Protocol
Maintaining a drag racing clutch is not a 'set it and forget it' endeavor. It requires a rigid, documented schedule based on pass counts and thermal cycling.
1. Pre-Race Pit Inspection (Every Race Day)
Before the first time trial, your focus must be on the hydraulic actuation system and external linkages. Heat soak from the exhaust and transmission tunnel degrades hydraulic fluid rapidly.
- Fluid Check: Inspect the master cylinder reservoir. Use a high-temp fluid like Motul RBF 660 (Dry Boiling Point 626°F / 330°C). If the fluid appears dark or cloudy, flush and bleed immediately.
- TOB Clearance: Verify the Throw-Out Bearing (TOB) gap. For most drag applications utilizing a standard bearing carrier, you need exactly 0.100' to 0.150' of free-play between the TOB face and the pressure plate fingers. Too tight, and you will slip the clutch under high RPM; too loose, and you risk over-traveling and bending the diaphragm fingers.
- Linkage & Pedal Stop: Ensure the pedal stop is correctly set to prevent the TOB from bottoming out against the pressure plate housing during the violent 1-2 and 2-3 shifts.
2. Post-Race Cool Down & Inspection
After the final round, the clutch assembly is at its most vulnerable state. Sintered iron discs retain massive amounts of heat.
- Thermal Imaging: Use an infrared thermometer to check the bellhousing temperature. If the external bellhousing exceeds 250°F, the internal sintered discs likely exceeded 1,000°F. This indicates excessive slip during the launch, requiring base pressure adjustments on the pressure plate.
- Hydraulic Bleed: Micro-boiling occurs in the slave cylinder during hard passes. Bleeding the system while the components are still warm (but not scorching) ensures any vaporized fluid is purged before it condenses and causes a spongy pedal for the next event.
3. The 20-Pass Teardown (Off-Season or Mid-Season Refresh)
For a 1,200 HP turbo car running a twin-disc sintered iron setup (such as the McLeod Racing RXT or RAM 900 Series), a complete teardown every 15 to 20 passes is mandatory.
- Drop the Transmission: Inspect the input shaft splines for galling. Sintered iron dust is highly abrasive and will mix with residual moisture to form a grinding paste on the splines. Clean with brake cleaner and apply a thin coat of high-moly assembly lube (never standard grease, which attracts dust).
- Measure Disc Thickness: Use a micrometer to measure the sintered discs. A new sintered disc typically measures around 0.115'. If wear exceeds 0.015' to 0.020' across the friction surface, the pack height is compromised, and the pressure plate can no longer apply adequate clamp load.
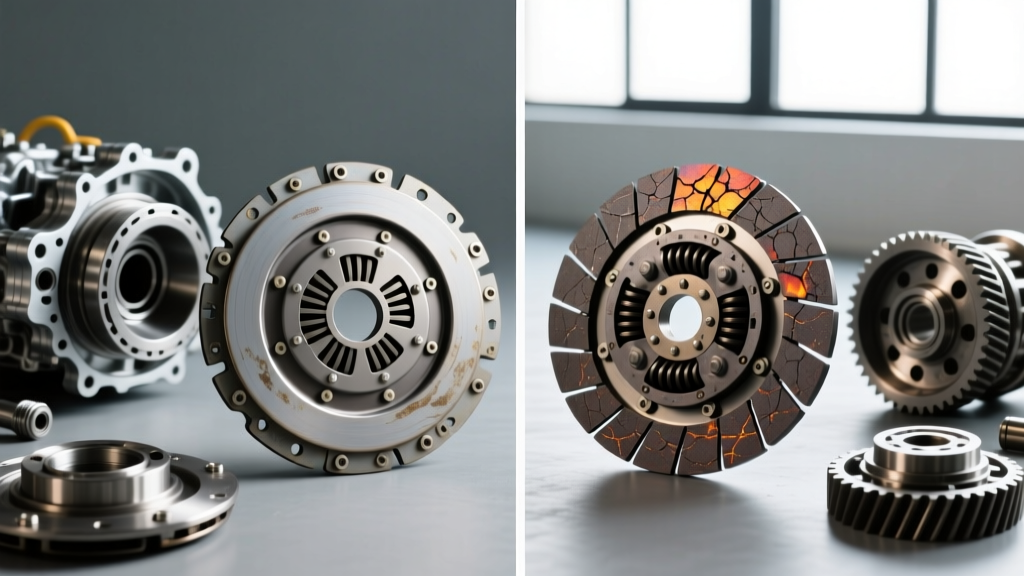
- Inspect the Flywheel and Floater Plates: Look for heat checking (micro-cracks) and bluing. Minor bluing can be resurfaced on a Blanchard grinder, but deep heat checks require replacement. Never turn a sintered iron flywheel on a standard lathe; it must be Blanchard ground to ensure absolute flatness.
Precision Setup: Clearances and Torque Specifications
Preventive maintenance starts with the initial installation. A drag clutch will self-destruct in three passes if the bellhousing and fasteners are not spec'd to aerospace tolerances.
Bellhousing Dial Indicating
You must dial-indicate the bellhousing to the crankshaft flange. The Total Indicator Runout (TIR) must be less than 0.005 inches. If the bellhousing is misaligned, the transmission input shaft will bind in the pilot bearing, causing the clutch to drag, resulting in missed shifts and shattered synchros in your G-Force or Liberty transmission.
Fastener Torque Specs
Vibrations from a solid-engine-mount drag car will back out standard hardware. Always use ARP fasteners and follow their specific lubrication protocols.
- Flywheel to Crank (e.g., GM LS with ARP 200-2803): 74 lb-ft using ARP Ultra-Torque lube. Apply a drop of Loctite 271 to the threads if the crank is not blind-tapped.
- Pressure Plate to Flywheel: 25 to 30 lb-ft in a strict star pattern. Do not use impact guns; hand-torque only to ensure even diaphragm loading.
- Bellhousing to Block: 35-50 lb-ft depending on bolt size, always using grade 8 or ARP hardware with hardened washers.
Expert Insight: 'Many racers blame the clutch manufacturer for premature slip, but 90% of the time, the failure traces back to improper bellhousing alignment or a hydraulic system that hasn't been bled with a pressure bleeder. Sintered iron is unforgiving; it demands precision.' — Drivetrain Engineer, AutoGearNexus
Hydraulic System Degradation and Upgrades
The hydraulic system is the weakest link in a drag car's clutch actuation. Standard rubber flex hoses expand under the sudden hydraulic pressure spike of a fast shift, absorbing pedal travel and causing incomplete clutch disengagement.
The Fix: Upgrade to a -3 AN stainless steel braided hard-line or Teflon-lined hose from the master cylinder to the slave. Furthermore, replace the factory plastic pushrods with adjustable, billet aluminum pushrods to eliminate slop. Check the master cylinder bore size; a 7/8' bore provides a firmer pedal and faster fluid displacement than a 1' bore, which is critical for the split-second shifts required in door-slammer drag racing.
Conclusion: Respect the Physics
The debate of stage 1 vs stage 2 clutch setups belongs on the street. On the drag strip, you are managing controlled explosions and extreme metallurgical stress. By adhering to strict pass-count teardowns, verifying TOB clearances before every round, and maintaining aerospace-level tolerances in your bellhousing alignment, you ensure that your drivetrain transfers every ounce of torque to the track. Treat your drag clutch as a consumable, high-precision race part, and it will carry you to the winner's circle pass after pass.