Why the Clutch Masters FX350 Demands a Hydraulic Line Upgrade
Upgrading to a Clutch Masters FX350 is a rite of passage for Nissan Z-car (350Z/370Z) and Infiniti G-coupe owners seeking a reliable, high-torque street-and-track clutch solution. The FX350 utilizes a heavy-duty, high-clamp-load pressure plate designed to handle upwards of 450 wheel horsepower. However, installing a high-performance clutch disc and pressure plate without addressing the hydraulic actuation system is a recipe for incomplete disengagement, synchro wear, and premature clutch failure.
The factory Nissan hydraulic clutch line is constructed from reinforced rubber. Under the stock clutch's clamp load (approximately 2,100 lbs), this rubber line performs adequately. The FX350, however, increases clamp load by roughly 35% to 45%. This massive spike in required pedal effort translates directly to a spike in hydraulic line pressure. Under these extreme pressures, the OEM rubber line experiences volumetric expansion (ballooning). Instead of the hydraulic fluid pushing the slave cylinder piston to fully disengage the FX350, the fluid expands the rubber hose. The result is a spongy pedal, reduced slave stroke, and the dreaded 'grind' when shifting into first or reverse.
OEM vs. Stainless Steel Braided Lines: The Data
To achieve a 1:1 pedal ratio and ensure the slave cylinder receives full hydraulic volume, replacing the soft line with a stainless steel braided alternative is mandatory. Below is a comparative analysis of line types under high-load conditions typical of an FX350 installation.
| Line Type | Volumetric Expansion (Under 1,200 PSI) | Pedal Feel | Lifespan / Heat Resistance |
|---|---|---|---|
| OEM Nissan Rubber (30741-CD000) | High (Balloons under FX350 load) | Spongy, inconsistent | 5-7 Years / Degrades near exhaust |
| Standard Aftermarket Rubber | Moderate to High | Soft, slight delay | 3-5 Years |
| Stainless Steel Braided (e.g., CZP / Techna-Fit) | Negligible (Near Zero Expansion) | Crisp, linear, immediate | Lifetime / Highly heat resistant |
The CPDV Factor: Deleting the Clutch Pedal Delay Valve
When performing a clutch hydraulic line replacement on a Z33 (350Z) or Z34 (370Z) platform, you must address the factory Clutch Pedal Delay Valve (CPDV). Nissan installed this restrictive valve inside the soft hydraulic line to slow down clutch engagement, preventing drivetrain shock for inexperienced drivers. While fine for a stock EXEDY clutch, the CPDV restricts fluid return and flow rates. When paired with the aggressive engagement window of the Clutch Masters FX350, the CPDV causes erratic pedal behavior and prevents rapid hydraulic return, leading to grinding during fast shifts. Replacing the factory line with a dedicated, CPDV-deleted stainless steel line from vendors like Concept Z Performance is a critical best practice.
Required Tools and Materials
Before beginning the hydraulic line replacement, ensure you have the following specialized tools and materials. Using improper tools will result in stripped flare nuts and a tow-trip to the dealership.
- 10mm Flare Nut Wrench (Line Wrench): A 6-point or crowfoot flare wrench is mandatory to prevent rounding the soft brass/nickel flare nuts on the hard line.
- 12mm & 14mm Open-End Wrenches: For the banjo bolt at the master cylinder.
- M10 Copper Crush Washers: You will need two new washers for the master cylinder banjo fitting (Nissan OEM 11026-01M02 or equivalent).
- High-Performance DOT 4 Fluid: Motul RBF 600 (Dry boiling point 626°F / 330°C) or Castrol SRF. Do not use standard DOT 3.
- Pressure Bleeder or Reverse Bleeder: A Motive Products Power Bleeder is highly recommended over the traditional 'pump-and-hold' method.
Step-by-Step Hydraulic Line Replacement
1. Master Cylinder Disconnection
Locate the clutch master cylinder against the firewall in the engine bay. Place a catch pan and shop towels beneath it, as DOT 4 fluid will rapidly strip paint and damage wiring harnesses. Remove the 12mm banjo bolt securing the soft line to the master cylinder. Immediately cap the master cylinder port with a clean rubber plug or tape to prevent debris ingress and minimize fluid loss. Discard the old copper crush washers.
2. Hard Line to Soft Line Separation
Trace the hard metal line down toward the transmission bellhousing. Locate the junction where the hard line meets the rubber soft line. Using your 10mm flare nut wrench on the soft line fitting and a standard 10mm wrench to hold the hard line nut stationary, carefully break the fitting loose. Expert Tip: Spray the fitting with penetrating oil (like PB Blaster) 24 hours prior to the install to prevent snapping the hard line.
3. Routing the New Stainless Steel Line
Remove the factory rubber line and CPDV assembly. When routing your new stainless steel braided line, ensure it follows the exact path of the OEM hard line to avoid interference with the steering shaft, exhaust headers, or subframe. Use adhesive-backed rubber isolator clips to secure the braided line away from the exhaust manifold; while the Teflon inner core is heat resistant, prolonged exposure to 800°F+ exhaust gases will eventually degrade the outer stainless braid.
4. Reconnection and Torque Specifications
Connect the new line to the hard metal line using the factory flare nut. Thread it by hand to prevent cross-threading. Once hand-tight, torque the flare nut to 11 ft-lbs (15 Nm). At the master cylinder, install a fresh M10 copper crush washer on both sides of the banjo fitting. Insert the banjo bolt and torque to 15 ft-lbs (20 Nm). Over-torquing the banjo bolt can crack the aluminum housing of the master cylinder.
Advanced Bleeding Protocols for High-Clamp Loads
The Clutch Masters FX350 requires absolute precision in the hydraulic system; even a 2% air volume in the line will result in a spongy pedal and incomplete disengagement. The Z-car hydraulic system is notorious for trapping air in the master cylinder loop and the slave cylinder bypass port.
- Fill the Reservoir: Fill the clutch master reservoir with fresh Motul RBF 600. Do not let the reservoir run dry during the bleeding process, or you will introduce air into the ABS module (if the brake/clutch reservoir is shared on your specific chassis variant, though Z-cars typically have separate reservoirs or isolated chambers).
- Pressure Bleed: Attach your pressure bleeder to the reservoir and pressurize to 12-15 PSI. Do not exceed 20 PSI, as high pressure can blow out the internal seals of the OEM slave cylinder.
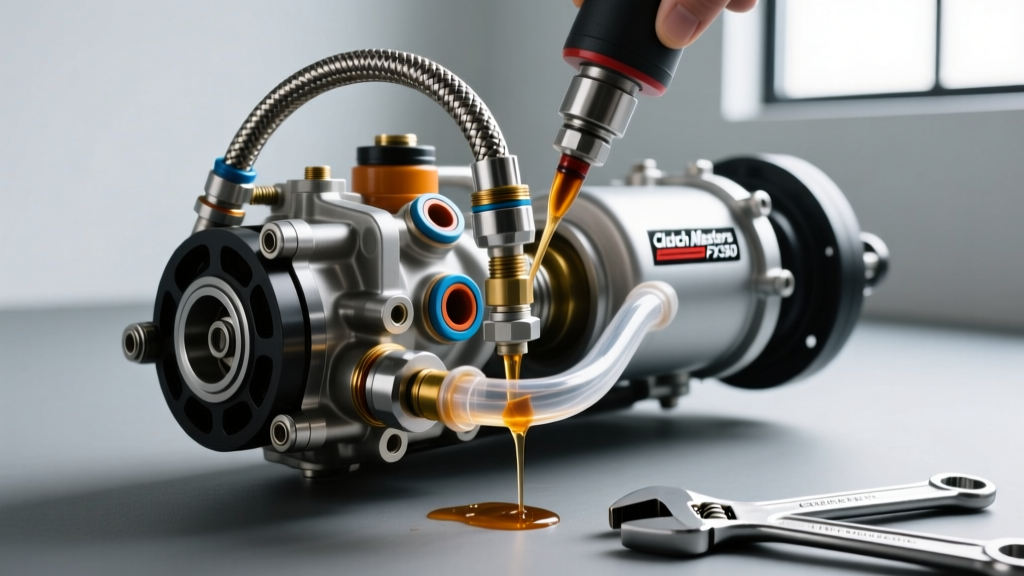
- Slave Cylinder Bleeder: Locate the bleeder valve on the slave cylinder. Attach a clear vinyl tube leading to a catch bottle. Open the valve exactly one-half turn. Allow fluid to flow until it is completely free of micro-bubbles.
- The 'Pedal Hold' Technique: Close the bleeder valve. Have an assistant press the clutch pedal to the floor and hold it. Crack the bleeder valve open for one second, then close it before the pedal is released. Repeat this 5 times to force out any air trapped behind the slave cylinder piston.
- Torque Bleeder Valve: The bleeder valve on Nissan slave cylinders is incredibly fragile. Torque it to just 7 ft-lbs (9.5 Nm) to prevent snapping the valve head off.
Troubleshooting Post-Install Issues
If you have completed the hydraulic line replacement and bled the system, but the vehicle still grinds into reverse or first gear, do not immediately blame the FX350. Diagnose the hydraulic system first:
- Master Cylinder Pushrod Play: Check the clevis pin connecting the clutch pedal to the master cylinder pushrod. If there is excessive free-play, the master cylinder is not achieving full stroke. Adjust the pushrod length to achieve 0.5mm to 1.0mm of free-play at the pedal.
- Slave Cylinder Bypass Port Blockage: If the slave cylinder piston does not fully retract, it can keep the clutch partially disengaged, causing slipping under the FX350's heavy load. Ensure the hard line and soft line are not kinked, restricting fluid return to the reservoir.
- Pivot Ball Wear: The CD009 and FS6R31A transmissions rely on a pivot ball for the release fork. If the OEM plastic pivot ball is worn, the slave cylinder stroke is wasted on taking up slack rather than pushing the FX350's diaphragm fingers. Inspect and replace with a bronze aftermarket pivot ball during the clutch installation.
By pairing your Clutch Masters FX350 with a high-quality stainless steel hydraulic line, deleting the restrictive CPDV, and utilizing meticulous bleeding procedures, you will achieve a crisp, predictable pedal feel that perfectly matches the aggressive torque capacity of your new drivetrain setup.