Why a Differential Parts Diagram is Your Ultimate Upgrade Blueprint
When pushing a heavy-duty truck or SUV beyond factory limits—whether you are towing a 12,000-pound fifth-wheel through the Rockies or crawling over jagged terrain in a built rig—the differential is the critical bottleneck between your drivetrain and the dirt. Many enthusiasts mistakenly treat axle upgrades as a simple swap of gears and lockers. However, true performance and reliability require a methodical approach. Utilizing a comprehensive differential parts diagram is not just a suggestion for factory technicians; it is an absolute necessity for aftermarket builders and DIY mechanics aiming for zero-failure operation.
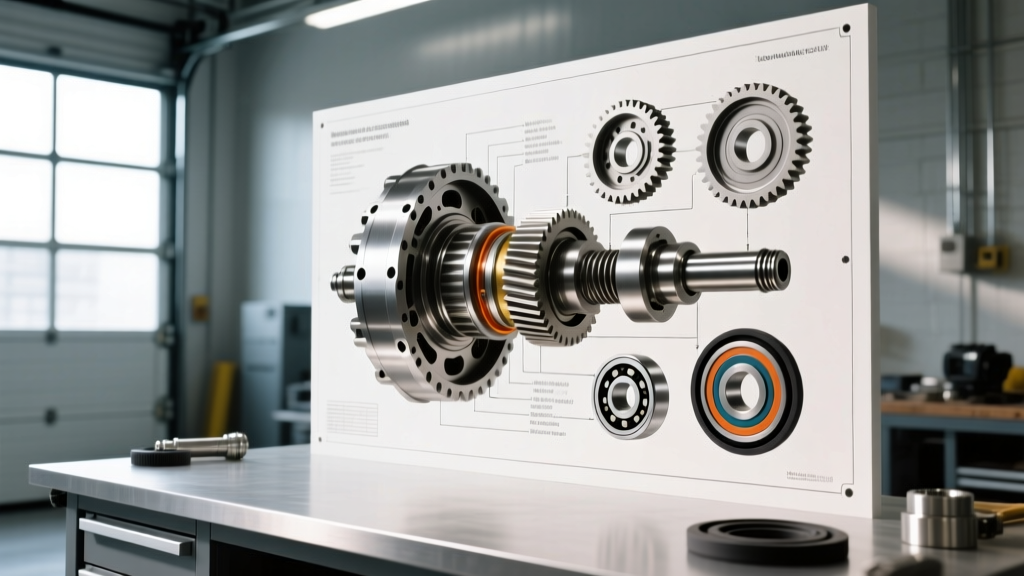
A schematic provides the exact spatial relationship between the pinion gear, ring gear, carrier, bearings, and shims. Without referencing a precise differential parts diagram, you risk improper shim stacking, incorrect bearing preload, and catastrophic gear whine or tooth shearing under load. In this performance and upgrade guide, we will decode the internal anatomy of heavy-duty axles like the Dana 60, GM 11.5-inch AAM, and Ford 10.5-inch, translating two-dimensional schematics into real-world torque specs, fluid dynamics, and upgrade paths.
Decoding the Schematic: Core Components and Upgrade Points
Before ordering parts from suppliers like Yukon Gear & Axle, you must understand what you are looking at on the schematic. Here is how to read the critical zones of a differential parts diagram for performance applications:
1. The Pinion Assembly and Crush Sleeve Elimination
On your diagram, the pinion assembly is supported by an inner and outer bearing. Factory setups utilize a crush sleeve between these bearings to establish preload. While cheap to manufacture, crush sleeves are a known failure point under high-torque, low-speed crawling or heavy towing. When the sleeve over-crushes or fatigues, pinion bearing preload is lost, leading to harmonic vibrations and destroyed pinion seals.
The Upgrade: Use your diagram to identify the crush sleeve and replace it with a solid spacer kit (such as the Ratech 4101 for Dana 60s). This requires using shims to dial in the exact rotational torque, but it creates a virtually indestructible pinion support structure.
2. Carrier Bearings and Shim Placement
The differential parts diagram will show carrier bearings pressed onto the differential case. The shims located behind these bearings dictate both your gear backlash and your pattern depth. In high-horsepower applications, upgrading to high-timken-grade carrier bearings and utilizing a carrier bearing spreader tool is mandatory to avoid damaging the housing during installation.
3. Full-Floating vs. Semi-Floating Axle Shafts
Study the outer edges of the diagram. A semi-floating axle (common on half-ton SUVs) uses C-clips inside the differential carrier to retain the axle shafts. If a shaft snaps, the wheel can detach. A full-floating diagram (like the Dana 60 or GM 11.5) shows the axle shaft bolting directly to a drive flange on the hub assembly, completely independent of the bearing and housing. Upgrading a semi-float SUV to a full-float kit is a premier safety and performance modification for off-roaders.
Fluid Dynamics: Matching Gear Oil to Your Upgraded Setup
Maintenance is just as critical as the hardware. Once you have assembled your differential using the schematic as your guide, the fluid you choose dictates the lifespan of your investment. The extreme pressures generated by 4.56 or 5.13 gear ratios require specialized lubrication.
- Standard Towing & Highway (75W-90): For daily driven trucks with 3.73 or 4.10 gears, a full synthetic 75W-90 like AMSOIL Severe Gear provides excellent film strength and cold-weather flow.
- Extreme Towing & Crawling (75W-140): If you are running 4.88+ gears and pulling heavy loads up steep grades, the increased viscosity of 75W-140 prevents the fluid from thinning out and shearing between the ring and pinion teeth under extreme heat.
- Friction Modifiers: If your diagram indicates a clutch-type Limited Slip Differential (LSD) like the Ford Trac-Lok or Eaton Posi, you must add the manufacturer-specified friction modifier (typically 4 oz) to prevent chatter during low-speed cornering. Note that locking differentials like the ARB Air Locker or Detroit Locker do not require friction modifiers.
Performance Upgrade Matrix: Towing vs. Off-Roading
Different applications demand entirely different internal configurations. Use the table below to cross-reference your build goals with the correct components found on your differential parts diagram.
| Application | Locker / Carrier Type | Ideal Gear Ratio (35" Tires) | Fluid Viscosity | Est. Parts Cost |
|---|---|---|---|---|
| Heavy Highway Towing | Helical LSD (Truetrac) | 4.10 - 4.30 | 75W-140 Synthetic | $800 - $1,200 |
| Hardcore Rock Crawling | Selectable (ARB Air Locker) | 4.88 - 5.38 | 75W-90 Synthetic | $1,500 - $2,200 |
| Overland / Mixed Use | Automatic (Detroit Locker) | 4.56 | 75W-90 Synthetic | $900 - $1,400 |
| High-HP Drag / Street | Spool or Mini-Spool | 3.73 - 4.10 | 80W-90 Conventional | $400 - $700 |
Precision Assembly: Torque Specs and Clearances
A differential parts diagram tells you where the parts go, but your service manual dictates how they are secured. When rebuilding a Dana 60 front axle, for example, guessing on torque specifications will result in immediate failure. Below are the benchmark specifications for a standard Dana 60 setup:
Ring Gear and Carrier Assembly
The ring gear bolts must be torqued to 110-120 lb-ft. Crucially, you must apply a high-strength threadlocker like Loctite 272 (Red) to the threads. Never use lock washers on ring gear bolts, as they can compress and cause the bolts to back out under load. The gear backlash should be set between 0.006" and 0.008" using a dial indicator mounted to the housing. If your backlash is too tight, the gears will bind and overheat; too loose, and the ring gear will slap the pinion, chipping teeth.
Pinion Bearing Preload
This is where the differential parts diagram and a high-quality inch-pound torque wrench become your best friends. For a Dana 60 with new Timken bearings, the target rotational preload is typically 20 to 30 inch-pounds. If you are reusing the factory crush sleeve, you must tighten the pinion nut incrementally (often requiring upwards of 250 lb-ft of leverage) while constantly checking the rotational drag. This is exactly why upgrading to a solid shimmed spacer is the preferred route for performance builds—it eliminates the guesswork and the risk of over-crushing.
Common Diagram Misinterpretations and How to Avoid Them
Even seasoned mechanics make mistakes when interpreting complex axle schematics. One frequent error involves the axle shaft seals. On a differential parts diagram for a full-floating axle, the wheel seal is located outboard at the hub, while the inner axle seal sits at the differential end of the axle tube. If you are upgrading to chromoly axle shafts for increased spline strength, ensure you order the correct seal kit. Installing an inner seal on a full-float without seating it perfectly square will result in immediate gear oil contamination of the wheel bearings.
Another common oversight is the thrust block. Many open differential diagrams show a small cross-pin and thrust blocks inside the carrier. When upgrading to a locker, these internal spider gears and thrust blocks are removed entirely. Failing to remove the thrust blocks when installing a lunchbox locker (like a LockRight or Spartan) will prevent the locker couplers from engaging, rendering the upgrade useless.
Conclusion: Respect the Schematic, Reap the Performance
Upgrading the differential in your truck or SUV is one of the most transformative modifications you can make, unlocking larger tires, better towing manners, and trail-conquering traction. However, the difference between a bulletproof axle and a trail-side catastrophe lies in the details. By treating your differential parts diagram as the ultimate blueprint, verifying every shim, adhering strictly to torque specs, and selecting the correct synthetic gear oil, you ensure that your drivetrain will perform flawlessly whether you are scaling a boulder field or pulling a camper up an 8% grade.