The Great Powersports Clutch Confusion: Drivetrain vs. HVAC
When most beginners hear the word "clutch" in the context of motorcycles and ATVs, their minds immediately jump to the drivetrain. They picture the primary and secondary sheaves of a CVT system on a Polaris RZR, or the wet multi-plate friction packs inside a Honda dirt bike's crankcase. However, the modern evolution of powersports has introduced a completely different component to the garage: the AC clutch assembly.
As enclosed UTVs, side-by-sides, and cab-forward utility ATVs (like the Polaris Ranger XP 1000 or Can-Am Defender) have become the industry standard, automotive-style HVAC systems are now commonplace. This means your machine has an air conditioning compressor driven by the engine's serpentine belt, utilizing an electromagnetic AC clutch assembly to engage and disengage the A/C system. Diagnosing clutch problems specific to these modern ATVs and UTVs requires a totally different mindset—and a different set of tools—than rebuilding a CVT.
| Feature | Drivetrain Clutch (CVT / Wet Multi-Plate) | HVAC AC Clutch Assembly |
|---|---|---|
| Primary Function | Transfer engine torque to the wheels | Engage A/C compressor via serpentine belt |
| Activation Method | Centrifugal force (rollers/weights) or hydraulic pressure | 12V Electromagnetic coil |
| Common Failure Symptom | Slipping, loss of top speed, belt dust | Warm cabin air, clicking noises, blown fuses |
| Diagnostic Tool | Clutch puller, spring compressor, calipers | Multimeter, feeler gauges, manifold gauges |
Anatomy of a UTV AC Clutch Assembly
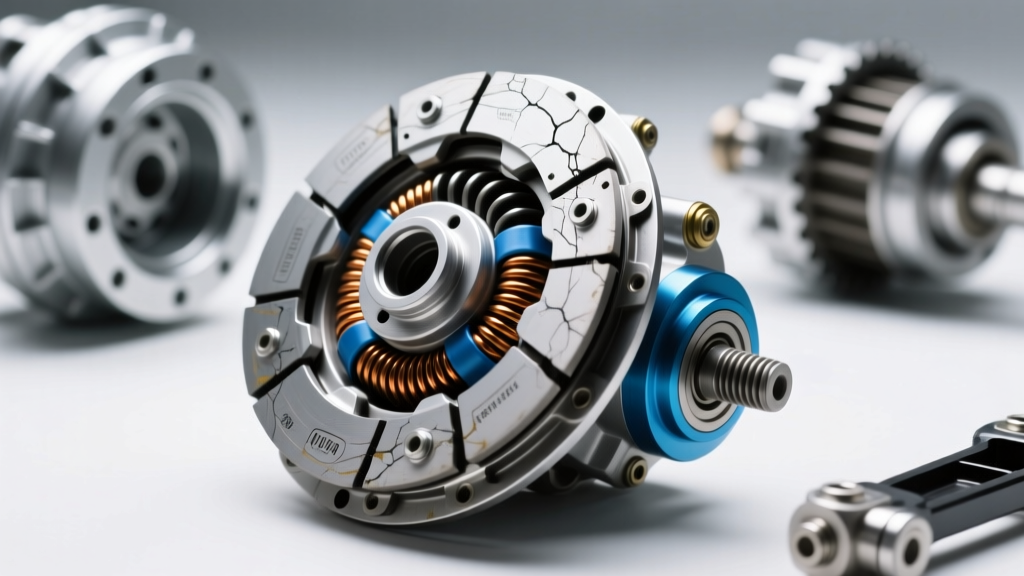
Before you start throwing expensive parts at your UTV, you need to understand what you are looking at. Most powersports HVAC systems utilize compressors manufactured by Sanden (such as the SD7H13 or PXE16 models). The AC clutch assembly mounted to the nose of the compressor consists of three main components:
- The Electromagnetic Coil: A stationary copper winding hidden behind the pulley. When 12V is applied, it generates a magnetic field.
- The Pulley and Bearing: Driven by the serpentine belt, this component spins freely on a sealed ball bearing whenever the engine is running, regardless of whether the A/C is turned on.
- The Friction Plate (Hub): Connected directly to the compressor's internal shaft. When the coil is energized, the magnetic field pulls this steel plate against the spinning pulley, locking them together and turning the compressor.
The critical measurement here is the air gap—the microscopic distance between the friction plate and the pulley face when the clutch is disengaged. According to Sanden Compressor Technical Guides, if this gap is too wide, the magnet cannot bridge the distance, resulting in a slipping clutch. If it is too tight, the clutch will drag and burn out the pulley bearing.
3 Telltale Symptoms of a Failing AC Clutch
1. The "Click-Clack" of Death (Rapid Cycling)
If you are sitting in your UTV at idle and hear a rapid, rhythmic clicking from the engine bay accompanied by warm air from the vents, your AC clutch assembly is likely slipping. As the friction surfaces wear down over thousands of engagement cycles, the air gap widens. The electromagnet struggles to pull the plate across the gap, causing it to snap against the pulley, slip, drop away, and repeat. This rapid cycling will eventually melt the coil's internal wiring.
2. Warm Air at Idle, Cold Air on the Trail
This is a classic voltage and air gap issue. When you are riding at 40 MPH, the UTV's stator and alternator are pushing maximum voltage (often 14.2V or higher). This extra voltage creates a stronger magnetic field, just enough to pull the worn friction plate across the widened air gap. However, when you stop at a trailhead and drop to an idle (where system voltage might dip to 12.8V), the magnetic field weakens, the clutch slips, and the cabin instantly gets warm.
3. The AC Fuse Keeps Blowing
If you replace the 10A or 15A HVAC fuse in your UTV's fuse box only to have it pop the second you turn on the A/C, your electromagnetic coil has likely shorted to ground. This is often caused by heat soak. UTV engines run incredibly hot, and the compressor is usually mounted low in the chassis near the radiator and exhaust headers. Over time, the intense thermal cycling melts the thin insulating varnish on the copper windings inside the coil, creating a dead short.
The Beginner's Diagnostic Workflow
Do not just order a new compressor right away. Follow this step-by-step diagnostic sequence to isolate the exact failure point of your AC clutch assembly. You will need a basic digital multimeter and a set of metric feeler gauges.
Step 1: The Relay Swap Trick
Locate your UTV's main fuse and relay block (often under the hood or behind the passenger seat). Find the A/C compressor relay. A classic beginner-friendly trick is to swap it with an identical, non-critical relay in the box, such as the horn or high-beam relay. If the A/C clutch suddenly engages after the swap, your clutch is fine—you just have a $15 bad relay.
Step 2: Verify Voltage at the Pigtail
Unplug the single-wire connector leading to the AC clutch coil. Set your multimeter to DC Volts. With the engine running and the A/C turned to MAX, probe the harness side of the connector. You should see a minimum of 12.0V. If you see 0V, your problem is upstream (a bad pressure switch, a blown fuse, or a broken wire). If you see 12.4V or higher, the wiring is good, and the fault lies in the clutch assembly itself.
Step 3: Measure Coil Resistance (Ohms)
Turn off the engine. Set your multimeter to Ohms (Ω). Place the probes on the terminals of the clutch coil itself (the component side, not the harness). A healthy 12V powersports AC clutch coil should read between 3.0 and 5.0 Ohms at room temperature (68°F / 20°C).
Diagnostic Key: If your meter reads "OL" (Open Line), the internal wire is broken. If it reads near 0.0 Ohms, the coil is shorted. Both scenarios require a coil replacement.
Step 4: Check the Air Gap Specification
This is where most beginners fail. Take a metric feeler gauge and slide it between the friction plate and the pulley face. The factory specification for almost all UTV and ATV AC clutch assemblies is 0.40mm to 0.60mm (0.016" to 0.024").
If your gap measures 0.80mm or larger, the clutch will slip. Fortunately, you don't always need to buy a new clutch. You can often remove the center retaining bolt, pull the friction plate off the shaft, and remove one of the thin metal shims located inside the hub to bring the gap back into spec.
Common Beginner Mistakes to Avoid
When working on clutch problems specific to motorcycles and ATVs, bad habits from the drivetrain side can ruin your HVAC system. Avoid these critical errors:
- Never Lubricate the Friction Surfaces: Unlike a motorcycle's wet clutch that bathes in oil, the AC clutch assembly relies entirely on dry friction. Spraying WD-40 or silicone spray on a squealing AC clutch will cause it to slip violently, generating enough heat to warp the steel plate and destroy the coil.
- Do Not Ignore the Thermal Limiter: Many modern UTV clutches feature a thermal fuse embedded in the wiring pigtail. If the clutch slips and gets too hot, this fuse blows to prevent a fire. If you have 12V leaving the relay but 0V reaching the coil, check the inline thermal limiter before condemning the coil.
- Watch Your Torque Specs: The center bolt holding the friction plate to the compressor shaft is usually an M8x1.25 threading into soft aluminum. The correct torque spec is typically 12 to 15 Nm (9 to 11 ft-lbs). Over-torquing will strip the compressor shaft, forcing you to replace the entire $500 compressor assembly.
OEM Part Numbers, Torque Specs, and Cost Breakdown
Referencing official service data from Polaris Off-Road Service Manuals and aftermarket HVAC suppliers, here is a quick-reference cheat sheet for modern UTV AC clutch repairs.
| Component | Typical OEM / Aftermarket Part | Specification / Torque | Est. Cost (2026) |
|---|---|---|---|
| Complete Clutch Assembly | Sanden SD7H13 Clutch Kit | Air Gap: 0.4mm - 0.6mm | $110 - $180 |
| Electromagnetic Coil Only | Polaris 2411467 (or equiv.) | Resistance: 3.0 - 5.0 Ω | $65 - $95 |
| Friction Plate & Hub | Generic 509-4030 Hub | Center Bolt: 12 - 15 Nm | $40 - $60 |
| Pulley Bearing | 35BD5220 (Double Row) | Press-fit, requires puller | $25 - $45 |
| Compressor Relay | Standard 12V 4-Pin 30A | Pin 85/86 (Coil), 30/87 (Load) | $10 - $15 |
Final Thoughts for the Powersports Wrench
Diagnosing an AC clutch assembly on a UTV or enclosed ATV is highly rewarding and entirely within the grasp of a beginner. By understanding the difference between your drivetrain CVT and your HVAC electromagnetic clutch, you can save yourself hundreds of dollars in misdiagnosed parts. Keep your feeler gauges clean, respect the torque specs on soft aluminum compressor shafts, and always verify your voltage before tearing into the dash. With a $15 multimeter and a basic understanding of magnetic fields, you will be blowing cold air on the trails in no time.