Phase 1: Cabin-Side Pedal Assembly & Mechanical Linkage
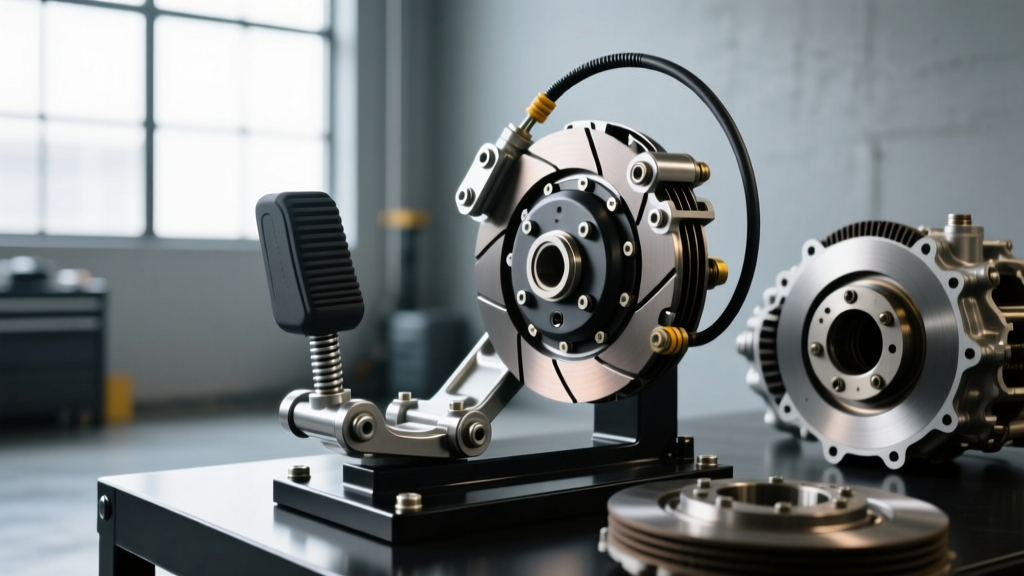
Before dropping a transmission or bleeding a hydraulic line, a proper clutch system inspection checklist must begin at the source of driver input: the pedal assembly. Misdiagnosing a worn clutch disc when the actual fault lies in a degraded pivot bushing is a costly error. As of 2026, many enthusiast vehicles and commercial manuals still utilize variations of the traditional hanging pedal design, which is prone to specific mechanical wear patterns.
Pedal Free-Play and Pushrod Geometry
For older cable-actuated or early hydraulic systems, measuring pedal free-play is critical. The industry standard specification typically dictates 0.59 to 0.98 inches (15-25mm) of free travel before the master cylinder pushrod engages. However, modern hydraulic self-adjusting systems—such as those paired with the Tremec T-56 Magnum or Honda K-series transmissions—require near-zero free play at the pushrod. The master cylinder piston must fully retract to uncover the compensation port, allowing fluid to return to the reservoir. If the pushrod is misadjusted and holds constant pressure on the piston, the clutch will slip under heavy thermal load due to fluid expansion.
Pivot Bushings and Clevis Pin Wear
- OEM Plastic/Delrin Bushings: Prone to ovaling out over 80,000 miles. This introduces lateral slop, causing the pushrod to bind inside the master cylinder bore, leading to premature internal seal failure.
- Upgraded Bronze/Spherical Bearings: Highly recommended for clutch pedal repair on track vehicles. They eliminate lateral deflection but require periodic PTFE-based lubrication.
- Clevis Pin Inspection: Check the master cylinder clevis pin for shear wear. A worn pin will create a "dead zone" at the top of the pedal stroke, often mistaken for a failing slave cylinder.
Phase 2: Hydraulic System Diagnostics (Master & Slave)
The hydraulic circuit acts as a force multiplier. A failure here mimics almost every symptom of a worn friction assembly. Proper diagnosis requires isolating the master cylinder, the hard/soft lines, and the slave cylinder.
Fluid Condition and Moisture Content
Clutch systems predominantly use DOT 3 or DOT 4 glycol-based brake fluid. Because glycol is highly hygroscopic, it absorbs ambient moisture. Use a digital brake fluid tester to check moisture content. If moisture exceeds 3%, the fluid's boiling point drops drastically. Under aggressive driving, the fluid can boil in the slave cylinder (which sits near the hot exhaust/bellhousing), creating vapor lock and a completely soft pedal. Flush the system with a high-dry-boiling-point fluid like ATE Type 200 DOT 4.
The Master Cylinder Internal Bypass Test
Internal seal failure in the master cylinder is notorious for mimicking a worn clutch. To test for internal bypassing:
- Start the engine and press the clutch pedal to the floor.
- Apply steady, moderate pressure (approximately 25 lbs of force) for 60 seconds.
- If the pedal slowly creeps toward the floor without any external fluid leaks, the internal primary cup seal is bypassing fluid back into the reservoir.
Pro-Tip: When performing a clutch pedal repair involving the master cylinder, always bench-bleed the new unit before installation. Gravity bleeding or standard pedal-pumping rarely removes the micro-bubbles trapped in the master cylinder's compensation port, leading to a spongy pedal for the first 500 miles.
Phase 3: Undercarriage Release Mechanism & Bellhousing
If the cabin and hydraulic components check out, the inspection moves to the bellhousing. This requires lifting the vehicle and, in some cases, removing the inspection cover or dropping the transmission.
External Slave Cylinder Stroke & Fork Pivot
For vehicles utilizing an external slave cylinder and release fork (common on GM F-Body T-56s and Ford Mustangs), verify the slave cylinder stroke. The piston should have approximately 0.500 inches of forward travel before contacting the fork. If the stroke is maxed out, the clutch friction material is severely worn, or the fork pivot ball has sheared off. Inspect the pivot ball for mushrooming; a worn pivot ball alters the fulcrum geometry, resulting in incomplete clutch disengagement even with full pedal travel.
Concentric Slave Cylinder (CSC) Inspection
Modern manual transmissions, including the ZF S5-42 and various GM LS/LT applications, utilize a Concentric Slave Cylinder (CSC) that wraps around the transmission input shaft. Because the CSC acts as both the hydraulic actuator and the release bearing, a failure requires complete transmission removal. Look for signs of weeping fluid at the bellhousing inspection plug. According to Schaeffler (LuK), replacing a CSC should always be done as part of a complete RepSet PRO kit, as reusing an old clutch cover with a new CSC alters the diaphragm spring preload.
Diagnostic Matrix: Symptom vs. Root Cause
Use this matrix to cross-reference driver complaints with mechanical faults during your inspection.
| Driver Symptom | Probable Root Cause | Verification Test / Inspection Point |
|---|---|---|
| Pedal sinks to floor when held down | Master cylinder internal bypass | 60-second static pressure test; check reservoir fluid level (will remain full). |
| Grinding entering 1st or Reverse | Slave cylinder stroke insufficient / Air in line | Measure external slave travel; check for hygroscopic fluid boil. |
| Clutch chatter on takeoff in 1st gear | Oil contamination or worn engine/trans mounts | Inspect bellhousing for rear main seal leaks; check mount durometer. |
| Pedal vibration at high RPM | Throwout bearing wear or warped pressure plate | Stethoscope test on bellhousing; inspect flywheel for hot spots/bluing. |
| Pedal return is slow or sticks halfway | Binding pushrod or degraded return spring | Disconnect master pushrod and cycle pedal by hand to isolate cabin friction. |
Phase 4: Reassembly Torque Specifications & 2026 Market Realities
When your inspection dictates a full teardown, adhering to precise torque specifications is non-negotiable. Over-torquing clutch cover bolts will warp the diaphragm spring, leading to premature release bearing failure and uneven clamping force.
Critical Fastener Torque Specs
- Bellhousing to Engine Block (GM LS/LT V8): M12 bolts torqued to 37 lb-ft (50 Nm). Ensure the two dowel pins are seated to prevent input shaft misalignment.
- Clutch Cover to Flywheel (Standard M8x1.25): 22 to 26 lb-ft (30-35 Nm), tightened in a crisscross star pattern to ensure even pressure plate loading.
- Flywheel to Crankshaft (Ford 5.0L Coyote): M11 bolts torqued to 59 lb-ft, followed by an additional 90-degree yield turn. These are TTY (Torque-to-Yield) and must never be reused.
Component Sourcing and Pricing
The 2026 aftermarket landscape offers diverse options for clutch pedal repair and full assembly replacements. OEM-equivalent kits from manufacturers like Exedy or Sachs typically range from $250 to $450 for standard passenger vehicles. For high-torque applications, aftermarket billet aluminum master cylinders and braided PTFE hard-lines have become the standard, eliminating the flex inherent in OEM plastic lines and rubber hoses. Expect to invest between $120 and $200 for a premium braided hydraulic line kit, which drastically improves pedal feel and modulation. For deeper technical installation guides on specific manual transmissions, resources provided by Tremec remain the gold standard for verifying clearances and spline alignments.
By following this systematic clutch system inspection checklist, you eliminate the guesswork from clutch pedal repair, ensuring that the root cause is addressed rather than just masking the symptom with a new friction disc.