The Illusion of Slip: Electronic vs. Mechanical Drivetrain Faults
As an automotive transmission specialist who spends most of my time dissecting ZF 8HP mechatronic units, rebuilding GM 6L80 torque converters, and diagnosing manual drivetrain faults, I frequently encounter cross-pollination in high-performance engineering. Modern performance motorcycles and manual-shift automobiles share identical electronic architectures when it comes to clutch position sensing. A prime example of this overlap is the Ducati clutch switch and its integration with ride-by-wire ECU mapping.
When a rider or driver complains of 'clutch slipping' under heavy acceleration, the immediate assumption is mechanical friction plate wear. However, as of 2026, with advanced traction control and quickshifter algorithms, a misadjusted or failing electronic clutch switch can trigger ECU intervention that perfectly mimics mechanical slip. The ECU may cut ignition, limit RPM, or alter fuel mapping if it receives conflicting data regarding clutch engagement. This preventive maintenance guide bridges the gap between motorcycle microswitch diagnostics and automotive clutch position sensor (CPS) troubleshooting, providing a definitive framework for isolating electronic faults from true mechanical degradation.
Diagnostic Matrix: Mechanical Slip vs. Electronic Switch Fault
Before tearing into the bell housing or clutch basket, you must determine if the slip is physical or digital. Use the following diagnostic matrix to categorize the symptoms.
| Symptom / Behavior | Mechanical Friction Slip | Electronic Switch / ECU Fault |
|---|---|---|
| RPM vs. Wheel Speed | RPM rises continuously without proportional speed increase under load. | RPM hits a hard ceiling or stutters; power feels 'cut' rather than slipping. |
| Lever / Pedal Feel | Lever may feel normal; bite point moves closer to the handlebar or firewall. | Lever feel is normal, but switch fails to register partial or full pull. |
| Throttle Response | Engine revs freely, similar to being in neutral, when clutch is fully engaged. | Throttle feels unresponsive or jerky; ECU ignores input to protect gearbox. |
| Diagnostic Tool Reading | No electrical codes; physical inspection reveals glazed or worn plates. | OBD2 or Moto-Diagnostic tool shows 'Clutch Switch Implausible' or correlation codes. |
Testing the Ducati Clutch Switch and Sensor Circuit
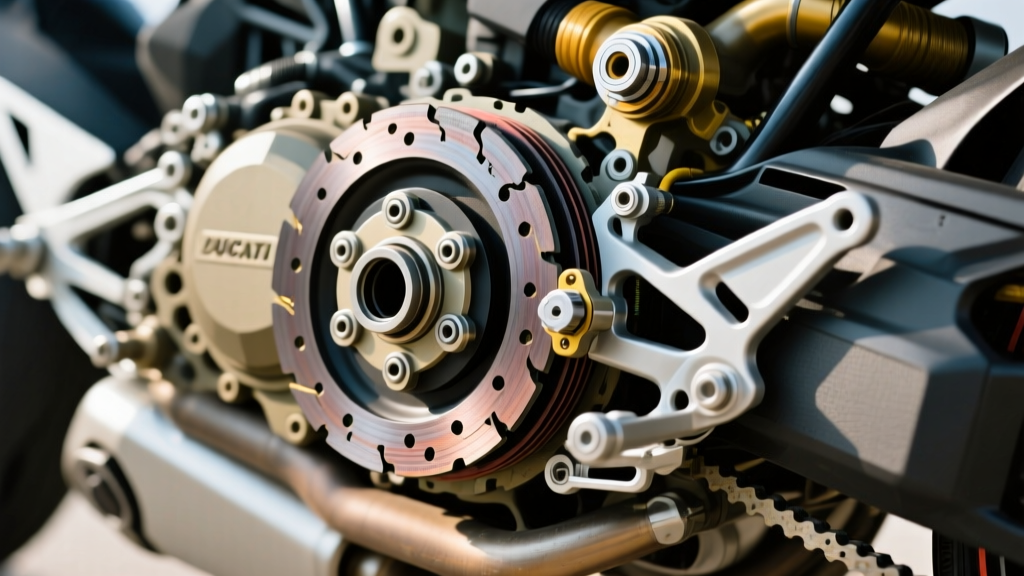
The Ducati clutch switch is typically a microswitch located at the clutch lever perch, designed to signal the ECU that the drivetrain is disconnected. This allows the ECU to enable neutral idle, permit starting, and manage quickshifter auto-blip functions. If the switch is misadjusted, resting your finger on the lever might trick the ECU into thinking the clutch is pulled, causing it to cut power under load—a sensation riders universally describe as 'slipping'.
Step 1: Continuity and Voltage Testing
Using a digital multimeter, verify the switch's electrical integrity. According to Fluke's guide on testing continuity, you should set your meter to the continuity or Ohms setting.
- Reference Voltage: Back-probe the switch connector with the ignition ON. You should read 5V or 12V (depending on the specific Ducati model year) on the supply wire.
- Continuity Check: With the lever released, the switch should be open (OL). Squeeze the lever; the switch should close (near 0 Ohms). If the transition is erratic or requires excessive lever travel, the internal contacts are pitted or the plunger is worn.
Step 2: Mechanical Adjustment and Free Play
The most common cause of false slip symptoms is improper free play. The clutch lever must have 2mm to 3mm of free play at the tip before it actuates the microswitch plunger or begins to push the hydraulic master cylinder piston. If the cable or hydraulic pushrod is too tight, the switch remains in a 'partially engaged' state, confusing the ECU's quickshifter logic and causing ignition cuts during aggressive acceleration.
True Mechanical Slipping: Friction Plates and Hydraulic Fade
If the electrical diagnostics confirm the switch and ECU are operating flawlessly, the diagnosis moves to physical drivetrain components. Whether you are inspecting a dry multi-plate Ducati clutch or a wet clutch system in an automotive manual transmission, the physics of friction degradation remain identical.
Measuring Friction and Steel Plates
Mechanical slip occurs when the clamping force of the springs is overpowered by engine torque, often due to worn friction material or warped steel plates.
- Friction Plate Thickness: Use a micrometer to measure the friction plates. A standard new plate measures approximately 3.0mm. The service limit is typically 2.4mm to 2.5mm. If the plates are glazed (shiny and hardened), they will slip even if thickness is within spec.
- Steel Plate Runout: Place the steel separator plates on a known flat surface plate. Use a feeler gauge to check for warping. Maximum allowable runout is 0.1mm. Warped plates prevent uniform clamping, leading to localized hot spots and slip.
- Clutch Spring Free Length: Measure the clutch springs. Heat and fatigue cause them to sag. If the free length drops below the manufacturer's service limit (often around 44mm from a 48mm nominal), clamping pressure is lost.
Hydraulic Master Cylinder and Fluid Degradation
Modern high-performance vehicles utilize hydraulic actuation. In motorcycles, this often involves a Brembo radial master cylinder. In automotive applications, it's a concentric slave cylinder (CSC) or external slave setup. DOT 4 brake fluid is highly hygroscopic. As it absorbs moisture over time, the fluid boils under heavy use, creating vapor pockets. Because vapor is compressible, the hydraulic pressure required to keep the clutch fully engaged drops, resulting in slip under high torque loads. Preventive maintenance dictates a complete hydraulic flush every 12 to 18 months.
Automotive Parallels: CPP Sensors and TCC Slip
The diagnostic methodology used for the Ducati clutch switch applies directly to automotive manual and automatic transmissions. Understanding these parallels elevates your diagnostic capability across all drivetrain types.
Manual Transmission: Clutch Pedal Position (CPP) Sensors
In vehicles like the Ford Mustang (MT82 transmission) or Porsche 911 GT3, the CPP sensor performs the same role as the Ducati microswitch. It tells the ECU when the clutch is depressed to enable cruise control cancellation and rev-matching. A failing CPP sensor with an intermittent signal will cause the ECU to abruptly disable rev-matching or cut throttle during shifts. Drivers often misinterpret this hesitation and RPM flare as 'clutch slip' or 'synchronizer wear,' leading to unnecessary $3,000 transmission teardowns when a $40 sensor was the culprit.
Automatic Transmission: Torque Converter Clutch (TCC) Slip
While manuals and motorcycles rely on physical friction plates, modern automatics like the GM 6L80 or ZF 8HP use a Torque Converter Clutch (TCC) and overlapping internal clutch packs. If a 6L80 throws a P0741 (TCC Stuck Off or Slipping) code, the symptom feels exactly like a manual clutch slipping at highway speeds. However, the root cause is rarely the friction material itself; it is usually a degraded mechatronic adapter sleeve, a failing PWM solenoid, or contaminated fluid causing a pressure drop in the TCC apply circuit. Proper diagnosis requires reading live solenoid pressure data via a bi-directional scan tool, not just checking fluid color.
Preventive Maintenance Schedule for Clutch Systems
To prevent both electronic ghost-faults and mechanical degradation, adhere to this rigorous maintenance framework:
- Every 5,000 Miles: Inspect clutch lever/pedal free play. Verify microswitch/CPP sensor activation point using a multimeter. Clean switch contacts with electrical contact cleaner.
- Every 12,000 Miles: Flush and bleed hydraulic clutch systems using fresh, sealed DOT 4 or DOT 5.1 fluid. Inspect slave cylinder pushrods for pitting.
- Every 20,000 Miles: Lubricate clutch cable assemblies (if applicable) with PTFE-based dry lubricant to prevent binding that mimics weak clutch springs.
- During Major Service: When the basket or bell housing is opened, torque the clutch hub nut to exact specifications (e.g., 40 Nm with medium-strength threadlocker for many Ducati dry clutches) to prevent basket notch wear, which causes dragging and premature plate glazing.
Expert Takeaway: Never assume mechanical failure until the electronic control circuit has been verified. Whether you are troubleshooting a Ducati quickshifter fault or a ZF 8HP mechatronic pressure drop, the ECU's interpretation of clutch position dictates drivetrain behavior. Validate the sensor data first, measure the friction materials second.