The Diagnostic Triage: Feel, Sound, and Vibration
Diagnosing modern manual transmission drivetrains requires more than a simple test drive; it demands a systematic triage of hydraulic pressure, acoustic feedback, and rotational mass behavior. When benchmarking against ZF Aftermarket engineering tolerances and Sachs clutch company standards, technicians must isolate whether a symptom originates from the friction assembly, the flywheel, or the hydraulic actuation circuit. This step-by-step guide breaks down clutch diagnosis by symptom—feel, noise, and vibration—providing exact measurement protocols and OEM replacement criteria for modern platforms like the VW MQB and BMW ZF 6-speed manuals.
Phase 1: Pedal Feel and Hydraulic Diagnostics
Pedal feel is your primary window into the hydraulic actuation circuit and the pressure plate diaphragm spring. Modern vehicles predominantly utilize a Concentric Slave Cylinder (CSC) paired with a Self-Adjusting Clutch (SAC) pressure plate.
- Spongy or Inconsistent Pedal: Often misdiagnosed as air in the lines, a spongy pedal on a high-mileage vehicle frequently points to a failing CSC internal seal or a degraded master cylinder bypass port. If the pedal sinks under sustained pressure at a stoplight, the master cylinder is bypassing internally.
- Heavy Pedal Effort with Late Engagement: This is the hallmark of a maxed-out SAC adjuster. As the friction disc wears, the SAC mechanism automatically compensates to maintain pedal freeplay. Once the adjuster reaches its mechanical limit (typically around 80,000 to 110,000 miles), the diaphragm spring fingers over-center, resulting in a heavy, abrupt pedal feel.
- Freeplay Measurement: OEM spec dictates 10mm to 15mm of freeplay at the pedal pad before hydraulic resistance is felt. Less than 10mm risks premature release bearing wear; more than 15mm indicates hydraulic wear or SAC failure.
Phase 2: Auditory Triage (Noise Mapping)
Clutch noise must be mapped against engine RPM and pedal position to isolate the failing component. The acoustic signature of a failing Dual-Mass Flywheel (DMF) is vastly different from a worn release bearing.
- Neutral Gear Rattle (Clutch Engaged): A distinct metallic clatter at idle that disappears when the clutch pedal is depressed indicates DMF primary-to-secondary mass spring fatigue. The torsion springs inside the DMF have lost their damping capability, allowing gear backlash to echo through the transmission housing.
- Whine or Growl (Pedal Depressed): If a rotational growl begins the moment hydraulic pressure is applied to the release bearing, the bearing's internal race is pitted or starved of high-temperature grease. Because modern CSCs are sealed units, this requires immediate transmission removal.
- High-Pitched Squeal (Pedal Released): A squeal that occurs only when the pedal is fully released points to a dry or binding clutch fork pivot ball, or a worn release bearing sleeve on the transmission input shaft collar.
Phase 3: Vibration and Chatter Analysis
Vibration during clutch engagement (chatter) is a kinetic issue stemming from uneven friction coefficients or rotational imbalance. While worn engine or transmission mounts can exacerbate the symptom, the root cause is usually at the friction interface.
Clutch chatter manifests as a violent shudder between 1,200 and 1,800 RPM during takeoff. This is frequently caused by flywheel hot spots (bluing on the cast iron surface) resulting from excessive slipping, or minor contamination from a leaking engine rear main seal or transmission input shaft seal. When replacing the clutch, if the flywheel exhibits thermal cracking or runout exceeding 0.50mm, it must be replaced to prevent immediate recurrence of the chatter.
Symptom-to-Component Diagnostic Matrix
Use the following matrix to cross-reference driver complaints with likely component failures before tearing down the drivetrain.
| Driver Symptom | Pedal State | Primary Suspect | Secondary Suspect |
|---|---|---|---|
| Metallic rattle at idle | Released (Engaged) | Dual-Mass Flywheel (DMF) | Transmission input shaft bearing |
| Rotational growl | Depressed (Disengaged) | Release Bearing / CSC | Input shaft collar wear |
| Violent shudder on takeoff | Slipping (Friction Zone) | Flywheel hot spots / Oil contamination | Broken engine/transmission mount |
| Heavy, abrupt pedal | Depressing | SAC Adjuster Maxed Out | Binding clutch fork / pivot ball |
| Pedal sinking at stops | Held Depressed | Master Cylinder Bypass | CSC internal seal leak |
Step-by-Step Physical Inspection Protocol
Once the transmission is removed, visual inspection is insufficient. You must measure against exact Sachs clutch company tolerances to guarantee the longevity of the replacement assembly.
Step 1: Flywheel Runout and DMF Freeplay
Mount a magnetic base dial indicator to the engine block and rest the needle on the friction surface of the flywheel. Rotate the crankshaft 360 degrees.
- New Flywheel Runout Spec: 0.10 mm maximum.
- Maximum Service Limit: 0.50 mm. Anything beyond this will cause severe clutch chatter and premature SAC adjuster failure.
- DMF Angular Freeplay: For a standard Sachs DMF (e.g., part number 2290 601 021 for VW/Audi 2.0T applications), the rotational freeplay between the primary and secondary mass should not exceed 15 to 20 degrees. If the secondary mass can be rotated freely more than two teeth on the starter ring gear, the internal torsion springs are collapsed.
Step 2: Friction Disc and Pressure Plate Inspection
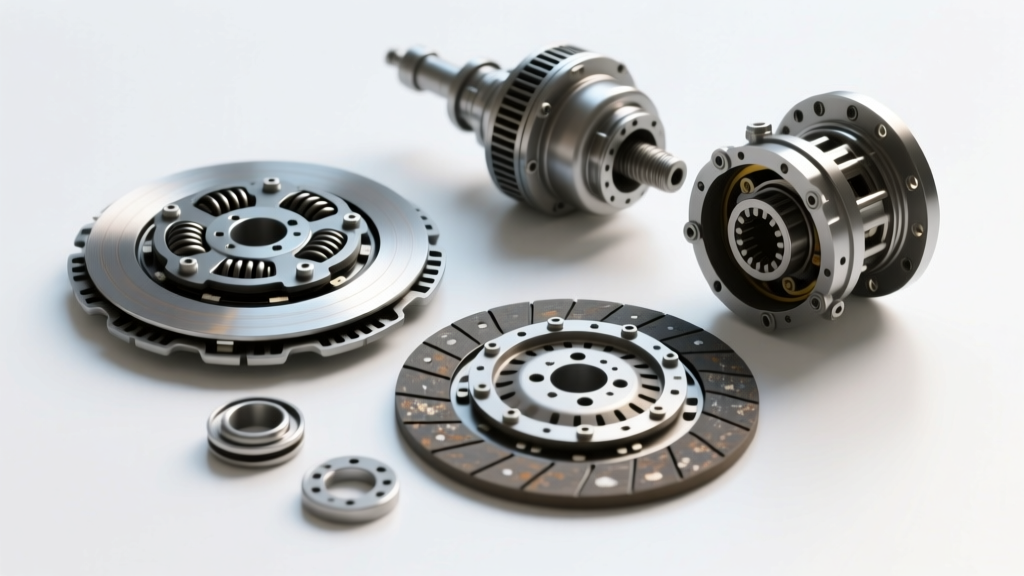
Measure the friction material thickness from the rivet heads. The wear limit is typically 0.3mm above the rivets. Inspect the pressure plate diaphragm fingers for uneven wear grooves. If the fingers show deep scoring from a spinning release bearing, the entire pressure plate assembly must be replaced.
Step 3: SAC Reset and Torque Sequences
If you are installing a new SAC pressure plate, you must use a SAC reset tool (such as the OTC 4500 or ZF Sachs specific tool) to compress the diaphragm spring and reset the internal adjuster ring before installation. Failing to do this will result in a clutch that refuses to disengage, potentially bending the clutch fork upon the first pedal press.
Crucial Torque Specifications (VW/Audi MQB Platform Example):
- Dual-Mass Flywheel to Crankshaft (M10 bolts): 60 Nm + 90-degree turn. Always use new stretch bolts.
- Pressure Plate to Flywheel (M8 bolts): 25 Nm, tightened in a star pattern to ensure even clamping load on the SAC mechanism.
- Transmission Bellhousing to Engine Block (M10/M12): 45 Nm / 65 Nm respectively.
Cost Analysis: Sachs OEM vs. Aftermarket Alternatives
When sourcing replacement parts, understanding the price-to-longevity ratio is critical for both shop profitability and customer satisfaction. While budget aftermarket kits are available, they often lack the proprietary SAC technology and DMF damping rates engineered by the original equipment manufacturers.
| Component Category | Sachs OEM / ZF Aftermarket | Budget Aftermarket Equivalent | Expected Lifespan Delta |
|---|---|---|---|
| Complete DMF & Clutch Kit | $650 - $950 | $350 - $500 | OEM lasts 100k+ miles; Budget often fails at 40k-60k miles due to poor torsion spring tuning. |
| Concentric Slave Cylinder (CSC) | $80 - $140 | $35 - $60 | Budget CSCs frequently suffer premature plastic sleeve melting and seal extrusion. |
| SAC Adjustment Tool (Investment) | $120 - $180 (One-time) | N/A (Often skipped) | Skipping this tool risks $2,000+ in labor for a warranty teardown. |
Final Verification and Bed-In Procedure
After reassembly and hydraulic bleeding (utilizing a pressure bleeder at 2.5 bar to ensure no micro-bubbles remain in the CSC circuit), the clutch must be properly bedded in. Instruct the driver to perform 10 to 15 moderate engagements from 20 to 40 mph, avoiding aggressive launches or heavy slipping for the first 300 miles. This allows the friction material to mate evenly with the flywheel surface, establishing the optimal coefficient of friction and ensuring the SAC adjuster calibrates correctly to the new stack height.
For further technical documentation on Self-Adjusting Clutch mechanisms and exact torque specifications for specific European platforms, consult the Sachs Performance technical portal or your local ZF Aftermarket distributor. Proper diagnosis and adherence to OEM tolerances are the only ways to eliminate repeat drivetrain complaints.