The Evolution of Fluid Coupling: CVT vs. Classic Automatics
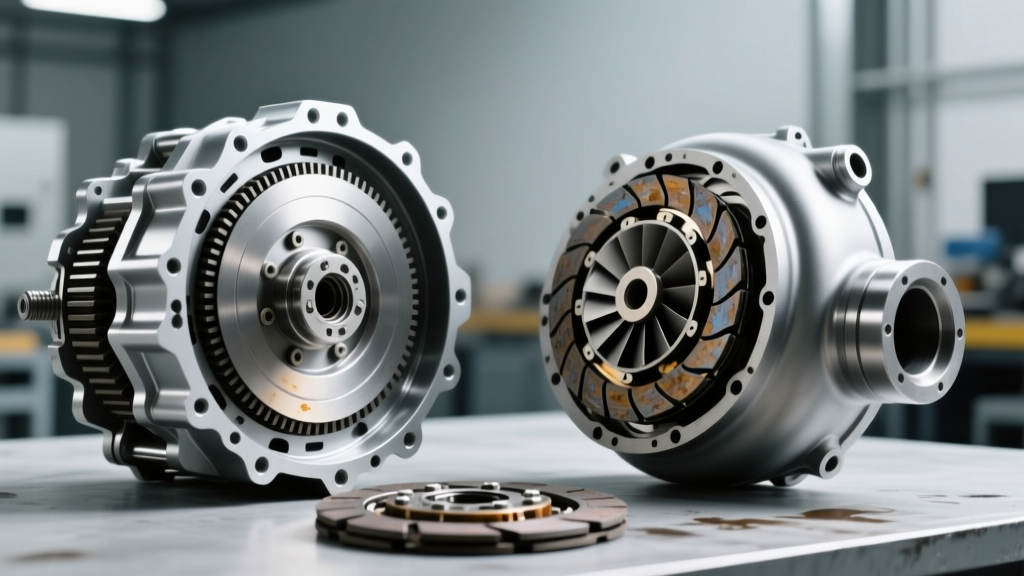
When automotive technicians and restoration enthusiasts study the c4 transmission torque converter, they are looking at a masterclass in simple, non-lockup fluid coupling. Introduced by Ford in the 1960s, the C4 utilized a basic 10.5-inch or 11.625-inch torque converter with a 24-spline input shaft and relied entirely on hydraulic fluid shear to multiply torque. Because it lacked a Torque Converter Clutch (TCC), it never experienced the infamous 'lockup shudder' that plagues modern vehicles.
Fast forward to today, and the torque converter in CVT transmissions (Continuously Variable Transmissions) serves a radically different purpose. In modern CVTs like the Jatco JF011E (used in Nissan and Jeep applications) or the Subaru Lineartronic TR690, the torque converter is primarily a launch device equipped with an advanced, micro-slip lockup clutch. Once the vehicle reaches 10-15 mph, the TCC applies to prevent slippage, protect the CVT push-belt or chain from excessive heat, and improve fuel economy. When this lockup mechanism degrades, it results in severe shudder, hesitation, and eventual belt slip.
This step-by-step diagnostic guide bridges the gap between classic hydraulic theory and modern electronic slip-control diagnostics, giving you a definitive roadmap for troubleshooting CVT torque converter failures.
Step 1: Electronic Triage and OBD2 Data Logging
Unlike a purely hydraulic C4 transmission where diagnosis begins with a mechanical stall test, diagnosing a CVT torque converter requires a high-end bi-directional scan tool capable of reading proprietary TCM (Transmission Control Module) data PIDs.
Key CVT TCC Codes to Monitor:
- P0741 (TCC Stuck Off): The TCM commands lockup, but engine RPM and transmission input shaft speed do not correlate. Common in Subaru CVTs due to worn lockup apply valves.
- P0742 (TCC Stuck On): The clutch fails to release, often causing the engine to stall at idle. This can be caused by a cross-leaked TCC control valve or contaminated CVTF fluid clogging the micro-filter.
- P1777 (Nissan/Jeep specific): Often points to a step motor or solenoid failure controlling the TCC apply pressure, leading to erratic lockup engagement.
Action Step: Graph the 'TCC Slip RPM' PID alongside 'Vehicle Speed' and 'Throttle Position'. A healthy CVT torque converter will show slip RPM dropping to near zero (±10 RPM) once lockup is commanded at cruise. If you see slip RPM oscillating between 50 and 150 RPM under steady throttle, the friction material on the TCC piston is glazing or delaminating.
Step 2: Fluid Analysis and the Friction Modifier Trap
The most critical mistake mechanics make when transitioning from classic automatics to CVTs is misunderstanding fluid chemistry. The classic c4 transmission torque converter required Ford Type F fluid—a fluid intentionally devoid of friction modifiers to allow for aggressive, firm clutch engagements in the transmission's internal bands and clutches.
CVTs require the exact opposite. Modern CVTF (such as Nissan NS-3 or Subaru CVTF) is heavily loaded with specialized friction modifiers designed to allow the torque converter clutch to 'micro-slip' continuously without grabbing or shuddering.
Fluid Inspection Checklist:
- Color & Smell: Fresh NS-3 is clear with a slight green/yellow tint. If it smells burnt or is dark brown, the TCC friction material has likely burned off and contaminated the entire hydraulic circuit, including the valve body and pulley clamping valves.
- Debris Check: Drain the fluid through a white paper filter. Metallic glitter indicates chain/belt wear, but black, fibrous sludge specifically points to torque converter clutch disintegration.
Step 3: The CVT 'Stall Test' (And Why You Must Avoid It)
If you were diagnosing a c4 transmission torque converter, a staple diagnostic procedure is the 'Stall Test'—foot-braking the vehicle at wide-open throttle (WOT) to measure the maximum RPM the converter can achieve before the engine overcomes the fluid coupling. For a stock C4, this is typically around 2,000 to 2,400 RPM.
WARNING: Never perform a traditional WOT stall test on a CVT. Modern CVTs rely on hydraulic line pressure to clamp the primary and secondary pulleys onto the push-belt. If you foot-brake a CVT at WOT, the sudden spike in input torque from the torque converter can exceed the pulley clamping pressure, causing the belt to slip catastrophically and gouge the pulley faces. Instead, rely on the electronic slip data gathered in Step 1 and perform a controlled, low-speed road test to feel for TCC shudder between 25-45 mph.
Comparative Data: CVT vs. C4 Transmission Torque Converter Specs
Understanding the mechanical differences between these two eras of transmission design is vital for proper diagnosis and replacement. Below is a technical comparison of a modern Jatco CVT torque converter versus the classic Ford C4 design.
| Specification | Jatco JF011E (Modern CVT) | Ford C4 (Classic 3-Speed Auto) |
|---|---|---|
| Diameter | 9.5 inches (240mm) | 10.5 or 11.625 inches |
| Lockup Clutch (TCC) | Yes (PWM Micro-Slip Control) | No (Pure Fluid Coupling) |
| Input Shaft Spline | 20-Spline (Typical Nissan App) | 24-Spline |
| Fluid Requirement | NS-2 / NS-3 CVTF (High Friction Modifiers) | Type F (No Friction Modifiers) |
| Primary Failure Mode | TCC Friction Material Delamination / Shudder | Fin Shearing / Impeller Hub Wear |
| Flexplate Bolt Torque | 35 lb-ft (47 Nm) | 20-23 lb-ft (Small Block V8) |
Step 4: Mechanical Removal and Converter Hub Inspection
If electronic data and fluid analysis confirm internal TCC failure, the torque converter must be replaced. Because the torque converter in CVT transmissions acts as the primary cooling loop and hydraulic pump drive, a failing unit will send debris directly into the CVT's external cooler and internal pump gears.
Removal Procedure & Best Practices:
- Support the Powertrain: Use an engine support bar across the strut towers. CVT subframes (especially in Nissan Altima/Rogue applications) require complete lowering to access the bellhousing.
- Flexplate Removal: Use an impact wrench or hold the flexplate with a pry bar to break the torque converter nuts loose. Remember the 35 lb-ft (47 Nm) torque spec for reassembly; overtightening can warp the thin CVT flexplate, causing a rhythmic knock at idle.
- Inspect the Pump Drive Hub: Before installing the new converter, inspect the CVT oil pump drive tangs. If the old converter's hub blued the steel or rounded the edges of the pump tangs, the oil pump must be replaced. Sonnax technical bulletins frequently highlight that reusing a damaged pump with a new converter will result in immediate low line pressure and belt slip.
- Pre-Fill the Converter: Unlike a C4 where you could pour a quart of Type F down the input shaft, modern CVT torque converters should be pre-filled with exactly 1.5 to 2 quarts of OEM CVTF via the drain plug (if equipped) or the hub neck before mating it to the transmission case to prevent dry-start pump cavitation.
Step 5: The TCM Relearn Procedure
You cannot simply bolt in a new CVT torque converter and drive away. The TCM adapts its TCC apply solenoid current based on the wear of the old clutch. If you install a new converter without clearing the adaptive memory, the TCM will command the aggressive apply pressure meant for a worn clutch, resulting in a harsh, banging lockup engagement that can shatter the new TCC damper springs.
Action Step: Use your bi-directional scanner to navigate to the TCM Special Functions menu. Select 'Clear TCC Adaptive Values' or 'Reset Transmission Learning'. Follow the manufacturer's specific drive-cycle relearn procedure, which typically involves driving the vehicle at 40 mph with light throttle (15-20% TPS) to allow the TCM to map the new micro-slip friction coefficients.
2026 Replacement Costs and Sourcing Data
The cost disparity between classic and modern torque converters is significant, driven by the complexity of internal dampers and electronic lockup pistons.
- Classic C4 Rebuild: A high-stall or stock replacement c4 transmission torque converter from a reputable builder like TCI or BTE typically ranges from $250 to $450. These are easily rebuilt by cutting the cover, replacing the stator and fins, and welding it back together.
- Modern CVT Replacement: A new OEM Jatco or Subaru CVT torque converter ranges from $850 to $1,400 for the part alone. When factoring in 6-8 hours of labor (subframe drop, flexplate removal, fluid exchange), the total shop bill in 2026 averages between $1,800 and $2,800.
Pro-Tip: Never install a used CVT torque converter from a salvage yard. Because TCC friction material degrades invisibly over time, a used unit is highly likely to begin shuddering within 10,000 miles. Furthermore, always replace the CVT external inline filter (often located near the radiator or transmission cooler lines) when replacing the converter to trap any residual debris.
Conclusion
Diagnosing the torque converter in CVT transmissions requires a fundamental shift in mindset. While the c4 transmission torque converter represents an era of brute-force hydraulic simplicity, modern CVT lockup clutches are precision instruments relying on micro-slip electronics and specialized fluid chemistry. By leveraging OBD2 slip data, respecting CVTF fluid requirements, and strictly adhering to TCM adaptive reset procedures, technicians can accurately diagnose shudder issues and perform lasting repairs without risking catastrophic belt or pulley damage.
For further reading on hydraulic valve body wear and TCC solenoid diagnostics, consult resources from the Automatic Transmission Rebuilders Association (ATRA) and stay updated on OEM technical service bulletins regarding CVT software flashes that often resolve perceived mechanical shudder issues.