The "Clutch" Confusion: Drivetrain Engagement vs. HVAC Engagement
When a driver reports a slipping sound, a failure to engage, or a burning smell from the engine bay, the word "clutch" immediately enters the diagnostic conversation. However, in modern and legacy automotive repair, this terminology spans two entirely different systems: the manual transmission drivetrain and the air conditioning HVAC system. Misdiagnosing clutch cable problems and adjustment issues as a failing ac compressor clutch assembly (or vice versa) can lead to catastrophic repair bills and unresolved vehicle symptoms.
As we navigate the 2026 automotive repair landscape, labor rates have surged, and the cost of misdiagnosis is higher than ever. A manual transmission clutch cable issue might present as a stiff pedal or gear-grinding, while an AC compressor electromagnetic clutch failure often mimics a slipping belt or causes engine load anomalies that feel like drivetrain chatter. This comprehensive cost analysis and diagnostic breakdown will help you differentiate between manual clutch cable adjustments and HVAC compressor clutch replacements, ensuring you only pay for the exact repair your vehicle requires.
Manual Transmission Clutch Cable Problems and Adjustment
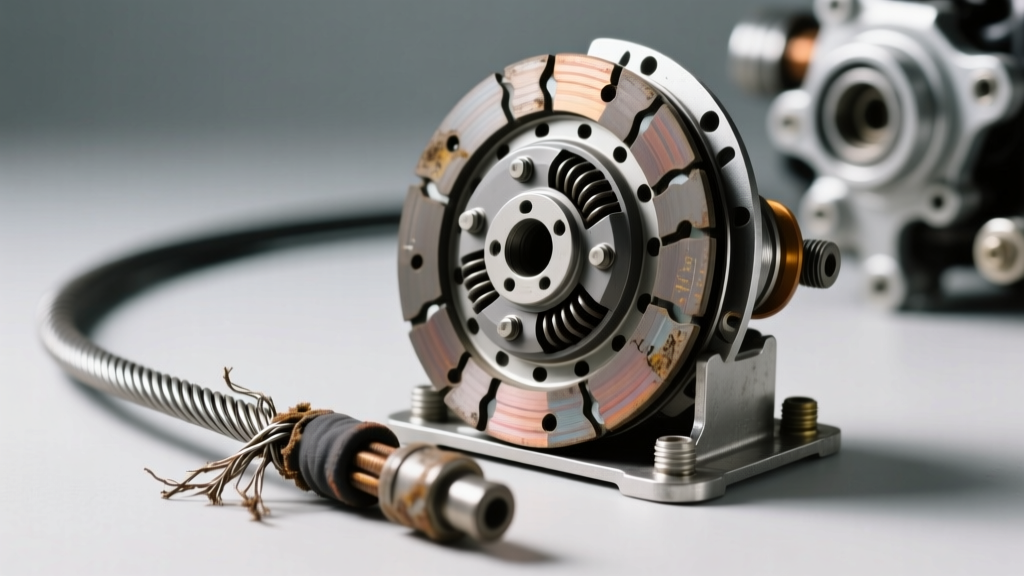
Despite the dominance of hydraulic and dual-clutch systems, millions of vehicles on the road today—ranging from Honda Civics and Subaru WRXs to heavy-duty commercial trucks—still rely on a mechanical Bowden-style clutch cable. The cable translates pedal force to the transmission release fork. When clutch cable problems arise, they rarely fail without warning; instead, they degrade through stretching, fraying, or casing compression.
Symptoms of a Failing or Misadjusted Clutch Cable
- High Pedal Engagement Point: The clutch only disengages when the pedal is pressed entirely to the floor, indicating excessive cable stretch or worn friction disc material.
- Grinding Gears on Shift: Incomplete disengagement due to a loose cable or collapsed outer casing lining, preventing the throw-out bearing from fully compressing the pressure plate fingers.
- Squeaking at the Firewall: Dry or fraying inner wire strands rubbing against the firewall grommet or pedal quadrant.
- Pedal Sticking to the Floor: A snapped inner wire or a cable that has jumped the pedal quadrant teeth (common in older Ford and GM cable-clutch setups).
Adjustment Specifications and Procedures
Before replacing any hardware, a proper adjustment is mandatory. Most OEM specifications require between 1.0 and 1.5 inches (25mm to 38mm) of free-play measured at the top of the clutch pedal pad. This free-play ensures the throw-out bearing is not constantly riding against the pressure plate diaphragm springs, which would cause premature bearing failure and clutch slip.
To adjust, locate the cable adjuster at the transmission bellhousing. Using a 14mm or 12mm wrench (depending on the application, such as the Honda K-Series or Subaru EJ25 platforms), loosen the locknut. Turn the adjuster nut to increase or decrease tension until the release fork exhibits exactly 0.5 to 0.75 inches of free travel before engaging the fingers. Torque the locknut to 12-15 lb-ft to prevent backing off during engine vibration. If the outer casing shows visible cracks, or if the inner wire has "bird-caged" (strands separating), adjustment is useless; complete replacement is required.
Diagnosing the AC Compressor Clutch Assembly
On the HVAC side of the engine bay, the ac compressor clutch assembly is an electromagnetic device that engages and disengages the compressor pulley from the compressor shaft. When drivers hear a metallic squeal, a rhythmic clicking, or experience engine RPM dips when the AC is turned on, the AC clutch is the primary suspect. According to diagnostic guidelines outlined by AA1Car, AC clutch failures usually stem from three areas: the pulley bearing, the electromagnetic coil, or the friction plate air gap.
Electromagnetic Coil and Relay Testing
Before condemning the mechanical assembly, verify the electrical circuit. A failing AC clutch relay or a voltage drop across the wiring harness can prevent the clutch from engaging. Using a digital multimeter, test the resistance across the clutch coil terminals. A healthy 12-volt electromagnetic coil should read between 3.5 and 5.0 ohms. A reading of infinite resistance (OL) indicates an open internal winding, requiring a coil or full assembly replacement. Furthermore, verify that the clutch is receiving a full 12.5V+ under load; voltage drops below 10V will cause the clutch to slip, generating intense heat and glazing the friction surfaces.
Air Gap Specifications and Shimming
As the friction plate wears over thousands of engagement cycles, the air gap between the rotor and the armature widens. The factory specification for this air gap is typically 0.020 to 0.030 inches (0.5mm to 0.75mm). If the gap exceeds 0.040 inches, the electromagnetic field weakens, especially when the engine bay is hot (since electrical resistance increases with heat). Using a feeler gauge, measure the gap at three equidistant points. If it is too wide, remove the center bolt, pull the friction plate, and remove one or two precision shims from the compressor shaft before reinstalling. This simple $0 repair often saves a $400 compressor clutch replacement.
2026 Cost Breakdown & Labor Analysis
Understanding the financial implications of these two very different "clutch" repairs is vital for accurate estimating. The table below outlines the average 2026 market costs for parts and labor, utilizing data baselines from RockAuto and national average shop rates of $165 per hour.
| Repair Component | Part Cost (OEM/Premium) | Labor Time | Labor Cost (@ $165/hr) | Total Estimated Cost |
|---|---|---|---|---|
| Manual Clutch Cable Replacement | $35 - $85 | 0.8 - 1.5 Hours | $132 - $247 | $167 - $332 |
| Clutch Cable Adjustment Only | $0 | 0.3 Hours | $49 | $49 |
| AC Compressor Clutch Assembly (Kit) | $95 - $280 | 2.5 - 4.0 Hours* | $412 - $660 | $507 - $940 |
| AC System Evac & Recharge (Required) | $45 - $120 (Refrigerant) | 1.0 Hour | $165 | $210 - $285 |
*Note: Labor time for the AC compressor clutch assembly assumes the compressor must be removed from the vehicle to safely press off the pulley and clutch hub. In some tight engine bays, the entire system must be evacuated and recharged to comply with EPA Section 608 refrigerant handling regulations, drastically increasing the final invoice.
Diagnostic Decision Matrix: Which Clutch is Failing?
To avoid paying for an HVAC repair when you need a drivetrain adjustment (or vice versa), use this rapid decision matrix when evaluating clutch-related symptoms:
- Symptom: Grinding when shifting into 1st or Reverse at a stoplight.
Diagnosis: Drivetrain. The manual clutch cable is too loose, or the casing has collapsed, preventing full disengagement. Adjust cable free-play to 1.25 inches. - Symptom: Loud metallic squeal that only occurs when the AC button is pressed.
Diagnosis: HVAC. The AC compressor clutch assembly pulley bearing is failing, or the friction plate is slipping due to an excessive air gap or low coil voltage. - Symptom: Engine RPM flares or feels like it is "slipping" under heavy acceleration, but AC is off.
Diagnosis: Drivetrain. While a misadjusted cable usually causes drag rather than slip, a severely stretched cable might prevent the pressure plate from fully clamping if the pedal quadrant is binding. Inspect the clutch disc and pressure plate. - Symptom: A rhythmic clicking from the engine bay every 10-15 seconds, accompanied by warm cabin air.
Diagnosis: HVAC. The AC clutch is short-cycling. This is rarely a cable issue; it points to a failing AC clutch coil, a bad pressure switch, or a low refrigerant charge causing the PCM to rapidly engage and disengage the compressor clutch to prevent damage.
By isolating the system based on pedal feel, cabin temperature, and specific auditory cues, you can confidently direct your diagnostic efforts—and your repair budget—toward the correct clutch mechanism.