Understanding Clutch Drag and Release Failures
Clutch drag is a debilitating symptom that occurs when the clutch friction disc fails to fully disengage from the flywheel, even when the pedal is fully depressed. This partial engagement keeps the transmission input shaft spinning, resulting in severe gear grinding (especially when shifting into 1st or Reverse), vehicle creeping at stoplights, and accelerated wear on the synchronizers and dog teeth. While hydraulic master and slave cylinder failures are common on modern vehicles, millions of manual transmission vehicles on the road today still rely on a mechanical steel braided cable. Over time, these cables stretch, fray, or suffer from internal housing degradation, leading to inadequate clutch fork travel. This comprehensive, step-by-step clutch cable repair guide will walk you through diagnosing, replacing, and precisely adjusting your mechanical linkage to eliminate clutch drag and restore crisp, clean shifts.
Diagnostic Checklist: Is the Cable the Culprit?
Before ordering parts and crawling under the vehicle, you must confirm that the mechanical linkage is the root cause of your clutch drag and release problems. Internal transmission faults can mimic cable failure. Perform these diagnostic checks first:
- The Pedal Return Test: Press the clutch pedal to the floor and release it quickly. A healthy cable and return spring setup will snap the pedal back to the top of its travel instantly. If the pedal returns sluggishly or stops an inch short of the firewall, the inner cable is likely frayed and binding against the outer housing liner.
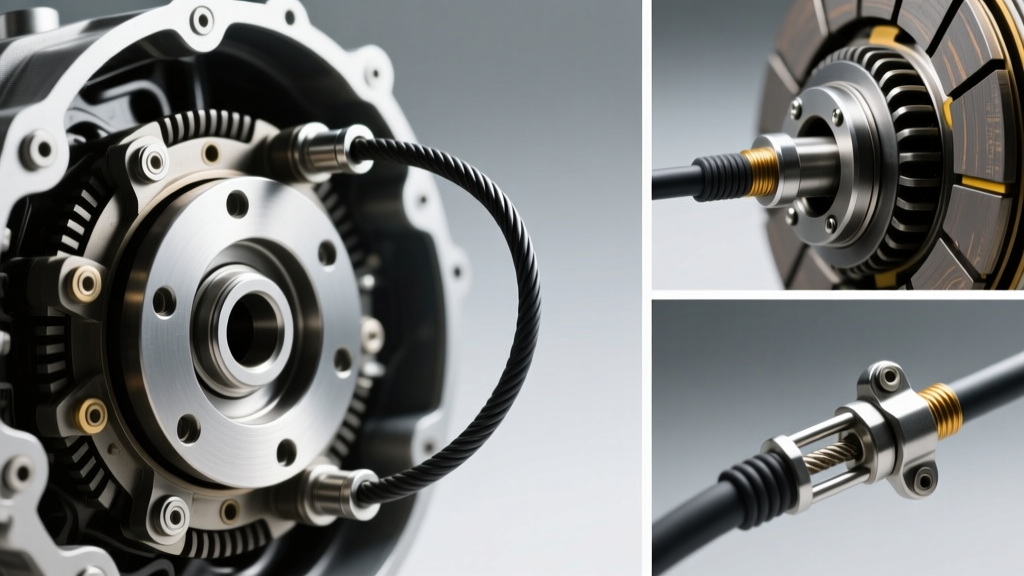
- The Visual Fray Test: Crawl under the vehicle and locate the clutch cable where it meets the bellhousing clutch fork. Inspect the outer rubber and steel braiding. If you see bulges, kinks, or exposed wire strands, the internal PTFE (Teflon) liner has failed, creating massive friction that prevents the clutch fork from fully retracting.
- The Quadrant Check (Ford Applications): On vehicles like the Foxbody and SN95 Mustangs, the cable relies on a self-adjusting firewall quadrant. If the plastic teeth on the quadrant strip, the cable will slip under load, causing sudden clutch drag and an inability to find neutral.
Required Tools and OEM Replacement Parts
A proper clutch cable repair requires precision tools to ensure correct tension and free-play. Budget between $45 and $120 for a high-quality replacement cable. Avoid cheap, no-name aftermarket cables; their inner liners degrade rapidly under the heat of the exhaust headers.
- Replacement Cable: For Ford 5.0L applications, use the Dorman 740-100 or Ford Performance M-7553-B ($75-$95). For Jeep Wrangler YJ 2.5L/4.2L models, use the Mopar 52087654 or Crown Automotive equivalent ($45-$70).
- Measuring Tape & Feeler Gauges: For measuring pedal free-play and firewall clearances.
- Torque Wrench: Capable of measuring 10 to 40 lb-ft for bellhousing inspection covers and pivot balls.
- Needle-Nose Pliers & Cotter Pins: For pedal box clevis removal.
- Dry Graphite or PTFE Spray Lubricant: Warning: Never use petroleum-based grease on modern PTFE-lined clutch cables. Petroleum causes the Teflon liner to swell and bind, ruining the new cable instantly.
Step-by-Step Clutch Cable Repair and Replacement
Step 1: Measure Existing Pedal Free-Play
Before disconnecting anything, measure the current pedal free-play. Press the pedal down by hand until you feel the resistance of the clutch pressure plate fingers. This distance is your free-play. If it is less than 1 inch, the cable is too tight, keeping the throwout bearing constantly pressed against the pressure plate, which causes slip and eventual drag as the bearing overheats and seizes.
Step 2: Firewall and Pedal Box Disconnection
Disconnect the negative battery terminal. Under the dash, locate the top of the clutch cable where it attaches to the pedal arm via a clevis pin. Remove the cotter pin using needle-nose pliers, slide the clevis pin out, and unhook the return spring. Next, locate where the cable housing passes through the firewall. Unbolt the retaining bracket (typically two 10mm or 13mm bolts) and carefully push the rubber grommet through the firewall into the engine bay.
Step 3: Bellhousing Fork Removal
Safely raise the vehicle on jack stands. Remove the bellhousing inspection cover (torque spec for reinstallation is typically 10-15 lb-ft). Locate the end of the cable hooked into the clutch fork. Compress the cable tension spring, unhook the cable end from the fork, and slide the outer housing out of its rubber isolator or metal retaining clip. Route the old cable out of the engine bay, noting its exact path to avoid exhaust components and steering shafts.
Step 4: Routing and PTFE Liner Warnings
Feed the new cable through the firewall from the engine bay into the cabin. Critical E-E-A-T Tip: Modern replacement cables feature an extruded PTFE inner liner designed to operate completely dry. Do not attempt to 'lube' the inside of the cable housing with WD-40 or white lithium grease. If the cable must be lubricated due to extreme binding in cold climates, use only a specialized dry PTFE spray. Connect the housing to the firewall bracket, attach the clevis to the pedal arm, and secure it with a fresh cotter pin.
Step 5: Precision Adjustment and Locking
Route the cable down to the bellhousing. Hook the cable end into the clutch fork and seat the outer housing into its retaining clip. For manual threaded adjusters (common on Jeeps and older imports), thread the adjuster nut at the firewall to achieve the manufacturer's specified free-play. For self-adjusting quadrant systems (Mustangs), pull the clutch pedal up firmly with your foot to ratchet the quadrant and set the baseline tension, then fine-tune using the threaded adjuster on the cable housing near the fork. Tighten the locking nut securely to prevent vibration from altering your adjustment.
Clutch Pedal Free-Play Specifications
Incorrect free-play is the number one cause of post-repair clutch drag. Too little free-play results in the throwout bearing riding the pressure plate; too much results in incomplete disengagement and gear grinding. Consult this reference table for common cable-clutch vehicles:
| Vehicle Application | Target Free-Play (Pedal Pad) | Cable Adjuster Type | Pivot Ball Torque Spec |
|---|---|---|---|
| Ford Mustang 5.0L (Foxbody/SN95) | 1.00' - 1.50' (25-38mm) | Firewall Quadrant + Inline Thread | 25-35 lb-ft |
| Jeep Wrangler YJ (2.5L / 4.2L) | 1.25' - 1.50' (32-38mm) | Firewall Threaded Nut / Locknut | 30-40 lb-ft |
| Honda Civic (EG / EK Chassis) | 0.75' - 1.00' (19-25mm) | Inline Threaded Adjuster | 22-28 lb-ft |
| Chevrolet S-10 (2.2L / 4.3L) | 1.00' - 1.25' (25-32mm) | Inline Threaded Adjuster | 25-30 lb-ft |
Troubleshooting Persistent Drag Post-Repair
If you have completed this clutch cable repair and verified your free-play is within spec, but the transmission still grinds into gear, the issue lies deeper within the bellhousing. Consider these advanced failure modes:
- Worn Clutch Fork Pivot Ball: The clutch fork pivots on a hardened steel ball stud. Over 100,000 miles, the fork can wear a groove into the ball, or the ball can loosen from the bellhousing. This alters the geometry of the release mechanism, preventing the throwout bearing from traveling far enough to release the clutch. Remove the inspection cover and check for lateral play. Replace the pivot ball and torque to 30 lb-ft.
- Seized Pilot Bearing: The pilot bearing supports the tip of the transmission input shaft inside the flywheel. If this bearing seizes, it will physically drag the input shaft along with the spinning engine, regardless of how perfectly your clutch cable is adjusted. Test this by starting the vehicle in neutral with the clutch depressed; if you hear a high-pitched whining or grinding noise that changes when you release the pedal, the pilot bearing is failing.
- Warped Friction Disc or Flywheel Runout: Extreme heat from previous clutch slip events can warp the steel friction disc marcel springs or the flywheel surface. Even with full cable travel, a warped disc will catch on the flywheel high spots, causing intermittent drag.
Authoritative Sources and Further Reading
Proper drivetrain maintenance requires consulting verified engineering data. For further reading on mechanical linkage geometry and OEM torque specifications, refer to the Summit Racing Tech Center for application-specific installation guides. Additionally, the Haynes Manuals Tech Tutorials provide excellent visual references for pedal box teardowns and firewall grommet sealing techniques to prevent cabin exhaust leaks during your repair. Always cross-reference your specific VIN with the RockAuto Catalog to ensure you are ordering the correct cable length, as mid-year production splits often result in different cable end styles for the exact same vehicle model.