The 4L65E Crossroads: Rebuild or Replace?
When your GM 4L65E transmission finally calls it quits, you are immediately faced with a critical financial and mechanical crossroads. Originally introduced in 2001 to handle the torque of LS-based V8 engines (like the 6.0L LQ4/LQ9 in early Silverados and the LS1/LS6 in C5 Corvettes and Camaros), the 4L65E is a robust evolution of the 4L60E. It features stronger 5-pinion planetary carriers, a deeper fluid pan, and upgraded internal hard parts. However, age and mileage eventually claim every transmission. In 2026, with supply chain shifts and evolving remanufacturing standards, deciding between a DIY or professional 4L65E transmission rebuild and dropping in a remanufactured replacement requires a methodical approach. This step-by-step guide will walk you through the exact diagnostic, financial, and technical evaluations needed to make the right choice for your vehicle and your wallet.
Step 1: Perform the Pan Drop Autopsy
Before you can decide on a replacement or a rebuild, you must understand exactly why the 4L65E failed. Dropping the transmission pan is your first diagnostic step. The debris left behind tells a detailed story about the condition of the core.
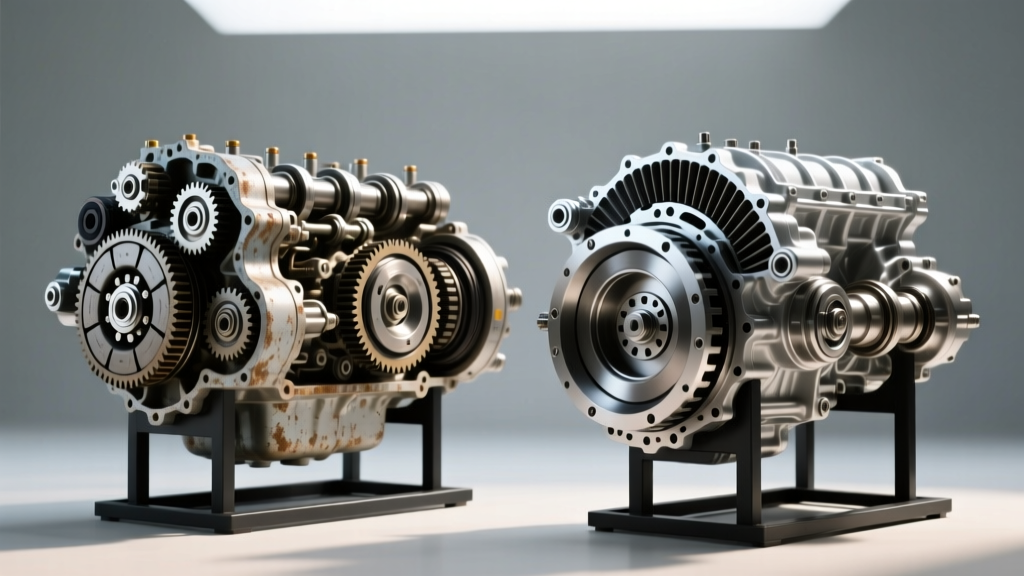
- Friction Material (Dark Sludge/Grit): If the pan is coated in a dark, gritty paste that smells severely burnt, your 3-4 clutch pack has likely disintegrated. This is the most common failure point in the 4L60E/4L65E family. If the hard parts (drums, steels, planetary gears) are intact, the core is an excellent candidate for a rebuild.
- Brass Shavings: Brass indicates bushing wear. In the 4L65E, this usually points to the front pump bushing, tail housing bushing, or input shaft bushings. A master rebuild kit with new bushings will easily resolve this.
- Glitter and Steel Chunks: If the fluid looks like metallic paint or you find actual chunks of steel, you have catastrophic hard part failure. This often means the sun shell has shattered, the reaction carrier has exploded, or the 5-pinion planetary gears have stripped. Severe hard part damage drastically increases rebuild costs and may tip the scales toward a replacement.
Expert Insight: Always inspect the transmission fluid filter. If the filter is completely clogged with friction material, the pump may have been starved of fluid, leading to secondary scoring on the pump rotor and slides. Factor pump replacement ($150-$250) into your rebuild estimate if this is the case.
Step 2: Audit Mandatory 4L65E Upgrades
If you opt for a 4L65E transmission rebuild, you cannot simply reuse the OEM parts. To ensure longevity, specific upgrades are mandatory. According to Sonnax 4L65E technical resources, the valve body and internal shafts require immediate attention during any teardown.
- The Sun Shell: The OEM stamped steel sun shell is notorious for stripping its splines. Upgrading to a hardened or billet sun shell (such as the legendary 'Beast' shell or modern billet equivalents) is non-negotiable. Cost: ~$120.
- PWM Solenoid Bore Wear: The Pulse Width Modulation (PWM) solenoid controls torque converter clutch (TCC) apply. The aluminum valve body bore wears out, causing TCC shudder and burnt converters. You must ream the bore and install a sleeved Sonnax valve. Cost: ~$85.
- 3-4 Clutch Hub: The splines on the 3-4 clutch hub wear down, causing delayed shifts or neutraling out in 3rd/4th gear. Cryo-treated or billet hubs are highly recommended. Cost: ~$90.
- Corvette Servos: Upgrading the 2nd and 4th gear servo pistons improves shift firmness and reduces clutch pack wear. Cost: ~$45.
Step 3: Calculate the True Rebuild Cost
Understanding the financial reality of a rebuild is crucial. Below is a realistic 2026 cost breakdown for a comprehensive, upgraded DIY 4L65E rebuild. Note that professional machine shop labor or a shop-performed rebuild will add significantly to these numbers.
| Component / Service | Estimated Cost (USD) |
|---|---|
| Master Rebuild Kit (Raybestos/Transtar w/ steels & bushings) | $350 - $450 |
| Billet Sun Shell & Upgraded Servos | $165 |
| Remanufactured Torque Converter (Stall matched to application) | $280 - $400 |
| Valve Body Reaming Tool Kit & Sleeves | $120 |
| Dexron VI ATF (12 Quarts) & Filter | $90 |
| Hard Parts (Replacement Pump/Planetary if damaged) | $150 - $400 |
| Total DIY Rebuild Cost | $1,155 - $1,625 |
If you take the core to a professional transmission shop, expect labor rates to push the total invoice for a custom 4L65E rebuild to between $2,400 and $3,200, depending on your region and the extent of hard part damage.
Step 4: Evaluate the Remanufactured Replacement Route
Alternatively, you can purchase a remanufactured 4L65E from established builders like Jasper, Powertrain Products, or local certified remanufacturers. As noted by industry analysts at Transmission Digest, modern remanufacturing processes often include dyno-testing and standardized upgrades that mimic a high-end custom rebuild.
The Pros and Cons of Replacement
- Cost: A remanufactured 4L65E typically costs between $2,200 and $2,800. You must also factor in a core charge (usually $400-$600) which is refunded when you return your broken unit.
- Warranty: Reman units usually come with a 3-year/100,000-mile nationwide warranty. A DIY rebuild carries zero warranty, while a local shop rebuild might offer 12 months/12,000 miles.
- Time: Swapping a transmission takes a weekend for a seasoned DIY mechanic. Rebuilding one on a bench can take 20-40 hours of meticulous labor, cleaning, and measuring.
Step 5: Assess Your Tooling and Technical Feasibility
If you are leaning toward the DIY 4L65E transmission rebuild, you must honestly evaluate your tooling. The 4L65E is highly sensitive to endplay and clutch clearance. You cannot build this transmission with just a socket set.
Mandatory Specialty Tools:
- Dial Indicator & Magnetic Base: Used to measure input shaft endplay. The 4L65E requires an endplay between 0.010' and 0.020'. Incorrect endplay leads to immediate planetary failure.
- Clutch Spring Compressor: Essential for safely disassembling and reassembling the 3-4 and forward clutch drums.
- Inch-Pound Torque Wrench: The valve body to case bolts must be torqued to exactly 97 in-lbs (11 Nm). Overtightening will warp the valve body and cause cross-leaking; undertightening leads to pressure loss.
- Feeler Gauges: For checking clutch pack clearances. The 3-4 clutch pack should generally be set to 0.040' - 0.070' of clearance depending on the specific friction material used (e.g., Raybestos Z-Pak).
If you do not own these tools and are unwilling to purchase or rent them, the replacement route is the only safe option.
Step 6: The Final Decision Matrix
Use this matrix to make your final determination based on your specific situation.
| Scenario | Recommended Action | Reasoning |
|---|---|---|
| Pan shows burnt friction material only; hard parts intact. | DIY Rebuild | Core is highly salvageable. Upgrades can be installed easily on the bench. |
| Shattered sun shell or exploded planetary carrier. | Pro Rebuild or Reman | Requires extensive case cleaning to remove metal shards; high risk of debris left in cooler lines. |
| Cracked transmission case or stripped bellhousing threads. | Reman Replacement | Core is structurally compromised. Sourcing a bare, machined case is cost-prohibitive. |
| Vehicle is a daily driver; downtime must be under 48 hours. | Reman Replacement | Bolt-in solution minimizes vehicle downtime compared to a multi-day bench rebuild. |
Conclusion
Deciding between a 4L65E transmission rebuild and a remanufactured replacement ultimately comes down to the condition of your core, your budget, and your mechanical patience. The 4L65E remains one of the most serviceable and rewarding transmissions to rebuild at home, provided you respect the strict torque specs, endplay tolerances, and mandatory valve body upgrades. However, if your teardown reveals catastrophic hard part destruction or you lack the precision measuring tools, investing in a warrantied remanufactured unit is the smartest path forward to keep your LS-powered machine on the road for years to come.