The Foundation of a Successful DIY Transmission Rebuild
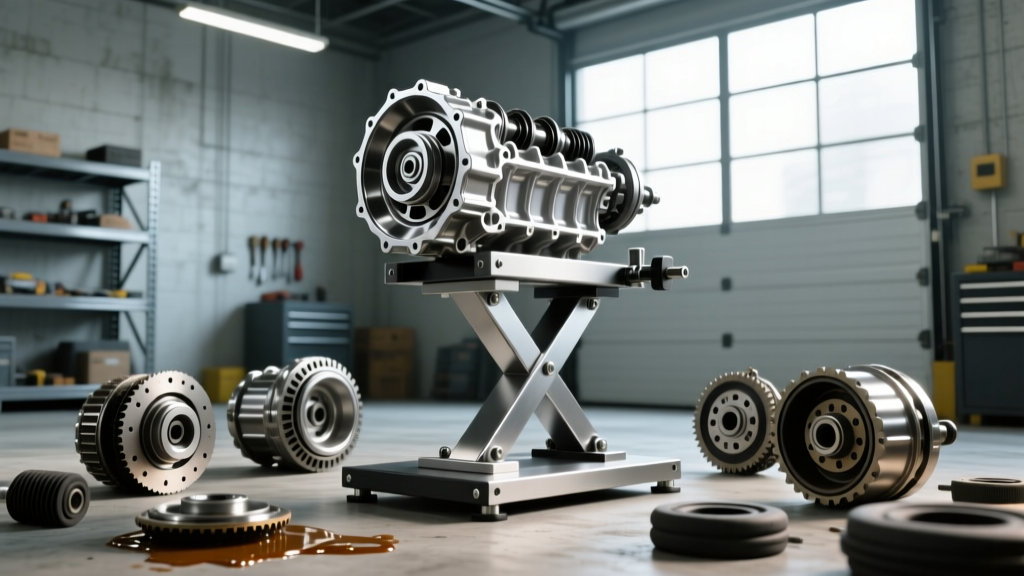
Embarking on a DIY transmission rebuild is one of the most rewarding and cost-effective projects an automotive enthusiast can tackle in 2026. However, the difference between a frustrating, knuckle-busting weekend and a smooth, professional-grade rebuild often comes down to ergonomics and workspace setup. While many hobbyists attempt to rebuild automatic transmissions on a standard workbench or by jury-rigging an engine stand, investing in a dedicated transmission stand for rebuilding is a non-negotiable step for serious DIYers.
A proper stand provides 360-degree rotation, secure bellhousing mounting, and optimal height adjustment. This allows you to carefully stage clutch packs, inspect valve bodies, and torque pump bolts without fighting gravity or risking a cracked aluminum casing. In this comprehensive buyer's guide and DIY tutorial, we will compare the best mounting solutions on the market and provide expert tips for leveraging your stand during a rebuild.
Why Standard Engine Stands Fail for Transmissions
Before diving into our top picks, it is crucial to understand why a standard engine stand with a generic adapter plate is often inadequate for modern automatic transmissions. Transmissions like the GM 6L80 or the ZF 8HP have deep, complex bellhousings and protruding input shafts.
- Center of Gravity: Transmissions are tail-heavy. Mounting one on a standard 4-arm engine stand pushes the center of gravity far beyond the base, creating a severe tipping hazard.
- Input Shaft Damage: Standard adapters often lack the depth to clear the torque converter hub and input shaft, forcing DIYers to rest the shaft on the stand's central post, which can bend the shaft or damage the internal stator support.
- Fluid Containment: Rebuilding requires constant cleaning. Dedicated transmission fixtures feature integrated drain trays and lower-profile saddles that allow you to rotate the unit upside down without fluid pooling in the bellhousing.
2026 Comparison: Top Transmission Stands & Fixtures
Below is a comparison of the most reliable transmission holding fixtures available for home shops. Pricing reflects early 2026 market averages.
| Model / Setup | Max Capacity | Bellhousing Compatibility | Avg. Price (2026) | Best Application |
|---|---|---|---|---|
| OTC 5726 Transmission Holding Fixture | 1,000 lbs | Universal (Requires specific adapter plates) | $380 - $420 | High-volume DIYers & Pro Shops |
| Sunex 31A Telescoping Stand | 1,000 lbs | Adjustable Saddle / Chain Mount | $260 - $290 | Heavy-duty trucks (Allison 1000) |
| OEMTOOLS 23976 Fixture | 1,000 lbs | Universal Bracket System | $210 - $240 | Budget-conscious hobbyists |
| Engine Stand + ATP Adapter Plate | 2,000 lbs (Stand dependent) | Specific to plate (e.g., GM 6-bolt) | $140 - $180 (Plate only) | Occasional single-model rebuilds |
Source reference: Tool specifications and pricing data aggregated from OTC Tools and major automotive retailers like Summit Racing.
Our Top Recommendation: The OTC 5726
For the dedicated DIYer, the OTC 5726 remains the gold standard. Its worm-gear rotation mechanism allows you to lock the transmission at any angle—a critical feature when installing delicate check balls into a valve body or measuring clutch pack clearances with a feeler gauge. When paired with the correct GM or Ford adapter plate, it perfectly supports the 235 lb dry weight of a 6L80 without flexing.
DIY Rebuild Tips: Maximizing Your Stand's Potential
Owning the right transmission stand for rebuilding is only half the battle. How you utilize it dictates the quality of your build. Follow these expert procedures to ensure a flawless rebuild.
1. Proper Mounting and Torque Specifications
When bolting your transmission to the adapter plate, you are threading into the aluminum bellhousing. Stripping these threads is a catastrophic and costly mistake.
- M10 x 1.5 Bolts: Torque to 35 lb-ft.
- M12 x 1.75 Bolts: Torque to 50 lb-ft.
2. Valve Body and Check Ball Staging
One of the most anxiety-inducing parts of a rebuild is installing the valve body and ensuring the check balls don't drop into the case.
- Rotate the stand so the valve body face is pointing straight up (12 o'clock position).
- Use a dab of petroleum jelly (Vaseline) to hold the 1/4" steel or plastic check balls in their respective locations on the spacer plate.
- As noted in the Sonnax Technical Resources library, petroleum jelly dissolves safely into the ATF upon first startup, unlike heavy greases that can clog delicate solenoid screens.
3. Clutch Pack Clearance Checks
When assembling the 3-5-R clutch pack on a 4L60E or the 1-2-3-4 pack on a 6L80, you must verify snap-ring clearances. Rotate the stand so the transmission is perfectly level. Use a dial indicator mounted to a magnetic base on the stand's frame to measure the travel of the clutch piston. A typical clearance spec ranges from 0.040" to 0.070" depending on the specific clutch module. Gravity will falsely seat the friction discs if the case is tilted, leading to inaccurate measurements and subsequent burnt clutches.
Model-Specific Mounting Nuances
Different transmissions require distinct approaches when securing them to a rebuilding fixture.
GM 4L60E / 4L80E
These units utilize a traditional, relatively shallow GM bellhousing pattern. A standard flat adapter plate works perfectly. Ensure you remove the torque converter before mounting to the stand to reduce weight and prevent the front pump gears from binding if the unit is rotated aggressively.
GM 6L80 / 8L90
The 6L80 features a much deeper bellhousing to accommodate the integrated TCM (Transmission Control Module) and deeper torque converter. If using a universal fixture, you must use a deep-cone adapter or stack heavy-duty steel spacers between the plate and the bellhousing. Failing to do so will cause the adapter's central post to crush the TCM connector or bend the input shaft.
ZF 8HP (Chrysler / BMW / Audi)
The ZF 8HP series uses a metric, non-traditional bellhousing pattern that rarely fits domestic adapter plates. DIYers rebuilding a ZF 8HP70 (common in Ram 1500s and Chargers) often need to source a specific ZF-compatible adapter ring or carefully fabricate a custom steel plate. The dry weight is roughly 205 lbs, well within the limits of standard 1,000 lb stands, but the awkward center of gravity requires a wide-base fixture like the Sunex 31A to prevent tipping.
Cost Breakdown: DIY Stand vs. Professional Labor
Let's contextualize the cost of a transmission stand for rebuilding within the broader scope of transmission repair costs in 2026.
- Professional Rebuild Labor: $1,500 - $2,800 (plus $800 - $1,500 for a master rebuild kit with billet upgrades).
- Remanufactured Unit: $2,200 - $4,000 (plus core charge and shipping).
- DIY Setup Cost: $350 (OTC Stand) + $60 (Adapter Plate) + $450 (Master Kit with Solenoids).
By investing $410 into a proper stand and fixture setup, you eliminate the ergonomic barriers of a DIY rebuild. The stand pays for itself on the very first job by saving you the $1,500+ professional labor fee. Furthermore, the stand becomes a permanent, depreciating asset in your home garage, useful for holding differentials, transfer cases, and engine blocks in future projects.
Final Verdict
Do not compromise your $500 master rebuild kit by attempting to assemble it on a wobbly workbench or an unsafe, tipped-forward engine stand. For most DIYers tackling domestic automatics, the OTC 5726 paired with the correct application-specific adapter plate offers the best balance of safety, precision, and value. Secure your transmission, lock the rotation gear, and take your time—precision is the ultimate currency in transmission rebuilding.