Completing a successful transmission oil cooler installation is a massive victory for your vehicle's longevity, but it is only the beginning. Without a dedicated maintenance routine, even the best stacked-plate coolers can become restricted, and poorly monitored fittings can leak, leading to catastrophic gearbox failure.
Whether you are towing heavy loads with a GM 6L80, navigating city traffic in a ZF 8HP45, or pushing a Ford 10R80 to its limits, your transmission relies entirely on the thermal management provided by your cooling system. As of 2026, modern automatic transmissions operate with incredibly tight hydraulic tolerances. A drop in fluid volume from a slow leak, or a spike in temperature from a debris-clogged cooler, can cause irreversible clutch pack glazing and torque converter shudder.
This beginner-friendly guide bridges the gap between your initial setup and long-term reliability. We will walk you through the exact maintenance protocols, torque specifications, and diagnostic routines required to keep your auxiliary or OEM replacement cooler functioning at peak efficiency.
The Critical First 500 Miles: Post-Installation Break-In
The most common point of failure in any aftermarket cooling setup occurs during the initial break-in period. Thermal cycling—where the transmission fluid heats up and cools down repeatedly—causes metal fittings and rubber hoses to expand and contract. This can easily loosen improperly torqued connections.
Verifying Fitting Torque Specifications
Beginners often overtighten fittings, which can crack aluminum cooler housings or strip threads. Conversely, undertightening leads to weeping fluid that burns on the exhaust. After your first 500 miles, put the vehicle on a lift or secure jack stands and verify your fittings using a calibrated torque wrench.
- AN-6 Aluminum Fittings (3/8" hose): Torque to 12-14 ft-lbs.
- AN-8 Aluminum Fittings (1/2" hose): Torque to 18-20 ft-lbs.
- 3/8" SAE Inverted Flare (OEM hard lines): Torque to 15-20 ft-lbs.
- NPT Threaded Ports: Never use standard Teflon tape, which can shred and block the transmission's valve body. Use a liquid PTFE thread sealant like Permatex 56521 High-Temperature Thread Sealant and torque to manufacturer specifications (typically 25-30 ft-lbs for 1/4" NPT brass into aluminum).
For more on proper fitting assembly, always consult the Derale Performance technical guidelines or your specific cooler manufacturer's documentation.
Airflow Management and Fin Cleaning
Mounting a cooler behind the grille or bumper exposes it to road debris, bugs, mud, and winter road salt. A clogged cooler cannot dissipate heat, no matter how large its surface area is. The cleaning method you use depends heavily on the internal architecture of your cooler.
Stacked-Plate vs. Plate-and-Fin vs. Tube-and-Fin
If you installed a heavy-duty stacked-plate cooler (like the popular Tru-Cool LPD4590), the internal plates are brazed together and highly durable, but the external fins are still susceptible to bending. For plate-and-fin or tube-and-fin coolers (such as the Derale Series 8000), the fins are often corrugated aluminum and much more fragile.
- Dry Brushing: Always start with a soft-bristle nylon brush to dislodge dry leaves, pollen, and large insects. Brush in the direction of the fins (usually vertically) to prevent bending.
- Chemical Cleaning: Apply a dedicated HVAC coil cleaner or a foaming automotive degreaser. Let it sit for 5 to 10 minutes to break down oily road film and bug acids.
- Low-Pressure Rinse: Use a garden hose with a wide fan nozzle. Never use a high-pressure power washer. Pressures above 1,500 PSI will instantly crush the aluminum fins of a tube-and-fin cooler, creating dead zones where air cannot pass through.
Hose Integrity and Clamp Inspections
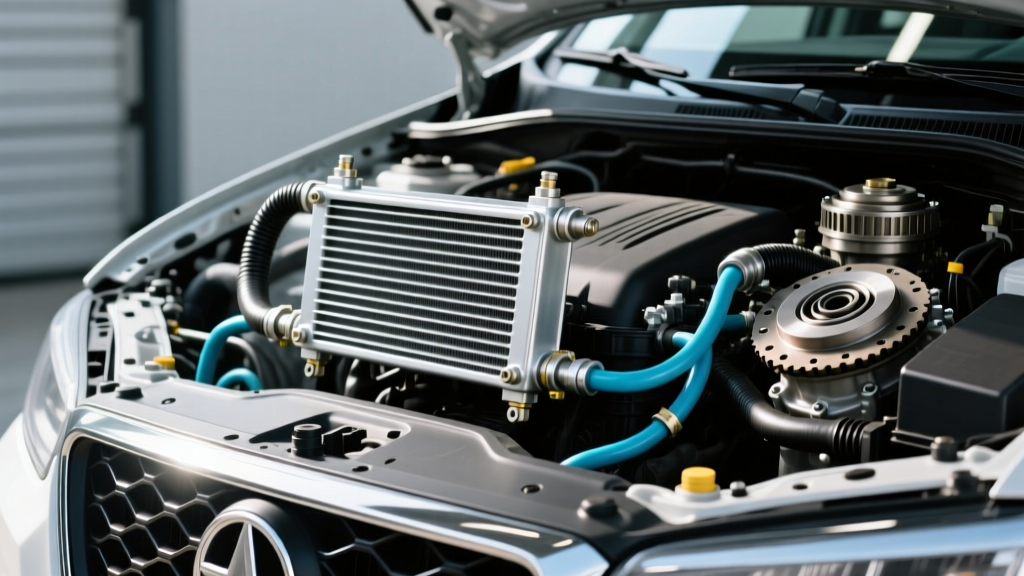
Transmission fluid operates under high pressure (often 150-250 PSI in the cooler circuit under heavy load) and extreme heat. The rubber hose connecting your hard lines to the cooler must be specifically rated for this environment.
Ensure your hoses meet the SAE J1532 standard for Transmission Oil Cooler Hose. Standard fuel line or emissions hose will swell, blister, and eventually burst when exposed to hot synthetic transmission fluid. During your bi-annual maintenance checks, squeeze the hoses. If they feel spongy, excessively hard, or show micro-cracking near the barb fittings, replace them immediately.
Pro-Tip on Clamps: Ditch the standard worm-gear clamps. They can cut into the rubber hose over time and lose tension as the hose compresses. Upgrade to constant-tension spring clamps or high-quality stainless-steel T-bolt clamps, which maintain uniform pressure through thousands of thermal cycles.
Fluid Diagnostics: Reading the Cooler's Output
Your transmission cooler is the final stop before fluid returns to the transmission pan. Checking the fluid at the cooler return line gives you an unfiltered look at the internal health of your gearbox. Pull the return line off the transmission (or use a sampling valve if installed) and evaluate the fluid against this diagnostic chart.
| Fluid Color | Odor | Diagnostic Meaning | Required Action |
|---|---|---|---|
| Bright Red / Translucent | Slightly Sweet / Chemical | Healthy fluid, cooler is flowing properly. | Continue standard maintenance intervals. |
| Dark Brown / Opaque | Burnt Toast / Acrid | Fluid has oxidized due to chronic overheating. Cooler may be restricted or undersized. | Flush system, verify cooler airflow, consider upgrading to a larger stacked-plate unit. |
| Milky / Strawberry Milkshake | No distinct odor | Coolant intrusion. Internal failure of the OEM radiator transmission cooler. | Stop driving immediately. Replace radiator, bypass OEM cooler, flush transmission. |
| Gray / Metallic Sheen | Normal / Slightly Metallic | Clutch material or bearing wear circulating through the cooler. | Drop pan, inspect for debris, flush cooler backwards to prevent trapping particles. |
The Reverse-Flush Protocol: Clearing Debris Traps
If your transmission experiences a failure—such as a burnt clutch pack or a shattered torque converter clutch (TCC)—the cooler becomes a massive debris trap. The internal passages of a plate-and-fin cooler are notorious for catching friction material. If you replace the transmission but do not properly flush the cooler, the new unit will be contaminated within the first 100 miles.
According to Sonnax technical resources on transmission line failures, simply running new fluid through the cooler in the normal direction of flow is insufficient. You must perform a reverse-flush.
Step-by-Step Reverse Flushing
- Disconnect both the supply and return lines from the transmission.
- Connect a pressurized flushing machine (or a DIY flush tank using compressed air regulated to 40 PSI and a dedicated solvent like Lubegard Automatic Transmission Flush) to the return line at the cooler.
- Push the fluid and air backwards through the cooler, exiting out of the supply line into a clear catch bucket.
- Cycle the air and solvent in short bursts (3 seconds on, 3 seconds off) to create a turbulent scrubbing action inside the cooler tubes.
- Continue until the fluid exiting the supply line is completely clear and free of dark particulate.
Auxiliary Fan and Electrical Maintenance
Many modern auxiliary coolers, especially those mounted in front of the A/C condenser or in custom bumper locations, rely on dedicated 10-inch or 12-inch PWM (Pulse Width Modulation) electric fans. These fans are controlled by thermal switches or standalone controllers that monitor fluid temperature.
During your maintenance routine, inspect the electrical connections. Road salt and moisture cause rapid galvanic corrosion on standard spade connectors. Clean the terminals with electrical contact cleaner and apply a dielectric grease to seal out moisture. Test the fan operation by grounding the thermal switch or using the controller's manual override feature to ensure the fan spins up to its maximum RPM before you hit the road for a heavy towing season.
Summary: Your Ongoing Maintenance Schedule
A successful transmission oil cooler installation protects your drivetrain, but proactive maintenance ensures that protection lasts. By adhering to a strict schedule—verifying torque specs at 500 miles, cleaning the fins every spring, inspecting SAE-rated hoses annually, and reverse-flushing after any internal transmission work—you will easily extend the life of your 6L80, ZF 8HP, or 10R80 by hundreds of thousands of miles. Treat your cooling system with the same respect you give your engine's oiling system, and your transmission will reward you with flawless, heat-free performance.