The Physics of Clutch Bedding in Off-Road Drivetrains
Off-road drivetrains endure a unique spectrum of abuse, from the high-RPM shock loads of motocross tracks to the low-speed, high-torque grind of deep mud and rock crawling. When upgrading or replacing your drivetrain components, understanding how to break in new clutch assemblies is the single most critical factor in determining their lifespan. Bedding is not merely a 'warm-up' period; it is a controlled metallurgical and thermal process. During break-in, the microscopic asperities (high points) on the friction material and the mating steel or aluminum surfaces are worn down to create a perfectly matched contact patch. Skipping this process or executing it improperly leads to immediate glazing, severe chatter, and catastrophic premature failure.
According to friction material engineers at EBC Brakes, the initial heat cycles dictate the resin curing process in organic and Kevlar-based friction plates. If the clutch is subjected to extreme slip before the resin has fully outgassed and seated, the surface turns to glass, permanently ruining the friction coefficient.
Wet Multi-Plate Clutch Bedding (Sport ATVs)
Application: Yamaha YFZ450R, Honda TRX450R, and KTM SX-F Models
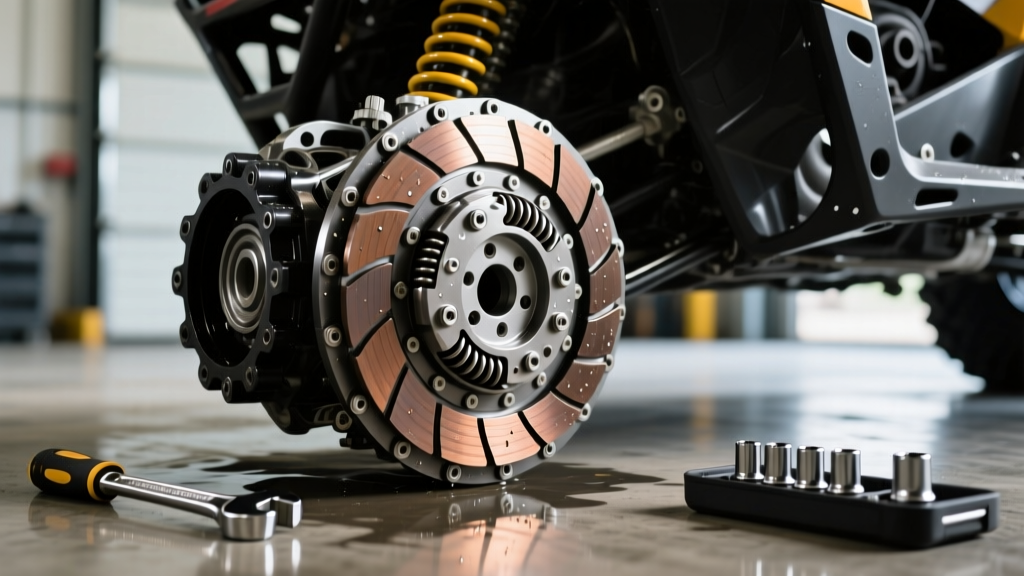
Sport ATVs and performance quads rely on wet multi-plate clutch systems bathed in engine oil. Whether you are installing an OEM replacement kit, an EBC SRC (Sintered) heavy-duty kit, or a complete Hinson Racing billet basket and fiber combo, the break-in protocol requires precision.
Step 1: Installation and Torque Verification
Before bedding, the hardware must be secured to exact factory specifications. Using an impact wrench on a clutch hub nut will often strip the mainshaft threads or warp the pressure plate. Use a dedicated clutch holding tool and a calibrated torque wrench.
- Yamaha YFZ450 / YFZ450R: Clutch boss locknut requires exactly 59 lb-ft (80 Nm).
- Honda TRX450R: Clutch center locknut requires 76 lb-ft (103 Nm).
- KTM 450 SX-F: Clutch basket nut typically requires 44 lb-ft (60 Nm) with a specific threadlocker.
Step 2: Fluid Selection and Priming
Never use automotive oils labeled 'Energy Conserving' or 'Resource Conserving.' These contain Molybdenum-based friction modifiers that will cause your new ATV clutch to slip instantly. You must use a JASO MA or MA2 certified 4-stroke motorcycle/ATV oil (e.g., Maxima MTL 75W-80 or Honda GN4 10W-40). After filling, let the engine idle for 5 minutes to allow the oil to penetrate the tight clearances between the new friction and steel plates.
Step 3: The 'Slip-and-Grip' Heat Cycle Method
Take the ATV to a flat, open dirt area. The goal is to generate moderate heat without overwhelming the friction material.
- Ride at 50% throttle in 2nd or 3rd gear.
- Lightly pull the clutch lever to induce a controlled slip for 2 to 3 seconds, then release it smoothly to let the plates grab.
- Repeat this slip-and-grip process 10 to 15 times. You should smell a slight 'hot oil' odor, but never a sharp, acrid burning smell (which indicates glazing).
- Allow the engine and cases to cool completely (about 20-30 minutes). This cool-down phase is when the friction resins set and harden into their final operational state.
CVT Primary and Secondary Clutch Bedding (UTVs)
Application: Polaris RZR XP 1000, Can-Am Maverick X3, Yamaha YXZ1000R
Modern UTVs predominantly use Continuously Variable Transmissions (CVTs). In a CVT, the 'clutch' consists of a primary drive clutch (with movable sheaves and weights) and a secondary driven clutch, connected by a high-tensile aramid drive belt. Breaking in a new CVT belt and freshly machined or cleaned sheaves is entirely different from a wet clutch.
Sheave Preparation: The Secret to Belt Life
According to off-road drivetrain specialists at Rocky Mountain ATV/MC, installing a new belt onto glazed or dirty sheaves is the leading cause of belt failure. Before installing the new belt, the inner V-angles of both the primary and secondary aluminum sheaves must be scuffed.
- Use a maroon Scotch-Brite pad wrapped around a wooden dowel to lightly scuff the sheave faces in a circular motion.
- Wipe down the sheaves thoroughly with acetone or a dedicated brake parts cleaner to remove all aluminum dust, grease, and old rubber residue.
- Ensure the secondary clutch is compressed and locked in the open position using the manufacturer's alignment tool before sliding the new belt on.
The 50-Mile Belt Seating Protocol
A new CVT belt (such as a Gates RPM Extreme or EPI Performance belt) is manufactured with a specific V-angle that may not perfectly match your worn sheaves right out of the box. The break-in process wears the belt's outer rubber jacket to perfectly mirror your specific clutch geometry.
For the first 50 miles, avoid Wide-Open Throttle (WOT) and avoid heavy towing or deep mud. Ride at 25% to 75% throttle, varying your speed constantly. This variation forces the primary sheave to open and close repeatedly, ensuring the belt wears evenly across its entire contact patch. If you hit WOT on mile one, the belt will slip against the unseated sheave, generating enough heat to melt the rubber compound or snap the internal cords.
Break-In Parameters by Drivetrain Type
| Vehicle Category | Clutch System | Break-In Duration | Throttle Constraint |
|---|---|---|---|
| Sport ATV (450cc) | Wet Multi-Plate | 15-20 Heat Cycles | 50% Max (Controlled Slip) |
| Utility ATV (700cc+) | Wet / Centrifugal | 30 Minutes Riding | 75% Max (No Lugging) |
| Performance UTV | CVT Belt & Sheave | 50-100 Miles | 75% Max (Vary Speed) |
| Youth ATV (110cc) | Dry Centrifugal | 10-15 Minutes | Light Load Only |
Critical Adjustments: Cable Free-Play and Hydraulics
A massive variable in the break-in equation is clutch actuation. As new friction plates bed in and compress, the physical distance between the pressure plate and the lifter changes. If you are running a manual cable-actuated clutch on a sport ATV, you must check the free-play at the lever after every single heat cycle during the break-in process.
Maintain exactly 1/8 to 1/4 inch of free-play at the lever perch. If the cable is too tight, the clutch will ride the lever, causing a micro-slip at high RPMs. This micro-slip generates intense localized heat, glazing the plates before the break-in is even complete. For UTVs or modified ATVs with hydraulic clutch lines, ensure the system is bled of all air, and verify that the master cylinder pushrod has the correct clearance to allow full fluid return to the reservoir.
Common Mistakes That Cause Immediate Glazing
- Lugging the Engine: Riding at full throttle in a high gear at very low RPMs puts immense torque load on the clutch plates, causing them to slip and overheat rather than bite.
- Mud and Water Intrusion: Breaking in a new clutch while submerged in deep mud or water prevents the necessary friction heat from generating. The water acts as a coolant and a contaminant, leading to a spongy, poorly bedded clutch.
- Ignoring Steel Plate Warpage: If you reused old, blued, or warped steel separator plates with new friction plates, the new material will only contact the high spots of the steel plates, resulting in a 40% loss of surface area and instant slipping.
2026 Performance Upgrade Costs & Considerations
As we navigate the 2026 off-road season, the cost of high-performance clutch components has stabilized, but the technology has advanced. Upgrading to a Hinson billet aluminum clutch basket for a Yamaha YFZ450R will cost between $380 and $450, while a complete EBC Dirt Racer clutch kit (fibers and steels) runs roughly $130 to $160. For UTV owners, a premium Gates RPM Extreme CVT belt costs around $180 to $220. While these prices represent a premium over OEM paper-based clutches and standard rubber belts, the sheer durability and heat resistance of Kevlar, carbon-fiber, and sintered bronze materials make them mandatory for aggressive trail riding, duning, and racing. Invest the time in the break-in process, and these components will easily outlast the machine they are installed in.