Decoding Powersports Clutch Symptoms: The First Step to a Fix
Motorcycle and ATV clutch systems endure extreme abuse. Unlike passenger cars, powersports machines utilize wet multi-plate clutches bathed in engine oil, subject to high-RPM launches, mud, and aggressive trail riding. When your Honda CRF450R starts slipping on a steep hillclimb, or your Honda TRX420 Rancher ATV creeps forward while in gear with the lever pulled, the culprit is often improper free play or worn friction material. Before tearing into the engine cases, mastering the use of a dedicated clutch adjuster tool is the most critical diagnostic step you can take.
As of 2026, modern sintered bronze and Kevlar-lined friction plates offer immense grip, but they are entirely dependent on precise mechanical clearances. A maladjusted clutch doesn't just ruin your ride; it accelerates wear on the clutch basket, pushrod, and release bearing. Let's break down how to diagnose symptoms and execute precise adjustments using the right tools.
Common Motorcycle and ATV Clutch Symptoms
- Clutch Slipping: Engine RPMs climb without a proportional increase in wheel speed. Often caused by an over-tightened cable (eliminating free play) or worn friction plates.
- Clutch Dragging: The bike or ATV wants to move forward even with the lever fully depressed. This points to excessive cable slack, notched clutch basket fingers, or warped steel separator plates.
- Clutch Chatter: A violent shuddering during initial engagement. Usually the result of contaminated oil, uneven clutch spring tension, or a warped pressure plate.
- Lever Sponginess: Specific to hydraulic systems; indicates air in the lines or degraded master cylinder seals.
Why You Need a Dedicated Clutch Adjuster Tool
Many beginners attempt to adjust their clutch pushrod or cable barrel nuts using slip-joint pliers or an ill-fitting crescent wrench. This is a catastrophic mistake. The knurled aluminum or brass adjuster nuts on modern dirt bikes and ATVs are easily deformed, leading to seized threads and snapped adjuster screws.
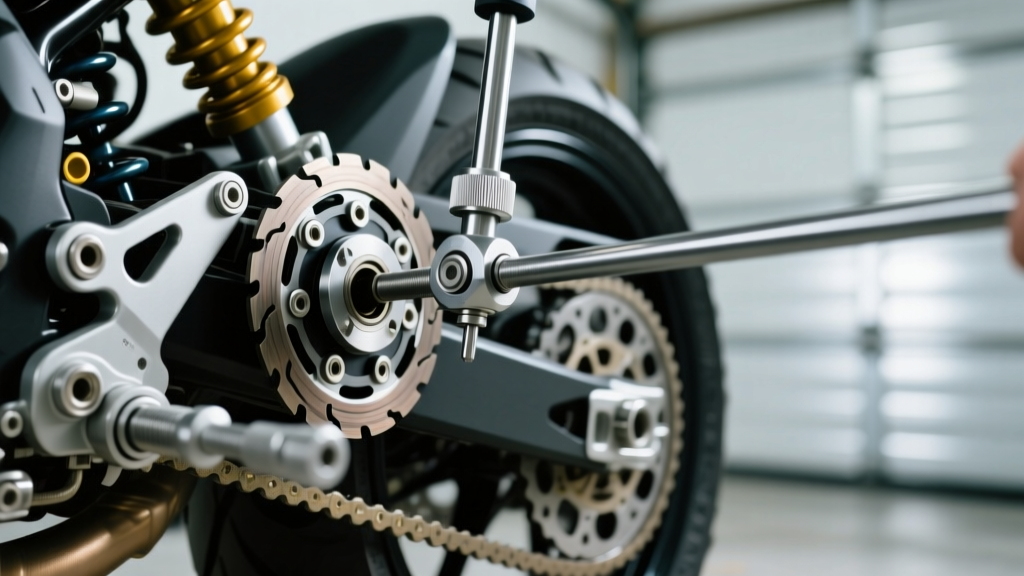
A proper clutch adjuster tool—such as the Motion Pro cable adjuster wrench or an OEM-specific pushrod T-handle—ensures that torque is applied evenly across the flats or knurling of the nut. For cable systems, inline barrel adjusters require a thin-profile spanner wrench to hold the locknut while turning the adjuster. For engine-case pushrod adjusters (common on Harley-Davidson Sportsters and many Honda ATVs), you need a specialized socket or T-handle that can reach into the recessed engine casing without stripping the 10mm or 12mm locknut.
Step-by-Step: Adjusting a Cable-Actuated Pushrod Clutch
The majority of dirt bikes and utility ATVs use a cable that pulls a mechanical arm on the engine case, which in turn pushes a rod into the clutch pack. Adjustment happens at two points: the handlebar lever and the engine case pushrod.
Phase 1: Handlebar Lever Free Play
Using your inline barrel clutch adjuster tool, dial in 10mm to 15mm of free play at the tip of the clutch lever. This ensures that when the engine heats up and the cable expands, the clutch is not being partially pulled open by a shrinking cable jacket.
Phase 2: Engine Case Pushrod Adjustment (The Core Task)
This is where precision matters. Follow this exact sequence to prevent clutch slip and pushrod damage:
- Access the Adjuster: Remove the clutch inspection cover on the engine case. You will see a threaded adjuster screw locked in place by a jam nut (typically 12mm).
- Loosen the Locknut: Use a 12mm wrench to break the locknut free while holding the center screw stationary.
- Seat the Pushrod: Using a flathead screwdriver or the specific OEM T-handle tool, turn the adjuster screw clockwise until you feel light resistance. This means the pushrod has just made contact with the clutch pressure plate.
- Back Off for Clearance: From the seated position, turn the adjuster screw counter-clockwise exactly 1/8 to 1/4 of a turn. This creates the vital air gap required for the clutch to fully engage without slipping.
- Secure the Locknut: Hold the center screw perfectly still and tighten the locknut. Torque spec: Typically 5 to 7 Nm (44-62 in-lbs). Do not over-torque, or you will strip the threads in the aluminum actuator arm.
Expert Warning: Never adjust the pushrod so tightly that it pre-loads the pressure plate. Even a microscopic amount of pre-load will cause the throw-out bearing to spin continuously against the pressure plate, leading to catastrophic engine case failure and melted friction plates within a few hours of riding.
Troubleshooting Hydraulic Clutch Systems (ATVs & Street Bikes)
Many modern side-by-side ATVs (like the Polaris RZR series) and street motorcycles use hydraulic clutch actuation. Here, a 'clutch adjuster tool' is replaced by a hydraulic bleed kit and a syringe. Hydraulic systems do not have manual free-play adjustments; the master cylinder self-adjusts as the friction plates wear. If your hydraulic lever feels spongy or the clutch is dragging, the issue is fluid degradation or air ingress.
Hydraulic Fluid Compatibility Chart
Using the wrong fluid will instantly destroy the internal EPDM rubber seals of your master and slave cylinders. Always verify your system requirements before bleeding.
| Clutch System Brand | Required Fluid Type | Boiling Point (Dry/Wet) | Common Applications |
|---|---|---|---|
| Brembo / Nissin | DOT 4 or DOT 5.1 | 446°F / 311°F | Most Japanese & European street bikes, KTM dirt bikes |
| Magura | Mineral Oil (Magura Blood) | N/A (Hygroscopic limits differ) | Many European dirt bikes, custom hydraulic ATV conversions |
| Hayes / Shimano | Mineral Oil or DOT | Varies by specific model year | Specialty ATVs and aftermarket hydraulic thumb clutches |
Source reference for hydraulic standards: Brembo Motorcycle Technical Documentation.
When bleeding a hydraulic clutch, always use a vacuum bleeder tool to pull fluid from the slave cylinder nipple up to the master cylinder reservoir. This forces trapped air bubbles upward, against their natural tendency to rise, ensuring a rock-solid lever feel.
When Adjustment Fails: Inspecting the Hard Parts
If you have perfectly adjusted the cable with your clutch adjuster tool, bled the hydraulics, and the motorcycle or ATV is still slipping or dragging, it is time to drain the oil and pull the clutch cover. As an automotive and powersports technician, you must rely on metrology, not guesswork.
Measuring Friction and Steel Plates
You will need a digital Vernier caliper and a machinist's flat glass plate to diagnose internal wear.
- Friction Plate Thickness: Measure the friction material at three points on each plate. For a typical Honda or Yamaha 450cc dirt bike, the standard thickness is 3.0mm. The service limit is usually 2.6mm. If any plate falls below 2.6mm, the entire friction pack must be replaced.
- Steel Plate Warpage: Place each steel separator plate on a flat glass surface. Attempt to slide a 0.1mm feeler gauge under the plate. If the gauge passes through, the plate is warped and will cause clutch drag, preventing the bike from shifting into neutral while idling.
- Clutch Basket Notching: Run your fingernail along the aluminum fingers of the inner hub and outer basket. If your nail catches in deep grooves (notches) worn by the steel plates, the clutch pack cannot expand and contract freely. Minor notches can be smoothed with a flat file, but deep notching requires a new billet aluminum basket (such as those from Hinson or Rekluse, costing between $250 and $400).
Clutch Spring Free-Length Specs
Clutch springs lose their tension over time due to extreme heat cycles. Measure the free length of the springs with your calipers. A standard spring might measure 45.2mm when new. If the service limit is 43.0mm and your springs measure 42.5mm, they are fatigued. Replacing a set of heavy-duty clutch springs costs roughly $30 to $50 and is the cheapest, most effective way to cure a slipping clutch under heavy ATV load.
Reassembly Torque Sequence: When reinstalling the pressure plate, always tighten the spring bolts in a crisscross (star) pattern to ensure even clamping force. The standard torque specification for most M6 clutch spring bolts is 10 Nm (88 in-lbs). Always apply a medium-strength threadlocker (like Loctite 243) to prevent the bolts from vibrating loose into the engine sump.
Final Thoughts on Powersports Clutch Maintenance
Mastering the clutch adjuster tool is the hallmark of a competent powersports owner. Whether you are setting the pushrod clearance on a trail-ridden ATV or bleeding the DOT 4 fluid on a canyon-carving street bike, precision is everything. By adhering to exact torque specifications, utilizing the correct metrology tools, and understanding the symbiotic relationship between the cable, pushrod, and wet clutch pack, you will ensure crisp shifting, maximum traction, and a significantly longer lifespan for your machine's drivetrain.