The Definitive Hydraulic Clutch System Inspection Checklist
Whether you are maintaining a factory Tremec T56 Magnum in a modern muscle car, troubleshooting a Porsche G50 transaxle, or debugging a standalone hydraulic setup in a 2026 EV restomod conversion, the hydraulic clutch system demands rigorous maintenance. Unlike cable-driven linkages of the past, modern hydraulic systems rely on incompressible fluid to transfer pedal force to the release bearing. When this system degrades, symptoms range from minor gear crunch to catastrophic drivetrain lock-up.
While many enthusiasts focus solely on mechanical wear (clutch discs and flywheels), the hydraulic circuit is often ignored until failure occurs. At the heart of preventive maintenance is a comprehensive inspection checklist and a timely clutch fluid change. Glycol-based brake and clutch fluids are inherently hygroscopic, meaning they absorb moisture from the atmosphere over time. This moisture not only lowers the fluid's boiling point—causing vapor lock under heavy track use—but also accelerates internal corrosion within the master and slave cylinders. Below is our expert-level, four-phase inspection checklist designed for professional technicians and advanced DIYers.
Phase 1: Hydraulic Hardware & Master Cylinder Inspection
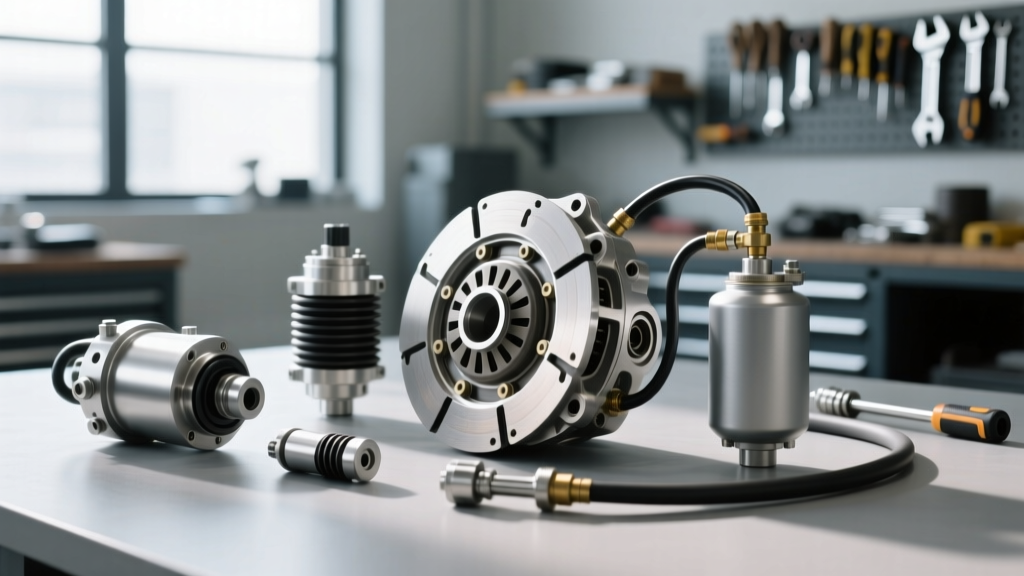
The first step in any clutch system diagnostic is a physical audit of the hydraulic hardware. Begin at the master cylinder (MC) and trace the system to the slave cylinder.
- Master Cylinder Pushrod Lash: Verify the clearance between the clutch pedal pushrod and the MC piston. Most OEM specifications call for 0.1mm to 0.5mm of freeplay. Zero lash can cause the MC compensating port to remain blocked, leading to pressure buildup, premature release bearing wear, and clutch slip.
- Bore Sizing & Upgrades: If you are running a high-clamp-load twin-disc setup (e.g., McLeod RST or RXT), verify your MC bore size. Upgrading from a factory 0.750-inch bore to a 0.875-inch bore increases fluid volume and hydraulic pressure, ensuring complete disengagement of stiff pressure plates.
- Hard Lines and Flex Hoses: Inspect the PTFE-lined stainless steel flex hoses and OEM rubber lines. Rubber hoses older than five years are prone to internal swelling, which acts as a restrictor and causes slow pedal return. Replace any hose showing micro-cracking or surface checking.
- Slave Cylinder Boot & Weep Hole: For external slave cylinders (common on older Ford Mustangs and Jeep Wranglers), pull back the rubber boot. Any presence of fluid indicates seal failure. For Concentric Slave Cylinders (CSC) found inside the bell housing of most modern GM and Chrysler manuals, inspect the inspection cover for drips. Note: CSC replacement requires transmission removal, making proactive fluid maintenance critical.
Phase 2: Pedal Dynamics & Diagnostic Matrix
Before cracking open a bleeder valve, evaluate the pedal dynamics. Measure the clutch pedal freeplay at the pad; it should typically fall between 3/8-inch and 1/2-inch (10mm-13mm). Use the diagnostic matrix below to correlate pedal symptoms with specific hydraulic or mechanical faults.
| Symptom | Probable Cause | Verification / Corrective Action |
|---|---|---|
| Spongy / Soft Pedal | Air in system / Fluid boil | Perform a complete clutch fluid change and pressure bleed. |
| Pedal Sinking to Floor | Master cylinder internal bypass | Inspect for fluid in cabin footwell; bench bleed or replace MC. |
| Gear Crunch (3rd/4th) | Incomplete disengagement | Check MC pushrod lash; verify fluid level; upgrade to larger bore MC. |
| Pedal Vibration / Chatter | Worn release bearing / Flywheel runout | Inspect mechanical fork; measure flywheel runout (must be <0.005"). |
| Slow Pedal Return | Swollen flex hose / Weak MC spring | Crack bleeder valve; if fluid bursts out, replace the flex hose. |
Phase 3: The Critical Clutch Fluid Change (Deep Dive)
The most overlooked element of the clutch system inspection checklist is the clutch fluid change. Because clutch systems share fluid reservoirs with the brake system (or use standalone DOT fluid reservoirs), they are subjected to the same chemical degradation. According to AA1Car's diagnostic guidelines, moisture contamination is the leading cause of premature slave cylinder seal failure.
Understanding Fluid Degradation
DOT 3, DOT 4, and DOT 5.1 fluids are glycol-ether based and hygroscopic. As they absorb water, their boiling points plummet. If you are tracking your vehicle or towing heavy loads, the heat transferred from the bell housing into the CSC can literally boil contaminated fluid, resulting in a sudden loss of hydraulic pressure (vapor lock).
| Fluid Type | Dry Boiling Point (New) | Wet Boiling Point (3.7% Water) | Application Notes |
|---|---|---|---|
| DOT 3 | 401°F (205°C) | 284°F (140°C) | Standard OEM; avoid for high-performance. |
| DOT 4 | 446°F (230°C) | 311°F (155°C) | Standard for most performance manuals. |
| DOT 4 LV | 446°F (230°C) | 338°F (170°C) | Required for modern ABS-integrated delay valves. |
| DOT 5.1 | 500°F (260°C) | 356°F (180°C) | Track use; requires more frequent flushing. |
| DOT 5 (Silicone) | 500°F (260°C) | N/A (Non-Hygroscopic) | NEVER USE in clutch systems; highly compressible. |
Execution: Pressure Bleeding vs. Gravity Bleeding
When executing your clutch fluid change, gravity bleeding is often insufficient for modern systems equipped with complex routing or clutch delay valves (CDVs). As noted in Hagerty's technical maintenance guides, pressure bleeding from the master cylinder reservoir down to the slave is the most reliable method to evacuate trapped micro-bubbles.
- Tooling: Use a pneumatic or manual power bleeder (e.g., Motive Products 0108) pressurized to 12-15 PSI. Do not exceed 15 PSI, or you risk blowing out the MC reservoir cap seal.
- Concentric Slave Cylinder (CSC) Nuance: CSCs (like those on the GM LS/LT platforms) are notorious for trapping air at the highest point of the bell housing. To properly bleed a CSC, the vehicle must be on a lift with the rear suspension hanging to rotate the pinion angle, or the bleeder valve must be clocked to the absolute highest vertical position.
- Torque Specs: When reinstalling hard line inverted flare nuts, torque to 11-14 lb-ft. Banjo bolts at the master cylinder should be torqued to 15-18 lb-ft with new crush washers to prevent micro-leaks.
Phase 4: Mechanical Linkage & Drivetrain Verification
Once the hydraulic circuit is verified and the clutch fluid change is complete, the final phase of the inspection checklist involves the mechanical linkage. Even with perfect hydraulic pressure, a worn pivot ball or damaged release fork will ruin clutch modulation.
- Release Fork & Pivot Ball: Through the inspection window, check the release fork for scoring where it rides on the pivot ball. Apply a high-temp moly grease (like Torco MPZ) to the pivot point. Never use standard chassis grease, as it will melt and contaminate the clutch friction material.
- Release Bearing Preload: Modern hydraulic systems are designed to be 'zero-lash' at the bearing face, meaning the slave cylinder piston is constantly in light contact with the release fork. Verify that the slave cylinder pushrod or internal spring is providing adequate forward pressure to prevent the bearing from rattling against the pressure plate fingers at idle.
- Clutch Delay Valve (CDV) Audit: Many modern OEMs (BMW, Subaru, GM) install CDVs in the hydraulic line to 'smooth' engagement for novice drivers. During your inspection, locate the CDV (often hidden inside the hard line or flex hose junction). For performance driving, removing or bypassing the CDV is highly recommended to achieve instantaneous clutch response and reduce syncro wear during aggressive downshifts.
Expert 2026 Maintenance Interval Tip: Do not wait for a spongy pedal to dictate your maintenance schedule. For dedicated track cars or heavy-duty towing rigs, perform a full clutch fluid change every 12 months or 15,000 miles. For daily-driven street vehicles using high-quality DOT 4 Low Viscosity fluid, a 24-month interval is sufficient to protect your slave cylinder seals and prevent costly transmission-out repairs.
By adhering to this comprehensive clutch system inspection checklist, you eliminate the guesswork from drivetrain diagnostics. Whether you are chasing a vibration, curing a gear crunch, or simply performing a routine clutch fluid change, understanding the symbiotic relationship between hydraulic pressure, fluid chemistry, and mechanical leverage is the key to a bulletproof manual transmission setup.