The Anatomy of a Failing V-Twin Clutch
Executing a successful DIY Harley clutch change requires more than just a primary gasket kit and a torque wrench; it demands a forensic approach to symptom diagnosis. Harley-Davidson’s wet clutch systems, housed within the primary chaincase, are bathed in oil and subjected to the immense low-end torque characteristic of American V-Twins. Whether you are wrenching on a 2015 Twin Cam 103 or a modern 2024 Milwaukee-Eight (M8) 117, misdiagnosing the root cause of clutch failure will result in premature wear of your new friction plates.
Before you drain the primary fluid and pull the derby cover, you must accurately map your symptoms. A slipping clutch and a dragging clutch require entirely different mechanical interventions. Below is the definitive troubleshooting and replacement guide for Harley-Davidson clutch systems.
Symptom Diagnosis: Slip, Drag, and Chatter
1. Clutch Slipping Under Load
Slipping occurs when the friction plates fail to lock against the steel plates, resulting in a flare in RPMs without a corresponding increase in road speed. This is most noticeable in high gears (5th or 6th) under heavy throttle or when climbing grades.
- Root Cause A (Fluid Contamination): Using automotive motor oil containing friction modifiers (like energy-conserving API grades) instead of dedicated V-Twin primary fluid or 20W-50 motorcycle oil.
- Root Cause B (Spring Fatigue): Traditional coil clutch springs lose tension over time due to heat cycling. If your springs measure less than the service manual’s free-length specification, they cannot apply adequate clamping force.
- Root Cause C (Glazed Friction Plates): Aggressive slipping burns the paper/cork friction material, creating a glass-like surface that sheds oil rather than gripping.
2. Clutch Dragging and Creeping
If your motorcycle lunges forward when shifting into first gear with the clutch lever fully pulled, or if the bike creeps forward at stoplights, you have a dragging clutch. This makes neutral difficult to find and causes harsh, clunking shifts.
- Root Cause A (Warped Steel Plates): Excessive heat can warp the steel separator plates. When the clutch is disengaged, the warped plates continue to rub against the friction plates, transferring rotational energy to the transmission input shaft.
- Root Cause B (Notched Clutch Basket): The aluminum tabs on the inner clutch hub or outer basket can develop deep notches from the tangs of the plates. This prevents the plates from separating freely when clutch pressure is released.
- Root Cause C (Cable Misadjustment): Insufficient free play at the clutch lever prevents the throw-out bearing from fully compressing the clutch pack.
3. Chatter and Grabby Engagement
Chatter manifests as a violent shuddering when releasing the clutch lever from a stop. According to Barnett Clutches, this is frequently caused by uneven clamping pressure, contaminated friction surfaces, or a warped pressure plate that applies force asymmetrically across the clutch pack.
Teardown: Primary Inspection and Measurement
Once the primary chaincase is drained and opened, the diagnostic phase moves to physical measurement. Do not skip this step. Installing a new clutch kit into a damaged basket or behind warped steel plates is a waste of time and money.
| Component | Measurement Type | Service Limit (Minimum/Maximum) | Action Required |
|---|---|---|---|
| Friction Plates (Paper/Cork) | Thickness | 0.126 inches (3.20 mm) | Replace entire pack if any plate is below limit. |
| Steel Separator Plates | Flatness / Warp | 0.006 inches (0.15 mm) max warp | Replace if warped; check for bluing/heat spots. |
| Clutch Springs (Coil) | Free Length | 1.97 inches (50.0 mm) minimum | Replace springs if sagging; consider heavy-duty upgrade. |
| Outer Basket / Inner Hub | Tang Notching | Visual / Tactile catch | File minor burrs; replace basket if notches exceed 1mm. |
The Milwaukee-Eight (M8) Diaphragm Spring Difference
If you are performing a clutch replacement on a 2018+ M8 Softail, you will encounter an Assist and Slip (A&S) clutch system. Instead of traditional coil springs, this system uses a single diaphragm spring and a ramp mechanism that increases clamping force under acceleration while reducing lever effort during deceleration. Diagnosing slip on an A&S clutch often points to a worn ramp mechanism or a fatigued diaphragm spring, requiring specific OEM replacement parts rather than generic coil-spring kits. Enthusiasts on HD Forums frequently note that using the wrong primary fluid viscosity in M8 A&S systems can cause the slipper ramps to engage prematurely, mimicking a worn clutch.
Step-by-Step DIY Harley Clutch Change Execution
Preparation and Soaking
The most common DIY mistake is installing dry friction plates. Paper and cork-based friction plates must be soaked in your chosen primary chaincase lubricant for a minimum of two hours prior to installation. Installing them dry will cause immediate glazing and burning upon the first engagement.
Hub Removal and Basket Inspection
To remove the clutch hub, you must secure the primary drive. Use a primary chain locking bar or wrap a heavy-duty strap wrench around the rear tire (with the bike in gear) to prevent the drivetrain from turning. The clutch hub nut is a standard right-hand thread but requires significant torque to break free. Once removed, slide the hub off the transmission mainshaft. Inspect the splines on the mainshaft and the inner hub for wear or rounding. Apply a thin layer of molybdenum disulfide assembly paste to the splines during reassembly to prevent galling.
Stacking the Clutch Pack
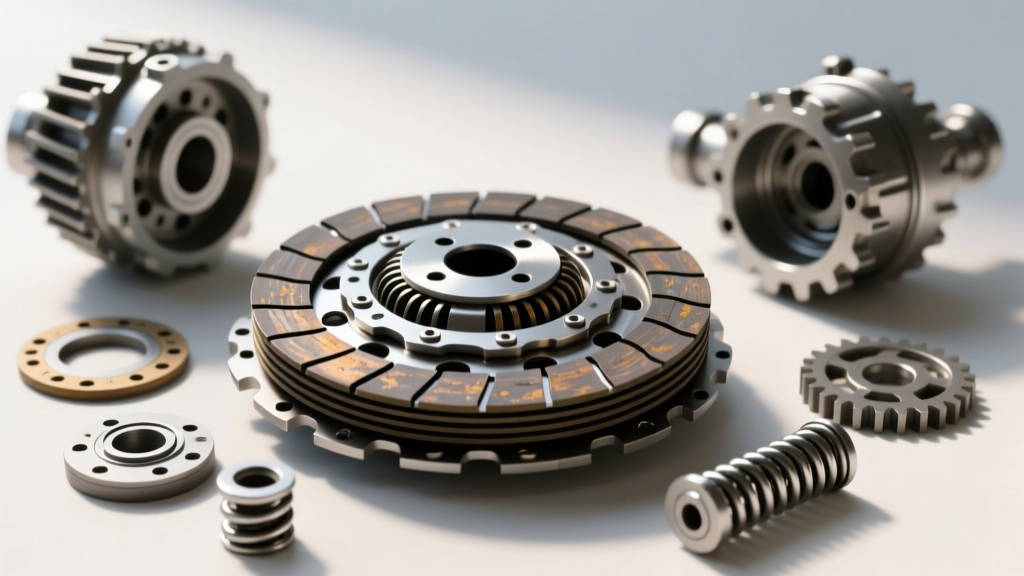
Alternate the installation of friction and steel plates. Ensure the tangs of the plates slide smoothly into the basket without forcing them. If you have to hammer the plates in, your basket is too notched and must be replaced. The final plate installed should be a friction plate, followed by the pressure plate.
Critical Torque Specifications and Fluids
Harley-Davidson primary components require precise torque values to prevent catastrophic failure at highway speeds. Always use a calibrated torque wrench.
Essential Torque Specs (Twin Cam / M8 Touring Coil Spring)
- Clutch Hub Nut: 70 - 80 ft-lbs (Apply 3 drops of Red Loctite 271 to the threads).
- Clutch Spring Retainer Screws (Tensioner): 84 - 108 in-lbs (Note: inch-pounds, NOT foot-pounds).
- Derby Cover Screws: 84 - 108 in-lbs (Use a star pattern to prevent warping the cover).
- Primary Chaincase Fill: 32 oz (Softail) / 38 oz (Touring). Fill to the bottom of the clutch basket diaphragm with the bike upright and level.
Note: Always verify specifications against the specific year and model service manual, as compensator sprocket and primary chain tensioner shoe torque values vary slightly between Dyna, Softail, and Touring chassis.
Post-Rebuild Troubleshooting
After reassembling the primary, filling it with high-quality V-Twin primary oil (such as AMSOIL V-Twin Synthetic or Harley-Davidson Formula+), and adjusting the clutch cable to 1/16" - 1/8" free play at the lever, test the system.
Issue: The Clutch Lever Feels Extremely Stiff
If you installed an aftermarket heavy-duty clutch spring kit (like a Screamin' Eagle High-Capacity kit) to handle increased horsepower, lever effort will increase. However, if the lever is bind, check your clutch cable routing. A cable that is bent too sharply or pinched under the fuel tank will create immense friction. Ensure the cable adjuster at the transmission side is properly lubricated.
Issue: Primary Chain Rattle After Rebuild
If you hear a metallic slapping sound from the primary at idle, your primary chain tension may be incorrect, or the hydraulic tensioner shoe (on models equipped with it) is failing to take up the slack. With the engine off, check the primary chain deflection. It should have 3/8" to 1/2" of up-and-down play in the middle of the bottom run. Adjust the tensioner shoe accordingly and re-torque the lock nut.
By methodically diagnosing your symptoms, measuring your internal clearances, and adhering to strict torque specifications, your DIY Harley clutch change will yield a smooth, predictable, and durable engagement for thousands of miles. For high-quality replacement friction plates and heavy-duty springs, consult reputable suppliers like J&P Cycles to ensure you are getting components engineered specifically for the high-torque demands of American V-Twins.