Understanding the 'Clutch Pedal Gone to Floor' Failure Matrix
Experiencing a sudden loss of hydraulic resistance is one of the most alarming manual transmission failures a driver can face. When your clutch pedal gone to floor scenario occurs, the immediate result is an inability to disengage the clutch, leaving you stranded in gear or unable to shift. However, simply replacing the master cylinder without understanding the root cause is a mistake that leads to repeat failures. As of 2026, while mild-hybrid manual transmissions utilize more complex electronic-hydraulic actuators, the vast majority of manual vehicles on the road still rely on traditional hydraulic and mechanical linkages.
To properly diagnose this failure, we must look beyond the puddle of fluid. True clutch diagnosis by symptom requires analyzing the feel of the pedal, the noises preceding the failure, and the vibrations transmitted through the chassis. This step-by-step how-to guide will walk you through isolating the exact point of failure, whether it is an internal hydraulic bypass, a shattered throw-out bearing, or a fractured release fork.
Step 1: The 'Pump and Hold' Pedal Feel Test
Before crawling under the vehicle, you must diagnose the hydraulic system by feel. The behavior of the pedal when pumped provides the first major clue regarding internal versus external system failures.
- The Slow Sink (Internal Bypass): Press the clutch pedal to the floor and hold steady pressure. If the pedal slowly rises back up on its own, or if you feel it 'squirm' and bypass under your foot, the primary cup seal inside the clutch master cylinder has failed. Fluid is bypassing internally from the high-pressure side back to the reservoir.
- The Dead Drop (External Leak or Air): If the pedal drops to the floor instantly with zero resistance and stays there, you have a catastrophic external leak (blown slave cylinder seal or ruptured flex hose) or severe air ingestion in the hard lines.
- The Notchy Bind (Mechanical Failure): If the pedal feels gritty, notchy, or binds halfway down before suddenly dropping to the floor with a 'clunk', the issue is likely mechanical. The release fork may be binding on a worn pivot ball, or the pressure plate diaphragm springs have collapsed.
Step 2: Auditory and Tactile Symptom Correlation
A clutch pedal that goes to the floor rarely happens in a vacuum. By correlating the pedal drop with specific noises and vibrations, you can pinpoint internal bellhousing failures without pulling the transmission.
Pre-Failure Chatter and Vibrations
If you experienced severe clutch chatter (a violent shuddering felt through the seat and steering wheel upon engagement) in the weeks leading up to the pedal dropping to the floor, the root cause is likely a fractured pressure plate or shattered friction disc hub. When the torsional dampening springs inside the clutch disc fail, or the pressure plate casting cracks under thermal stress, the mechanical linkage can over-extend. This over-extension pushes the slave cylinder past its maximum stroke, blowing the internal seal and dumping fluid onto the bellhousing.
The 'Crunch' or 'Snap' Auditory Cues
Listen carefully to the exact moment the pedal hit the floor. Did you hear a metallic snap or crunch from the transmission tunnel? According to technical service bulletins from Schaeffler Automotive Aftermarket (the parent company of LuK clutches), a loud snap followed by a dead pedal almost always indicates a fractured release fork or a sheared pivot ball stud. In high-torque applications like the Tremec T56 Magnum or Getrag G56, the stamped steel release forks can fatigue and snap at the pivot point, instantly removing all mechanical resistance from the hydraulic system.
Step 3: Visual Inspection of Hydraulic Components
Once the feel and sound have narrowed down the suspects, proceed with a visual inspection of the hydraulic circuit. Always use a high-quality DOT 4 fluid (such as Motul RBF 600 or Castrol SRF) for high-temperature manual transmission applications, as standard DOT 3 fluid boils and degrades rapidly in the confined space of a modern engine bay.
Master Cylinder Pushrod and Bore Inspection
Inspect the clutch master cylinder (CMC) at the firewall. Look for fluid weeping from the pushrod boot. If fluid is present, the rear seal has failed. Next, check the pushrod free-play. Most manufacturers specify 0.5mm to 1.0mm of free-play between the pedal arm and the CMC pushrod. If an aftermarket adjustable pushrod was installed with zero clearance, the master cylinder piston never fully returns to the resting position, blocking the compensation port and causing massive hydraulic pressure buildup that eventually blows the slave cylinder seals.
Tracing the Hard Lines and Flex Hoses
Follow the 3/8-inch or 7/16-inch hard lines from the firewall to the transmission. Pay special attention to the rubber flex hose that bridges the gap between the chassis and the moving transmission. These hoses degrade internally, and the outer rubber jacket can hide a ruptured inner bladder. Use a 11mm or 12mm flare nut wrench to check the hard line fittings for moisture.
Step 4: Evaluating the Slave Cylinder (External vs. CSC)
The design of your slave cylinder dictates the complexity of the repair. External slave cylinders (common on older Honda, Mazda, and early GM F-body platforms) are easily visible on the outside of the bellhousing. If wet with DOT fluid, the rebuild or replacement is straightforward.
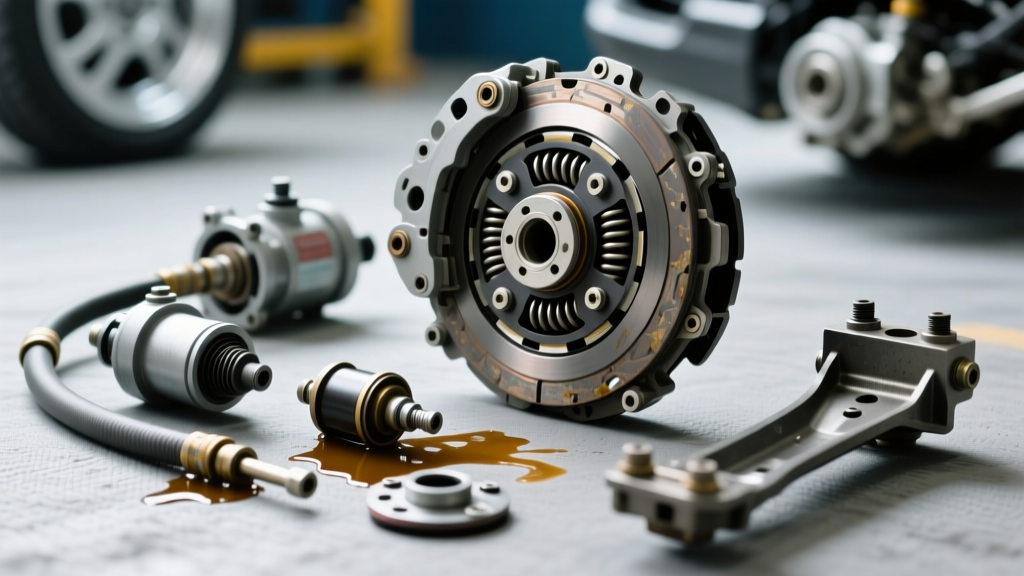
However, most modern manual vehicles utilize a Concentric Slave Cylinder (CSC), also known as an internal hydraulic release bearing. As detailed in FTE Automotive's clutch actuation engineering guides, CSC units combine the slave cylinder and throw-out bearing into a single unit that slides over the transmission input shaft. If a CSC fails and your clutch pedal goes to the floor, the fluid will be trapped inside the bellhousing. You will see fluid weeping from the bellhousing inspection cover or the rear main seal area. Warning: Never attempt to replace a CSC without also replacing the clutch disc and pressure plate, as the labor to remove the transmission is the primary cost driver.
Diagnostic Matrix: Symptom, Root Cause, and Repair Costs
| Preceding Symptom (Feel/Noise) | Failure Event (Pedal to Floor) | Probable Root Cause | 2026 Est. Parts Cost |
|---|---|---|---|
| Spongy feel, slow sink under pressure | Pedal stays on floor, no external fluid leak | Internal Master Cylinder Bypass (Cup Seal Failure) | $60 - $140 (CMC) |
| Violent chassis chatter upon engagement | Sudden drop, fluid inside bellhousing | Shattered Clutch Disc Hub / Over-stroked CSC | $250 - $600 (LuK RepSet PRO) |
| Metallic 'snap' from tunnel, notchy feel | Instant dead pedal, fluid level normal | Fractured Release Fork or Sheared Pivot Ball | $45 - $120 (Fork & Pivot) |
| Whirring/grinding noise that suddenly stops | Pedal drops, inability to shift into gear | Throw-out Bearing Cage Disintegration | $80 - $180 (CSC / Bearing) |
Step 5: Reassembly, Bleeding, and Critical Torque Specifications
Once the failed component is identified and replaced, proper reassembly and bleeding are critical to ensure the pedal feel is restored and the system does not fail again. Air trapped in the hydraulic lines will cause a spongy pedal that can eventually bottom out under heavy use.
Proper Bleeding Techniques
For systems with long, convoluted hard lines (such as the Ford Mustang GT or Chevrolet Corvette), gravity bleeding and standard pedal pumping are often insufficient to dislodge air bubbles trapped in the high points of the line. Use a reverse pressure bleeder (like the Motive Products Power Bleeder) to push fluid from the slave cylinder bleeder valve up to the master cylinder reservoir. This forces air upward, following its natural tendency to rise.
Critical Torque Specifications
When reinstalling components, adhere strictly to manufacturer torque specifications to prevent warping or leaks:
- Master Cylinder Firewall Nuts: 15 to 20 lb-ft. Over-torquing can crack the plastic reservoir or warp the aluminum bore.
- Hydraulic Line Flare Nuts: 11 to 15 lb-ft. Always use a flare nut wrench to avoid rounding the soft steel fittings.
- Bellhousing to Engine Block Bolts: Varies by platform. For GM LS/LT V8 engines, torque to 37 lb-ft. For Ford Modular/Coyote V8s, torque to 59 lb-ft. For Ford EcoBoost 4-cylinders, torque to 35 lb-ft.
- External Slave Cylinder Mounting Bolts: 15 to 25 lb-ft. Apply a medium-strength threadlocker (blue Loctite) to prevent vibration-induced backing out.
Conclusion
A clutch pedal gone to the floor is a definitive sign of system failure, but it is merely the final symptom of a deeper issue. By systematically diagnosing the problem through pedal feel tests, auditory correlation, and precise visual inspections, you can avoid the 'parts cannon' approach to repair. Whether you are dealing with a simple FTE master cylinder bypass or a catastrophic LuK concentric slave cylinder failure inside a Tremec bellhousing, understanding the interconnected symptoms of vibration, noise, and hydraulic pressure is the hallmark of expert-level manual transmission diagnostics. Always prioritize high-quality OE-equivalent replacement parts and rigorous bleeding procedures to ensure your manual transmission shifts flawlessly for the next 100,000 miles.