The Hidden Story in Your Old Friction Disc
Swapping a manual transmission clutch is rarely as simple as unbolting the old assembly and dropping in a replacement. When upgrading to high-capacity Dalton clutch kits for heavy-duty diesel trucks, track-prepped V8s, or modern EV-swaps, failing to read the outgoing clutch disc's wear pattern is a costly mistake. The old friction disc is a physical data logger. Its wear signatures reveal underlying drivetrain misalignments, hydraulic release bearing faults, or improper flywheel surfacing that will instantly destroy your new investment.
As of 2026, the explosion of EV manual-swaps utilizing electric crate motors means clutch discs face instantaneous, zero-RPM torque spikes. Standard organic discs with light marcel springs are routinely crushed under these loads. Upgrading to heavy-duty setups is mandatory, but diagnostics must come first. Below, we decode the critical wear patterns and outline the exact best practices for prepping your mating surfaces and fasteners.
Decoding the 4 Most Common Clutch Disc Wear Patterns
1. Asymmetric Radial Wear (Cone Wear & Runout)
If the friction material is worn heavily on one side of the disc's circumference, or if the inner radius shows severe wear while the outer edge is barely touched (or vice versa), you are dealing with a concentricity issue. This 'cone wear' is typically caused by excessive flywheel runout, a worn pilot bearing, or a bent transmission input shaft. According to Centerforce engineering guidelines, dial-indicator runout testing must be performed on the assembled crankshaft flange, not just the bare flywheel, to rule out crankshaft end-play and thrust bearing wear.
- Acceptable Runout Limit: 0.005 inches (0.127 mm) maximum at the friction surface.
- Corrective Action: Replace the pilot bearing (e.g., SKF or Timken sealed units) and check bellhousing alignment using a dial indicator on the input shaft bore.
2. Spline Galling and Hub Chatter
Inspect the inner hub splines of the old disc. If you see deep scoring, metal transfer (galling), or a 'stepped' wear pattern on the spline teeth, the disc is hanging up on the transmission input shaft. This prevents the clutch from fully disengaging or releasing smoothly, causing severe chatter upon takeoff. This is rampant in high-torque applications using 26-spline Tremec T56 Magnum or 10-spline GM T5 shafts.
- Root Cause: Lack of high-temperature molybdenum disulfide (moly) grease on the input shaft, or misalignment between the engine block and bellhousing.
- Corrective Action: Apply a microscopic layer of high-temp moly grease to the input shaft splines. Never over-apply, as excess grease will sling onto the friction material under centrifugal force, ruining the new Dalton clutch kit instantly.
3. Marcel Spring Collapse & Thermal Bluing
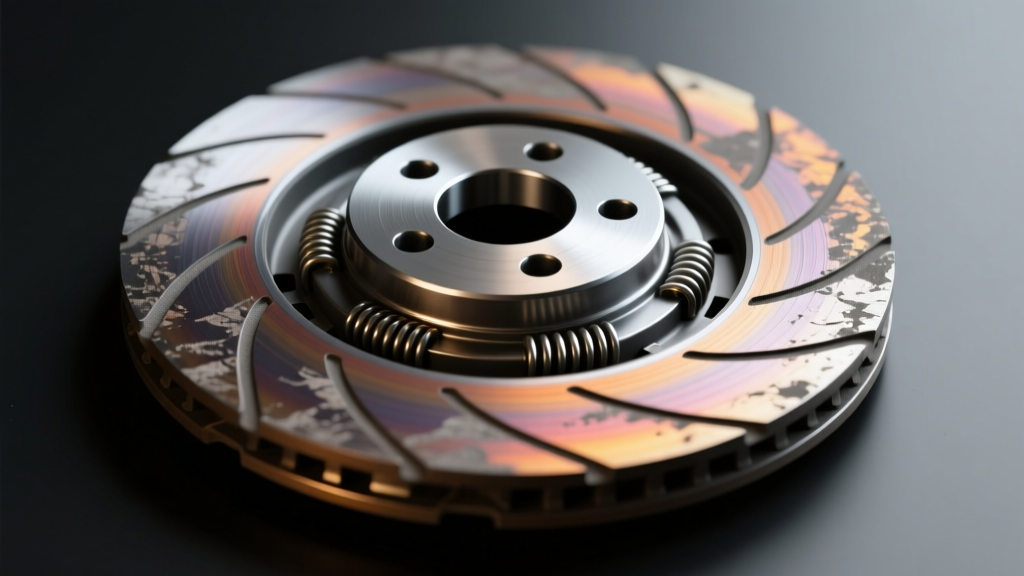
The 'marcel spring' is the thin, wavy steel plate riveted between the two friction faces. It provides progressive engagement. If the old disc shows severe bluing (oxidation from extreme heat) and the marcel spring is completely flattened or fractured, the clutch was subjected to excessive slip or insufficient clamping force. In 2026 EV-swaps producing 600+ lb-ft of torque at 0 RPM, standard marcel springs yield immediately. When transitioning to a rigid-hub or heavy-duty sintered iron Dalton setup, you must ensure the pressure plate's clamp load (diaphragm spring rating) matches the engine's torque curve to prevent slip-induced thermal destruction.
4. Torsional Damper Fatigue
Look closely at the coil springs housed within the disc's hub. If the springs are sagging, fractured, or if the window cutouts in the hub show impact marks, the torsional dampers have bottomed out. This indicates that the engine's harmonic vibrations (common in diesel engines or cross-plane V8s with aggressive camshafts) are exceeding the dampening capacity of the stock-style disc. Upgrading to a dual-disc or a heavy-duty single-disc with poly-cushion dampers is required.
Wear Pattern Diagnostic Matrix
| Wear Pattern | Visual Cue | Root Cause | Corrective Action Before Install |
|---|---|---|---|
| Cone / Asymmetric Wear | Uneven friction material depth radially | Flywheel runout, bad pilot bearing | Dial-indicate crank flange; max 0.005" runout |
| Spline Galling | Scored inner hub, metal transfer | Input shaft misalignment, dry splines | Check bellhousing bore; apply moly grease |
| Thermal Bluing | Blue/purple hue on steel marcel plate | Excessive slip, weak pressure plate | Upgrade clamp load; verify hydraulics |
| Edge Overhang | Unworn lip on outer edge of disc | Flywheel step-height mismatch | Measure flywheel step; machine to spec |
| Hub Spring Bottoming | Impact marks on hub windows | Harmonic vibration exceeds dampening | Upgrade to dual-disc or poly-cushion hub |
Flywheel Mating Surface: The RA Finish Secret
The most common reason for premature failure when installing heavy-duty Dalton clutch kits is ignoring the flywheel's RA (Roughness Average) surface finish. Many machine shops resurface flywheels to a mirror-like finish (10-15 RA) because it 'looks clean.' This is catastrophic for modern performance friction materials.
According to McLeod Racing's technical documentation, improper RA finish is the leading cause of warranty returns on sintered iron and cerametallic clutches. The friction material requires microscopic grooves to bite into the steel and shed heat.
- Organic / Kevlar Blends: Require a smooth 15 to 30 microinch (µin) RA finish.
- Sintered Iron / Cerametallic (Puck Style): Require a rougher 40 to 60 µin RA finish.
If you mate a sintered iron Dalton disc to a 15 RA mirror-finish flywheel, the disc will slip violently under load, glaze the friction material, and generate enough heat to warp the pressure plate diaphragm. Always instruct your machinist on the exact RA target based on your specific friction compound.
2026 Best Practices: Preload, Torque, and Sequencing
Modern manual swaps frequently utilize hydraulic release bearings (HRBs) rather than traditional mechanical throwout forks. Setting the correct air gap and preload is critical to prevent the bearing from riding on the pressure plate fingers, which causes parasitic drag and premature bearing failure.
Hydraulic Release Bearing Preload
Most aftermarket HRBs (such as those from Tremec or McLeod) require a static preload of 0.100" to 0.150" against the pressure plate diaphragm fingers when the transmission is fully bolted to the bellhousing. Measure this using a digital caliper and adjust the HRB piston shims or pushrod length accordingly before final assembly.
Critical Torque Specifications
Improper fastener torque leads to uneven clamping, which manifests as localized hot spots and warped pressure plates. Always use a calibrated torque wrench and follow these industry-standard baselines (verify with your specific OEM service manual):
- GM LS/LT Flywheel Bolts (TTY): 25 lb-ft + 50 degrees rotation. (Always use new OEM torque-to-yield bolts or aftermarket ARP equivalents with ARP Ultra-Torque lube).
- Ford 5.0L Coyote Flywheel Bolts: 65 lb-ft (use medium-strength threadlocker like Loctite 243 if not using OEM pre-applied patch).
- M8 x 1.25 Pressure Plate Bolts: 25 to 28 lb-ft. Tighten in a strict star/crisscross pattern, advancing only one turn per bolt to ensure the diaphragm spring seats evenly without binding.
- Bellhousing to Engine Block: 35 lb-ft. (Crucial for maintaining input shaft concentricity).
Final Verification and Break-In Protocol
Once the transmission is mated and the hydraulics are bled (using a vacuum bleeder to ensure zero air bubbles in the slave cylinder), perform a static engagement test. With the vehicle on a lift and the rear wheels free, start the engine, depress the clutch, and shift into 3rd gear. The wheels should stop spinning within 2-3 seconds, indicating complete disengagement. If they continue to spin, you have a spline bind, hydraulic air, or excessive flywheel step-height.
Expert Break-In Rule: When installing organic or Kevlar-based Dalton clutch kits, perform 500 miles of mixed city/highway driving, avoiding full-throttle pulls or forced downshifts. This allows the friction resin to outgas and properly mate to the flywheel's RA profile. Sintered iron and cerametallic puck-style clutches, however, require no traditional break-in; they are designed for immediate, aggressive engagement. For standardized friction testing metrics and thermal thresholds, refer to the SAE J2522 Dynamometer Test Procedure.
By treating the old clutch disc as a diagnostic tool rather than simple scrap metal, you ensure that your upgraded drivetrain components survive the immense torque demands of modern performance and EV-swap platforms. Never skip the dial-indicator runout test, respect the RA finish requirements, and torque every fastener to specification.