Understanding Motorcycle and ATV Clutch Systems
Whether you are riding a Kawasaki KX250 dirt bike, cruising on a Harley-Davidson Sportster, or tearing through trails on a Honda TRX400EX ATV, your machine likely relies on a Bowden-style clutch cable to actuate the clutch basket. For beginners, the clutch lever is just a mechanism to change gears. However, from a diagnostic perspective, the cable is the critical link between your hand and the transmission's friction plates. When clutch problems arise—ranging from slipping under heavy throttle to dragging when trying to find neutral—the root cause is often as simple as a stretched cable or improper adjustment.
In this beginner-friendly explainer, we will demystify clutch system diagnostics for two-wheeled and off-road vehicles. You will learn the exact mechanical symptoms of a failing clutch, the precise methodology for adjusting the clutch cable, and how to determine when internal components like friction plates and springs require replacement.
Recognizing the Symptoms of a Misadjusted Cable
Before grabbing your wrenches, you must accurately diagnose the symptom. A cable that is too tight or too loose will manifest in very distinct ways on the trail or street.
Clutch Slipping Under Load
If you are accelerating hard in third gear and the engine RPMs surge but your vehicle speed does not increase proportionally, your clutch is slipping. While worn friction plates are a common culprit, a cable with zero 'free play' is the most frequent beginner mistake. If the cable is too tight, it constantly pulls on the clutch actuator arm, preventing the clutch springs from fully clamping the friction and steel plates together. This microscopic gap causes immense friction heat, glazing the plates and burning up your transmission oil.
Clutch Dragging and Creeping
Conversely, if your motorcycle creeps forward even with the lever pulled entirely to the handlebar, or if you hear a loud 'clunk' and the bike stalls when shifting into first gear from a stop, your clutch is dragging. This means the cable is too loose (or stretched beyond its adjustment limit), and the actuator arm is not pulling the pressure plate far enough apart to disengage the friction surfaces. Dragging makes finding neutral nearly impossible and causes premature wear on your transmission shift forks and dog gears.
The Golden Rule: Understanding 'Free Play'
The secret to adjusting the clutch cable correctly lies in understanding 'free play.' Free play is the small amount of slack in the cable measured at the lever perch before the cable begins to pull on the engine's actuator arm. According to RevZilla's Common Tread technical guides, this slack is non-negotiable. It ensures that when the clutch springs expand due to heat, or as the friction plates wear down over time, the actuator arm can still return to its fully resting position.
Pro Mechanic Tip: The industry standard for clutch lever free play is between 2mm and 3mm (approximately 1/8 inch) measured at the pivot point of the lever, or about 10mm to 15mm of movement at the very tip of the lever before you feel resistance. Always consult your specific OEM service manual, as heavy V-Twins may require slightly more play than lightweight 250cc enduros.
Step-by-Step: Adjusting the Clutch Cable
Adjusting the clutch cable is a straightforward process that requires minimal tools. Here is your step-by-step framework for achieving perfect lever feel and clutch engagement.
Tools Required
- Feeler gauge set (for precise free play measurement)
- 10mm and 12mm open-end wrenches (for lower actuator locknuts)
- Needle-nose pliers (for stubborn barrel adjusters)
- Teflon-based cable lubricant
Step 1: Utilize the Handlebar Barrel Adjuster
For minor tweaks and on-the-fly adjustments, start at the handlebar. Locate the rubber dust boot on the clutch perch and slide it back to expose the threaded barrel adjuster. Loosen the locking ring by turning it counter-clockwise. Turn the barrel adjuster outward (away from the lever) to increase cable tension and reduce free play. Turn it inward to add slack. Once you achieve 2-3mm of play at the pivot, thread the locking ring down against the perch to secure it.
Step 2: The Lower Actuator Adjuster (For Major Slack)
If your barrel adjuster is threaded all the way out, your cable has stretched and requires adjustment at the engine case. Follow the cable down to the clutch actuator arm on the engine cover. You will see a threaded stud with a locking nut (usually 10mm or 12mm). Loosen the locknut, turn the adjuster screw to take up the excess slack until you feel slight resistance on the actuator arm, then back it off exactly one full turn to reintroduce your necessary free play. Hold the adjuster screw in place with a screwdriver or slot, and tighten the locknut to approximately 5-7 Nm to secure it.
Diagnostic Table: Symptoms vs. Adjustments
| Symptom | Likely Cable State | Adjustment Action Required |
|---|---|---|
| RPMs flare without acceleration (Slipping) | Too Tight (Zero Free Play) | Add slack via barrel or lower adjuster |
| Hard to find neutral / Clunking into gear | Too Loose (Excessive Free Play) | Remove slack to increase actuator pull |
| Lever feels incredibly stiff or notchy | Frayed Inner Wire / Dry Housing | Lubricate cable or replace if frayed |
| Lever pulls to bar but bike still creeps | Cable Maxed Out / Worn Plates | Check lower adjuster; inspect clutch pack |
When Adjusting the Clutch Cable Isn't Enough
As a beginner, it is vital to recognize when a cable adjustment is merely a band-aid for a deeper mechanical failure. If you have maxed out both the handlebar and lower adjusters, and the clutch is still slipping or dragging, you are facing internal clutch pack degradation.
Friction Plate Wear Limits
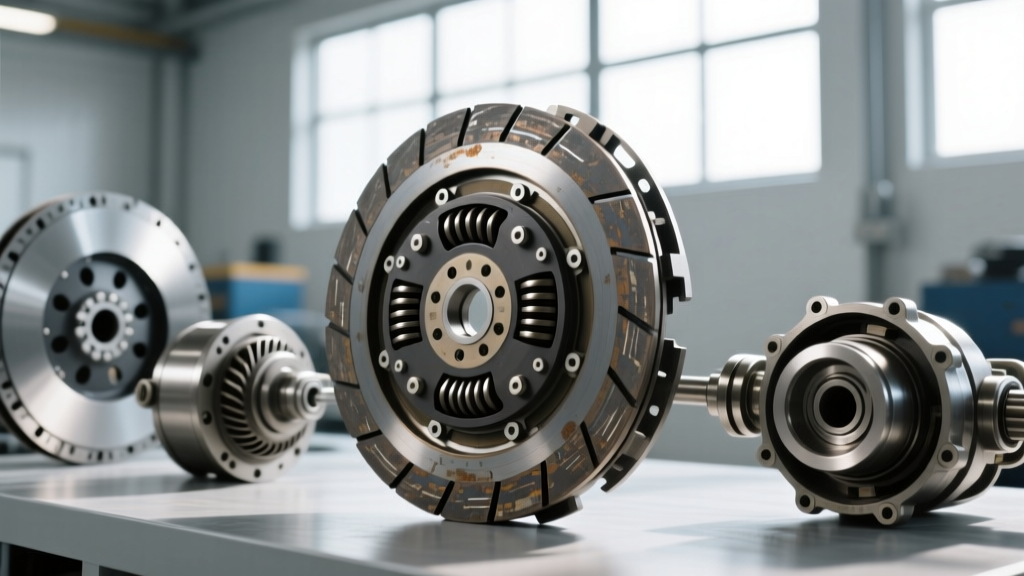
Friction plates are the sacrificial components in your clutch basket. They are lined with cork, Kevlar, or ceramic material. Over time, they wear thin. For example, on a popular platform like the Honda CRF250R, the standard OEM friction plate thickness is 3.0mm, with a strict service wear limit of 2.6mm. If your plates measure below 2.6mm using a set of digital calipers, no amount of cable adjustment will save you. You must replace the pack. High-performance replacements, such as EBC Brakes Motorcycle Clutch Kits (like the CK or DRC-HD series), typically cost between $80 and $130 and offer vastly superior bite and heat resistance compared to OEM cork plates.
Warped Steel Plates and Weak Springs
When a clutch slips severely and overheats, the friction plates transfer immense heat to the interleaved steel separator plates. This causes the steels to warp and develop a blueish heat tint. Warped steels will cause persistent clutch drag even with perfect cable adjustment. Furthermore, the clutch springs can suffer from 'heat sag.' Always measure your clutch springs against the OEM service manual. A standard spring might have a free length of 47.3mm, with a service limit of 45.5mm. If they are compressed beyond the limit, they cannot provide the necessary clamping force. Replacing a set of heavy-duty springs costs around $25 to $40 and is a mandatory step during any clutch rebuild.
Notched Clutch Baskets
If your clutch lever feels 'notchy' or you experience delayed disengagement, inspect the inner hub and outer basket fingers. The constant impact of the friction plate tabs can gouge deep notches into the soft aluminum basket. This prevents the plates from sliding apart smoothly when you pull the lever. Minor notches can be carefully filed smooth with a flat mill file, but deep gouges require a complete billet or cast aluminum basket replacement ($150 to $300).
Pro Maintenance: Lubrication and Routing
A properly adjusted cable will still fail prematurely if it is neglected. Moisture, dirt, and rust are the enemies of the Bowden cable. To maintain a buttery-smooth lever feel, you should lubricate your clutch cable at least once a season, or immediately after riding in deep water or mud.
Do not rely on aerosol sprays that evaporate quickly. Instead, use a dedicated pressure lubrication tool like the Motion Pro Cable Luber V2. This tool clamps over the cable housing and uses the pressure from an aerosol can of Teflon or silicone-based lubricant to force the fluid all the way through the housing, pushing out grime and coating the inner wire. Avoid petroleum-based greases, as they can cause the rubber linings inside modern cable housings to swell and bind.
Finally, pay attention to cable routing. Ensure the cable follows the OEM path, avoiding sharp kinks near the steering stem or contact with hot exhaust headers. A poorly routed cable will stretch unevenly and cause erratic clutch engagement, ruining the precise free play you just spent time dialing in.
Final Thoughts for Beginners
Mastering the art of adjusting the clutch cable is a foundational skill for any motorcycle or ATV owner. By understanding the relationship between lever free play, actuator arm movement, and clutch pack clamping force, you can diagnose issues before they lead to catastrophic transmission damage. Keep your feeler gauges handy, respect the OEM wear limits, and your machine will reward you with crisp shifts and flawless power delivery on every ride.