Diagnosing the Failure: How to Test Clutch Master Cylinder
Modern manual transmissions, from the Tremec TR-3450 to the ZF S6-53, rely on precise hydraulic actuation to move heavy clutch pressure plates. When shifts become notchy, or the pedal feels disconnected, the clutch master cylinder (CMC) is often the culprit. Before tearing into the firewall, you must confirm the diagnosis. Understanding how to test clutch master cylinder integrity saves hours of wasted labor and prevents misdiagnosing a worn slave cylinder or a damaged synchronizer.
The Pedal Sink Test (Internal Bypass)
The most common CMC failure is an internal seal bypass. To test this:
- Start the vehicle and leave it in neutral.
- Depress the clutch pedal fully and hold it steady against the floor.
- Shift into first or reverse gear.
- If the pedal slowly rises back toward your foot, or if you feel a 'pulsing' pushback as fluid bypasses the internal cup seal and returns to the reservoir, the master cylinder is internally compromised.
The Reservoir Drop Test (External vs. Internal Leaks)
Check the brake/clutch fluid reservoir. If the fluid level is dropping but the brake lines and calipers are bone dry, trace the CMC pushrod. A failing rear seal will leak DOT fluid directly into the cabin footwell, often pooling under the carpet near the pedal assembly. If the carpet is dry but fluid is missing, the master cylinder is likely bypassing fluid back into the reservoir tank during actuation, a hallmark of a scored cylinder bore.
Repair vs. Replacement: Component Selection Matrix
Rebuilding a clutch master cylinder with a $15 seal kit is rarely recommended for daily drivers or track cars. The aluminum or composite bores wear unevenly, and a new piston will not seal against a scored wall. As of 2026, complete assembly replacement is the industry standard. Below is a comparison of top-tier OEM and aftermarket options.
| Brand / Part Type | Example Part Number | Avg. Cost (USD) | Best Application | Material / Notes |
|---|---|---|---|---|
| FTE Automotive (OEM) | KG15024.0.1 | $110 - $160 | European (BMW, Porsche, VW) | Composite/Aluminum. Direct factory replacement. |
| Sachs (ZF Brand) | SH5005 | $65 - $95 | Domestic & Import Daily Drivers | High-grade polymer. Excellent seal longevity. |
| LuK (Schaeffler) | LMC425 | $50 - $85 | General Replacement / Budget | Cast aluminum. Good for light-duty applications. |
| Tilton / Wilwood | 78-Series | $180 - $250 | Motorsport / Heavy-Duty Track | Billet Aluminum. Adjustable pushrod, rebuildable. |
Note: Always consult your specific vehicle's service manual. For deep technical specifications on drivetrain compatibility, resources from Tremec and FTE Automotive provide excellent OEM baseline data.
Pre-Installation: The Mandatory Bench Bleed Procedure
The single biggest mistake DIYers and junior technicians make is installing a dry master cylinder. If you bolt up a dry CMC and pump the pedal, the internal seals will run dry against the bore, generating enough friction heat to permanently warp or tear the rubber cup seals within minutes.
Step-by-Step Bench Bleeding
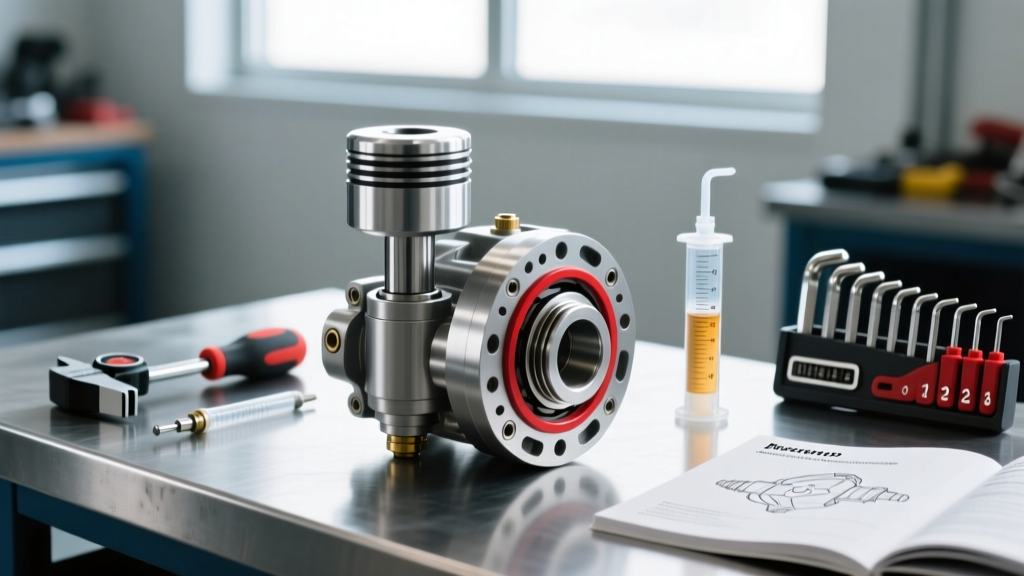
- Secure the Cylinder: Clamp the CMC body in a vise using soft jaws. Do not crush the composite or aluminum mounting flange.
- Fill the Reservoir: Fill the integrated or remote reservoir with fresh DOT 4 Low Viscosity (LV) or Bosch ESI6 fluid. Never use DOT 5 (Silicone) in a system designed for glycol-based fluids; it will swell the EPDM seals and cause total system failure.
- Submerge the Outlet: Attach a short piece of clear tubing to the outlet port and route the other end back into the reservoir fluid.
- Stroke the Pushrod: Using a blunt punch or dowel, slowly push the CMC pushrod in and let it return slowly. Do this 15 to 20 times.
- Verify Zero Bubbles: Continue until no micro-bubbles appear in the clear tube during the return stroke. Cap the outlet port immediately to prevent fluid loss.
Firewall Installation and Pushrod Calibration
Accessing the firewall nuts is often the most frustrating part of the job. In vehicles like the C5/C6 Corvette or Porsche 997, you may need to remove the under-dash HVAC ducting and the steering column support bracket to reach the 10mm or 12mm retaining nuts.
Torque Specifications
When reinstalling the CMC to the firewall, precision is key. Over-torquing can crack the composite housing or distort the bore, leading to immediate internal bypassing.
- Firewall Mounting Nuts (M8): 15 to 18 Nm (11 to 13 lb-ft).
- Hydraulic Hardline Flare Nut (12mm): 14 to 16 Nm (10 to 12 lb-ft). Use a flare-nut wrench to avoid rounding the soft steel fitting.
- Pushrod Clevis Pin (if applicable): Secure with a new cotter pin; never reuse a fatigued pin.
The Critical Pushrod Free-Play Adjustment
If your replacement CMC features an adjustable pushrod, you must set the free-play correctly. The master cylinder piston must fully retract to uncover the compensation port (the tiny hole connecting the bore to the reservoir). If the pushrod is adjusted too tight (preload), the piston will block this port. As the brake fluid heats up and expands during driving, the pressure will have nowhere to go, resulting in a partially engaged clutch, severe slip, and eventual clutch disc destruction.
Pro-Tip: Measure for 1.0mm to 1.5mm of free-play at the pedal pad before the pushrod begins to move the CMC piston. This ensures the compensation port remains open during cruising.
System Bleeding: Gravity, Manual, and Pressure Methods
Once the CMC is installed and the hydraulic line is torqued, the entire system (master cylinder, hardline, flexible hose, and slave cylinder) must be bled. Air in the system compresses, robbing you of the hydraulic volume needed to fully disengage the pressure plate fingers.
1. Gravity Bleeding (The Safest Method)
Gravity bleeding is slow but prevents the slave cylinder from being slammed against its housing, which can damage internal return springs. Open the slave cylinder bleeder screw, attach a catch tube, and let gravity pull the fluid down. Keep the reservoir topped off. This takes 30–45 minutes but yields a rock-solid pedal.
2. Pressure Bleeding (The Shop Standard)
Using a motive power bleeder set to 15-20 PSI over the master cylinder reservoir forces fluid through the lines quickly. This is ideal for vehicles with complex hardline routing or ABS-integrated clutch delay valves (like many modern BMWs and Ford Mustangs). Ensure the pressure bleeder cap seals perfectly to the reservoir to avoid spraying corrosive DOT fluid onto your vehicle's paint.
3. The 'Reverse Bleed' Trick for Stubborn Systems
If you are dealing with a lifted truck or a vehicle where the slave cylinder sits higher than the master (creating an air trap in the hardline), traditional bleeding often fails. Use a syringe to inject fluid from the slave cylinder bleeder screw up into the master cylinder reservoir. This pushes air upward, following its natural buoyancy, clearing the trap.
Final Verification and Break-In
After bleeding, pump the pedal 20 times with the engine off to build residual pressure. Start the engine and verify that the clutch disengages fully in first and reverse without gear clash. Take the vehicle for a test drive, performing 10-15 moderate clutch engagements to seat the internal seals and verify that the pedal returns crisply without sticking. Proper testing, bench bleeding, and precise pushrod calibration will ensure your new clutch master cylinder provides flawless shifts for the next 100,000 miles.