The Symbiosis of the Centrifugal Clutch and Flywheel in Modern Two-Strokes
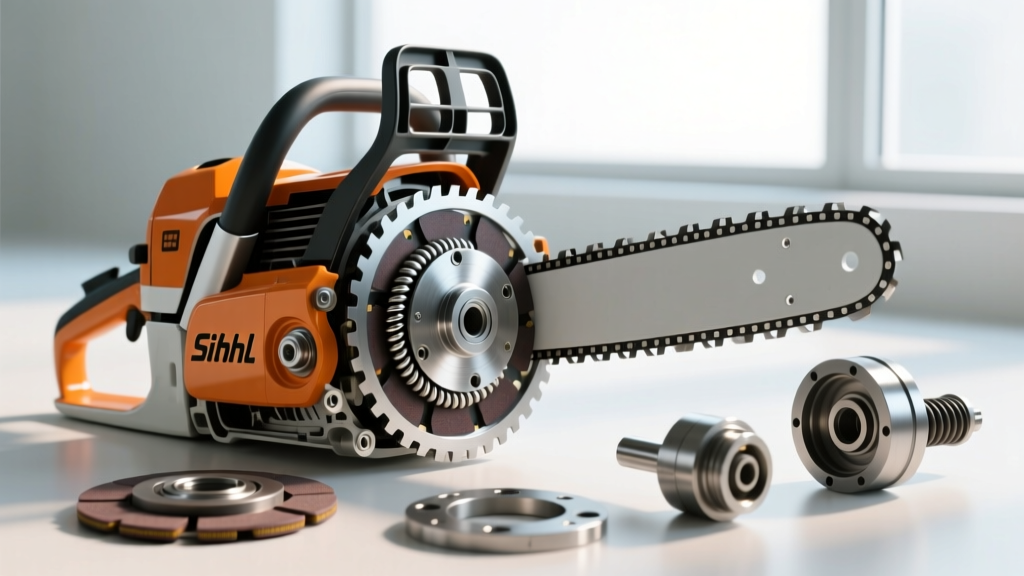
When professional arborists and loggers push high-performance two-stroke engines to their absolute limits, the drivetrain components endure immense mechanical and thermal stress. In the context of professional forestry equipment, a Stihl chainsaw clutch replacement is rarely an isolated event. While the centrifugal clutch drives the cutting attachment and the flywheel generates the spark and cooling airflow, both components share a critical, symbiotic relationship via the crankshaft. As we move through 2026, with the widespread adoption of advanced electronic fuel injection (EFI) systems like Stihl's M-Tronic and the MS 500i's direct injection platform, the tolerances for crankshaft runout and ignition timing are tighter than ever before.
Treating the clutch and flywheel as separate entities during a preventive maintenance teardown is a common mistake that leads to premature bottom-end failure. A failing clutch needle bearing—often clogged with a mixture of bar oil, wood dust, and metallic debris—generates extreme friction. This heat travels directly down the crankshaft journal, degrading the flywheel-side main oil seal and potentially altering the magnetic properties of the flywheel. In this comprehensive preventive maintenance guide, we will explore the exact procedures, OEM specifications, and mechanical insights required to execute a dual-component teardown on professional-grade Stihl chainsaws.
Diagnostic Matrix: When to Trigger a Dual-Component Teardown
Before unbolting the outer casings, it is vital to understand the failure modes that necessitate replacing the clutch assembly alongside a flywheel audit. The following diagnostic indicators suggest that damage has likely crossed the crankshaft threshold:
- Clutch Slip at High RPM: Often caused by oil-soaked clutch shoes or weakened tension springs. If accompanied by a high-pitched whine from the flywheel side, the main bearings are likely compromised.
- Erratic Idle on M-Tronic Models: The MS 261 C-M and MS 271 C-M rely on precise flywheel magnet positioning to inform the stator. If the woodruff key is partially sheared due to clutch-side shock loads (such as a sudden chain bind), the ignition timing will retard, causing the ECU to miscalculate fuel delivery.
- Visible Scoring on the Clutch Drum: Deep grooves on the drum indicate a failed needle cage bearing. If the bearing seizes, the resulting torque spike can twist the crankshaft, immediately affecting the flywheel-side air gap.
Pro Tip: Never ignore a 'rattling' sound at idle. On high-displacement saws like the MS 500i, a loose flywheel nut or degraded woodruff key will cause the EFI stator to read incorrect rotor positions, leading to catastrophic detonation and piston strikes.
OEM Part Matrix and Precision Specifications
To maintain the integrity of the powertrain, always utilize genuine OEM components or high-precision aftermarket equivalents (such as INA or SKF bearings). Below is the reference matrix for the industry-standard MS 261 C-M and the flagship MS 500i.
| Component | OEM Part Number (MS 261 C-M) | OEM Part Number (MS 500i) | Specification / Torque |
|---|---|---|---|
| Clutch Drum & Spur Sprocket | 1141 160 8100 | 1147 160 8100 | Left-Hand Thread, 10 Nm |
| Needle Cage Bearing | 9512 003 1060 | 9512 003 1060 | Grease-Free Installation |
| Clutch Shoe Assembly | 1141 160 8000 | 1147 160 8000 | Inspect Springs for Stretch |
| Flywheel Assembly | 1141 430 1200 | 1147 430 1200 | 25 Nm (18.5 ft-lbs) |
| Woodruff Key | 1110 791 6105 | 1110 791 6105 | DIN 6888 Standard |
Essential Tools for a Safe Teardown
Avoid the infamous 'nylon rope trick' for locking the piston. Stuffing rope into the cylinder through the spark plug hole frequently results in nylon strands wedging into the exhaust port or, worse, bending the connecting rod when torque is applied to the flywheel nut. For a proper 2026-standard preventive teardown, you must invest in the correct tooling:
- Mechanical Piston Stop: Stihl part #4180 893 3800. This threads into the spark plug hole and safely halts the piston at Top Dead Center (TDC) without lateral stress on the con-rod.
- Flywheel Puller: Stihl part #4182 893 3800. Essential for extracting the tapered flywheel without damaging the ignition module or the crank threads.
- Clutch Spring Compressor: Required to safely remove the C-clip retaining the clutch shoes without sending high-tension springs across the workshop.
- Dial Indicator: For measuring crankshaft runout and verifying the ignition module air gap (0.3mm - 0.5mm).
Step-by-Step: Clutch Side Disassembly
1. Securing the Bottom End and Drum Removal
Begin by removing the spark plug and threading the mechanical piston stop into the cylinder. Rotate the flywheel by hand until the piston contacts the stop. Because the clutch drum utilizes a left-hand thread (M10x1.25 LH), you must turn the drum clockwise to break it free. Use a specialized clutch drum socket and a breaker bar. Once the drum is removed, inspect the needle bearing on the crankshaft journal. If the bearing shows blue heat-staining or pitting, the crankshaft journal must be measured for out-of-round tolerances.
2. Extracting the Clutch Shoes and Springs
Using the clutch spring compressor, carefully depress the tension springs to access the retaining C-clip. Remove the C-clip and slide the clutch shoe assembly off the crankshaft spline. Clean the crankshaft threads with a brass wire brush and apply a fresh coat of high-temperature anti-seize to the splines to prevent galvanic corrosion, a common issue when saws are exposed to acidic wood saps and moisture.
Step-by-Step: Flywheel Side Teardown and Audit
1. Flywheel Extraction
Flip the saw and remove the recoil starter assembly. Install the piston stop on the flywheel side if necessary, though the existing lock from the clutch side teardown is usually sufficient if the crankshaft is securely held. Remove the flywheel retaining nut (standard right-hand thread). Thread the Stihl flywheel puller into the flywheel boss and tighten the center bolt to extract the flywheel from the tapered crankshaft journal. Never strike the flywheel with a hammer; the brittle cast aluminum and embedded neodymium magnets will shatter under impact.
2. Inspecting the Woodruff Key and Stator Gap
Once the flywheel is off, extract the woodruff key from the crankshaft slot. Inspect the key for any signs of 'rolling' or shear marks. Even a microscopic deformation of 0.1mm will alter the ignition timing curve on an MS 500i, causing the EFI system to inject fuel at the wrong millisecond, resulting in severe carbon buildup and power loss. Furthermore, clean the flywheel magnets with isopropyl alcohol and verify that the ignition module air gap is precisely set to 0.3mm using a brass feeler gauge before reassembly.
Reassembly: Torque Sequences and Thread Locking
Reassembly requires strict adherence to torque specifications to prevent catastrophic disassembly at 14,000 RPM. Begin by reinstalling the flywheel, ensuring the woodruff key is fully seated. Torque the flywheel nut to exactly 25 Nm (18.5 ft-lbs). Do not overtighten, as this can stretch the crankshaft threads and compromise the taper lock.
On the clutch side, install the new needle cage bearing. Do not grease the needle bearing. Centrifugal force will sling the grease onto the clutch shoes, causing immediate and dangerous chain engagement at idle. Reinstall the clutch shoe assembly and secure it with a fresh C-clip. Finally, apply a single drop of Loctite 243 (Blue) to the clutch drum threads. Thread the drum onto the crankshaft (remember, it is left-hand thread, so turn counter-clockwise to tighten) and torque to 10 Nm. The Loctite 243 is critical; it prevents the drum from backing off during aggressive plunge cutting or when the chain brake is repeatedly engaged and disengaged.
2026 Preventive Maintenance Intervals and Longevity
For commercial logging operations running MS 261 C-M or MS 500i saws in abrasive environments (such as cedar or dirty salvage timber), a complete clutch and flywheel audit should be integrated into the 500-hour top-end rebuild cycle. Replacing the $8 needle bearing and inspecting the flywheel keyway during a scheduled piston and ring replacement costs a fraction of a new short block. According to technical bulletins from Stihl USA, maintaining the precise air gap and ensuring zero crankshaft runout is the primary factor in achieving the advertised 2,000+ hour lifespan of modern EFI chainsaws.
Furthermore, community consensus on professional forums like ArboristSite heavily emphasizes that ignoring clutch-side heat transfer is the leading cause of premature flywheel-side main seal failure. By treating the Stihl chainsaw clutch replacement not as a simple wearable swap, but as a holistic crankshaft health audit, equipment managers can drastically reduce unplanned downtime in the field. For further reading on small engine drivetrain dynamics and EFI troubleshooting, resources like Madsen's Shop provide excellent visual teardown references that complement these OEM specifications.
Final Thoughts on Drivetrain Preservation
A chainsaw is only as reliable as its weakest rotational component. The marriage of the centrifugal clutch and the flywheel dictates the cutting rhythm, the ignition spark, and the overall survivability of the two-stroke engine. By utilizing mechanical piston stops, adhering to left-hand thread protocols, and respecting the microscopic tolerances of the woodruff key and stator gap, you elevate your maintenance program from reactive repairs to true preventive engineering. Keep your torque wrenches calibrated, your bearings clean, and your saws cutting at peak efficiency.