Why Your Husqvarna is More Than Just a Tool
For professional arborists, fellers, and custom millers, a high-performance saw like the Husqvarna 572 XP or 592 XP isn't merely a tool; it is a commercial daily driver. Just as a fleet mechanic wouldn't ignore the transmission on a daily-driven Ram 3500 dump truck, a professional logger cannot afford to ignore the centrifugal clutch on their primary rig. The husqvarna chainsaw clutch replacement procedure is a critical pillar of preventive maintenance. When your saw is subjected to 8-hour shifts, constant wood dust ingestion, and extreme thermal cycling, the clutch assembly becomes a primary wear item. In this 2026 preventive maintenance guide, we break down the exact diagnostics, teardown procedures, and torque specifications required to keep your daily driver out of the repair shop and in the timber.
Anatomy of the Husqvarna Centrifugal Clutch
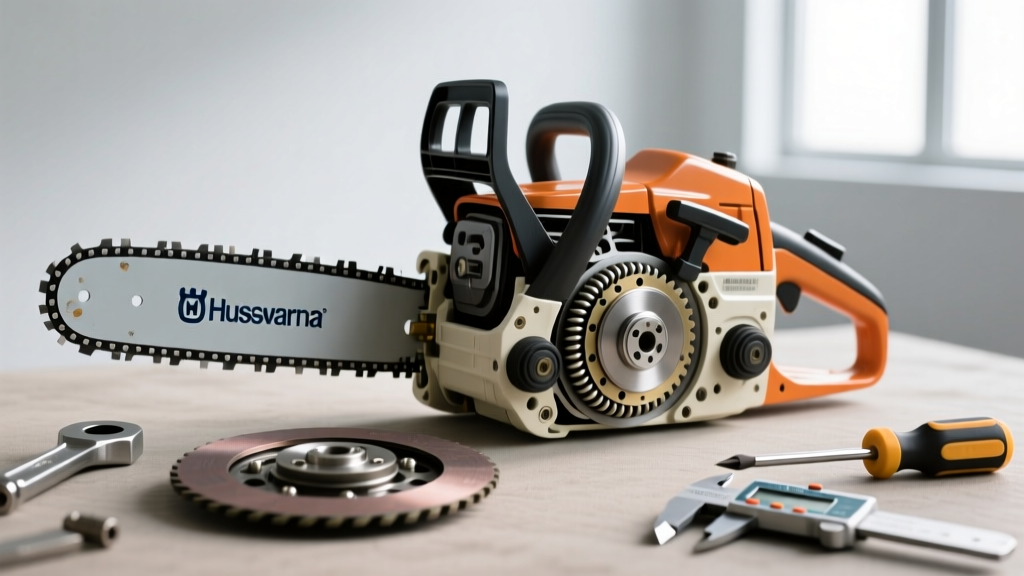
Unlike the multi-plate wet clutches found in automotive manual transmissions or motorcycles, your Husqvarna utilizes a dry, centrifugal clutch system. Understanding its architecture is mandatory for proper diagnostics.
- Clutch Spider & Shoes: The spider is bolted or splined to the crankshaft. As engine RPM increases, centrifugal force pushes the friction shoes outward.
- Clutch Springs: These hold the shoes inward at idle. Spring tension dictates the engagement RPM (typically 3,000 to 3,500 RPM on stock XP models).
- Clutch Drum & Rim: The drum catches the shoes, transferring rotational energy to the chain sprocket (rim).
- Needle Bearing (Cage): Sits between the clutch drum and the crankshaft journal, allowing the drum to remain stationary at idle while the crank spins at up to 13,500 RPM.
Diagnostic Checklist: Identifying Clutch Failure
Before ordering parts, verify the failure mode. A slipping chain isn't always a dull chain or a worn bar; it often points to internal drivetrain degradation.
1. Chain Creep at Idle
If your chain engages and moves while the saw is idling, your clutch springs have lost their tensile strength, or the clutch shoes are contaminated with bar oil and wood dust. Fix: Spring replacement or full clutch assembly swap.
2. Slipping Under Load (The Milling Syndrome)
For those using their Husqvarna as a daily driver on an Alaskan chainsaw mill, slipping is a common plague. Milling requires high torque at lower RPMs. If the shoes glaze over, they will slip inside the drum, generating massive heat and melting the plastic wire insulation near the ignition module. Fix: Upgrading to stiffer aftermarket springs or replacing glazed shoes.
3. Metallic Grinding and Drum Wobble
This is the most catastrophic failure mode. It indicates that the clutch needle bearing has disintegrated. If ignored, the wobbling drum will score the crankshaft journal, requiring a complete engine teardown or crankshaft replacement.
Step-by-Step Husqvarna Chainsaw Clutch Replacement
Performing a husqvarna chainsaw clutch replacement requires precision. The forces involved in a 13,500 RPM engine mean that improper reassembly can lead to catastrophic component ejection.
Required Tools & Parts
- Piston Stop Tool (Metal, not plastic)
- Clutch Removal Spline Tool / Spanner Wrench
- External Circlip Pliers
- Torque Wrench (inch-pounds capable)
- OEM Needle Bearing (Part # 503 85 01-01)
- OEM Clutch Assembly (Part # 599 65 76-01 for 572 XP)
Phase 1: Teardown and Extraction
- Secure the Engine: Remove the spark plug. Thread a metal piston stop tool into the cylinder and rotate the flywheel by hand until the piston contacts the stop. This locks the crankshaft.
- Break the Thread: The clutch spline or nut is a Left-Hand Thread. Use your spline tool and a breaker bar to turn clockwise to loosen. Never use an impact wrench without a piston stop, or you risk shearing the crankshaft keyway.
- Remove the Drum: Slide the clutch drum off the crankshaft. Inspect the drum's inner race for bluing or gouging. If scored, replace the drum (Part # 599 65 77-01).
- Extract the Needle Bearing: Use a specialized needle bearing puller or carefully tap it out from the inside. Never pry against the crankshaft journal.
Phase 2: Inspection and Reassembly
The crankshaft journal must be mirror-smooth. If you feel any ridges with your fingernail, the journal is compromised. According to master mechanics on ArboristSite, a scored journal requires professional machining or a crank swap.
- Install New Needle Bearing: Coat the new needle bearing in clean 2-stroke oil. Press it into the drum. CRITICAL: The bearing has a stamped side that must read 'OUT'. Installing it backward makes future removal nearly impossible without a torch.
- Clean the Crankshaft: Wipe the threads and splines with brake cleaner. Apply a single drop of blue Loctite (243) to the clutch splines to prevent micro-vibrations from backing out the assembly.
- Thread the Clutch: Hand-thread the clutch spider onto the crankshaft (remember, it tightens counter-clockwise).
- Torque to Spec: Using your piston stop and torque wrench, tighten the clutch to 30 Nm (265 in-lbs). Remove the piston stop and reinstall the spark plug.
Preventive Maintenance Schedule for Commercial Rigs
To maximize the lifespan of your drivetrain, adhere to this strict maintenance interval table, specifically designed for daily driver saws operating in harsh environments.
| Interval | Maintenance Action | Component Focus |
|---|---|---|
| Daily (Pre-Shift) | Blow out clutch cover with compressed air | Prevents wood dust from packing into the clutch shoes, which causes slipping and glazing. |
| Every 50 Hours | Inspect chain tensioner and sprocket wear | A worn rim sprocket causes uneven load distribution on the clutch drum, accelerating bearing wear. |
| Every 250 Hours | Grease clutch drum bearing (if equipped) | Use high-temp lithium complex grease. Do not over-grease, as excess attracts abrasive dust. |
| Every 500 Hours | Full clutch teardown and inspection | Replace the needle bearing (503 85 01-01) proactively. Inspect shoes for minimum thickness (replace if under 1mm of friction material). |
OEM vs. Aftermarket: 2026 Sourcing Guide
When sourcing parts for a husqvarna chainsaw clutch replacement, the debate between OEM and aftermarket is fierce. For daily driver commercial saws, OEM is non-negotiable for the needle bearing and clutch drum. Aftermarket drums often suffer from poor heat-treating, leading to rapid spline wear and chain derailment at high RPMs.
However, for the clutch springs, aftermarket tuning options are highly recommended for specific applications. If you are running a milling setup, companies like TreeStuff or Bailey's offer high-tension spring kits that raise the engagement RPM to 4,000+, ensuring the saw stays in its peak torque band and preventing the low-RPM slipping that destroys stock clutches. Always consult the Husqvarna Professional Portal for the latest technical service bulletins regarding spring color-codes and engagement thresholds for your specific engine displacement.
Safety and Compliance
A failing clutch doesn't just cost you downtime; it is a severe safety hazard. A clutch that fails to disengage at idle violates basic chain brake safety protocols. Always ensure your chain brake mechanism is tested after reassembly. The Occupational Safety and Health Administration (OSHA) mandates that commercial cutting equipment must have fully functional chain catches and brakes to prevent kickback injuries. A properly torqued, clean, and maintained clutch assembly ensures your inertia-activated chain brake functions within milliseconds when you need it most. Treat your Husqvarna with the same mechanical respect you would a heavy-duty automotive transmission, and it will reliably power your daily operations for thousands of hours.