Understanding Disc Spring Overload in Modern Drivetrains
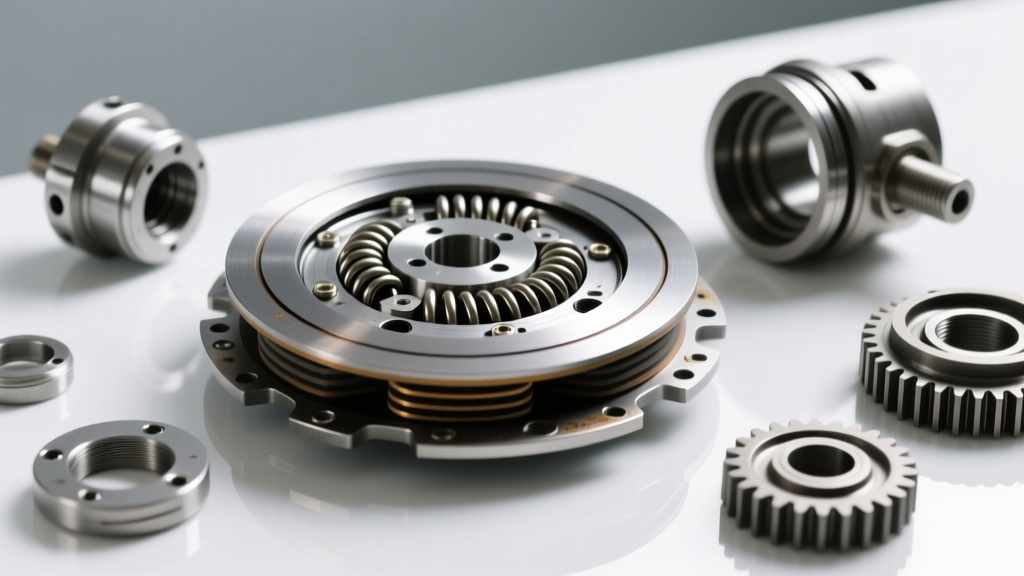
The diaphragm spring—often technically referred to as a Belleville spring or disc spring—is the critical load-bearing element in modern manual clutch assemblies. When subjected to extreme torque loads, aggressive riding, or hydraulic over-travel, these components experience disc spring overload. This overload condition pushes the spring past its elastic limit into plastic deformation, fundamentally altering its load-deflection curve. For transmission specialists and advanced DIYers, identifying the micro-failures associated with disc spring overload clutches requires a rigorous, data-driven inspection checklist. This guide details the exact metrology, torque specifications, and metallurgical indicators required to diagnose diaphragm fatigue in high-performance and heavy-duty applications.
Phase 1: Pre-Teardown Hydraulic and Pedal Kinematics
Before dropping the transmission (whether it is a Tremec T-56 Magnum, a Porsche G50, or a standard Aisin AR5), you must establish the baseline kinematics of the release system. Disc spring overload is frequently misdiagnosed as simple friction material wear when the root cause is hydraulic over-pressurization or incorrect pedal geometry.
Measuring Release Bearing Pre-Load and Over-Travel
Modern self-adjusting clutch (SAC) systems and standard diaphragm clutches rely on precise release bearing air gaps. An over-extended hydraulic master cylinder (often due to aftermarket adjustable pushrods set too long, or an oversized 0.875-inch bore master cylinder replacing a 0.75-inch OEM unit) forces the release bearing to maintain constant pressure against the disc spring fingers. This constant preload accelerates fatigue and induces mechanical overload.
- Free Play Specification: Measure pedal free play at the pad. Standard specification is 1.0 to 1.5 inches (25-38mm). Anything under 0.75 inches risks constant finger contact and chronic overload.
- Master Cylinder Pushrod Clearance: Verify a minimum of 0.020-inch (0.5mm) clearance between the master cylinder piston and the pushrod at rest to ensure complete fluid return to the reservoir.
- Hydraulic Fluid Moisture: Test DOT 3/4 fluid with a moisture pen. Fluid exceeding 3% water content lowers the boiling point, causing vapor lock and erratic clutch disengagement, which forces the driver to pump the pedal, inducing cyclic spring overload.
Phase 2: The Core Inspection – Measuring Disc Spring Fatigue
Once the pressure plate assembly is removed from the flywheel, the physical inspection of the disc spring begins. The Belleville spring operates on a non-linear load-deflection curve. Overload causes the crown of the spring to flatten, reducing the clamping force (clamp load) exerted on the friction disc.
Finger Tip Wear and Grooving Analysis
The release bearing contacts the inner tips of the disc spring. Under overload conditions, the contact pressure exceeds the yield strength of the spring steel, resulting in grooving and material displacement.
Expert Note: According to Schaeffler (LuK) engineering guidelines, maximum allowable wear on diaphragm spring fingers is typically 0.6mm (0.024 inches). Wear exceeding 0.8mm indicates severe overload and necessitates complete pressure plate replacement, as the altered geometry will prevent proper clamping even with a new friction disc.
Metallurgical Analysis of the Belleville Crown
High-quality disc springs are manufactured from chrome-vanadium alloy steel (such as 51CrV4) and undergo rigorous heat treatment followed by shot peening. Shot peening induces compressive residual stresses on the convex side of the spring, which is critical for resisting fatigue cracking. When a clutch experiences severe thermal overload from prolonged slipping, the heat sinks into the diaphragm crown. Temperatures exceeding 400°F (204°C) can relieve these compressive stresses and begin to anneal the spring steel. Inspect the crown area (the solid ring between the fingers and the outer pressure plate contact points) for discoloration. A dark blue or straw color indicates thermal overload and a permanent loss of Rockwell hardness.
Spring Tension and Clamp Load Verification
While few shops possess a dedicated clutch pressure tester (like the ProCut or specialized hydraulic arbor presses), you can perform a comparative deflection test. Using a calibrated digital force gauge, apply pressure to the center of the spring fingers. A healthy heavy-duty diaphragm spring (e.g., from a South Bend or McLeod twin-disc setup) may require 80-120 lbs of force to reach the release point. If the force required drops below 70% of the OEM baseline, the disc spring has suffered plastic deformation from thermal or mechanical overload.
Phase 3: Pressure Plate and Flywheel Mating Surface Metrology
Disc spring overload does not occur in a vacuum; it is inextricably linked to the friction surfaces. When the spring loses clamp load due to overload fatigue, the friction disc slips, generating catastrophic heat that feeds back into the pressure plate, further annealing the disc spring in a destructive feedback loop.
Identifying Thermal Overload and Martensitic Transformation
Inspect the cast iron or nodular iron pressure plate friction surface. Look for 'heat checking' (fine spiderweb cracks) and blueing. While nodular iron handles thermal cycling better than grey cast iron, it is still susceptible to warping. Blueing indicates the iron reached temperatures exceeding 500°F (260°C). At these temperatures, the localized metallurgy of the adjacent disc spring can undergo martensitic transformation or tempering, permanently reducing its spring rate and leading to clutch chatter upon engagement.
Diagnostic Measurement Specifications and Tolerances
Precision measurement is non-negotiable when evaluating disc spring overload clutches. Use the following reference table for standard V8 performance applications (e.g., GM LS-series with Tremec T-56, Ford Coyote with MT-82).
| Inspection Parameter | OEM Tolerance / Specification | Failure Mode / Overload Indicator |
|---|---|---|
| Diaphragm Finger Wear Depth | Max 0.6mm (0.024') | Grooves > 0.8mm indicate yield failure |
| Flywheel Lateral Runout (TIR) | Max 0.004' (0.10mm) | > 0.008' causes cyclic spring shock-loading |
| Pressure Plate Flatness | Max 0.002' (0.05mm) | Warping causes uneven finger deflection |
| Flywheel Resurfacing Limit | Max 0.020' (0.50mm) removed | Exceeding alters spring geometry, causing overload |
| GM LS Flywheel Bolt Torque | 74 lb-ft + 50 degrees | Under-torquing causes harmonic runout |
| Ford Coyote Flywheel Bolt Torque | 59 lb-ft (80 Nm) | Stretch bolts must be replaced if yielded |
Phase 4: Flywheel Runout and Harmonic Shock Loading
A frequently overlooked cause of premature disc spring overload is excessive flywheel lateral runout. When the flywheel exceeds 0.004 inches (0.10mm) of Total Indicator Runout (TIR), the pressure plate assembly is subjected to high-frequency harmonic shock loading every time the clutch is engaged. This cyclic impact fatigue initiates micro-cracks at the base of the disc spring slots (the window area), eventually leading to catastrophic finger breakage under load.
Measurement Protocol: Mount a magnetic base dial indicator to the engine block or bellhousing. Position the stylus on the friction surface of the flywheel, approximately 0.5 inches from the outer edge. Rotate the crankshaft two full revolutions. If TIR exceeds specifications, the flywheel must be resurfaced on a precision lathe or replaced. Do not attempt to correct runout using tapered shims between the crankshaft flange and flywheel, as this introduces severe imbalance at high RPMs and exacerbates the shock loading on the disc spring.
Reassembly: Torque Sequences and Final Validation
If the inspection confirms the disc spring is within tolerance and the overload symptoms were caused by peripheral issues (like a binding pilot bearing or hydraulic fault), reassembly must be executed flawlessly to prevent immediate recurrence.
- Pilot Bearing Validation: A seized pilot bearing creates immense drag on the transmission input shaft, forcing the disc spring to work harder during disengagement. Always replace the pilot bearing and verify input shaft alignment using a dummy shaft.
- Clutch Alignment: Use a precision machined alignment tool (not the cheap plastic ones included in box kits) to center the friction disc. Misalignment causes the disc spring to bend laterally upon clamping, inducing asymmetric overload on specific fingers.
- Torque Sequence: Tighten the pressure plate bolts in a crisscross (star) pattern in three incremental steps (e.g., 15 lb-ft, 25 lb-ft, then final spec of 35-50 lb-ft depending on the manufacturer). This ensures the diaphragm spring seats evenly against the flywheel without binding or distorting the outer strap bolts.
Conclusion: Preventing Recurrent Overload
Diagnosing disc spring overload clutches requires looking beyond the friction material. By systematically evaluating hydraulic pre-load, measuring finger wear to the hundredth of a millimeter, and verifying flywheel runout, technicians can identify the root cause of clamp load degradation. For further engineering data on diaphragm spring kinematics, refer to the Schaeffler Automotive Clutch Systems technical repository and the SAE International Technical Papers database on Belleville spring fatigue modeling. Additionally, the BorgWarner drivetrain engineering guidelines provide excellent baseline metrics for heavy-duty torque converter and manual clutch overload thresholds.